When you’ve got a long list of projects and all of them have deadlines, the only possible thing to do is start another project as quickly as possible. For my Emergency Procrastination Project I chose a reticule. It looks like a fat juicy berry, holds my cell phone and my wallet with room to spare, and is trimmed pleasingly with antique glass beads. I liked it so much that i decided to procrastinate even further by writing up the making of it, and so, here is a tutorial for a raspberry regency reticule!
I have written about reticules previously. This raspberry one has more pieces, and is three dimensional instead of flat, but the construction is straightforward, and while getting the edges to meet can be a bit fiddly, it comes together quickly. If you’re uncertain about matching the corners you can try the pattern out by making it all in one color – you’ll have the fun shape, but won’t have to worry about the tricky corner-matching bits!
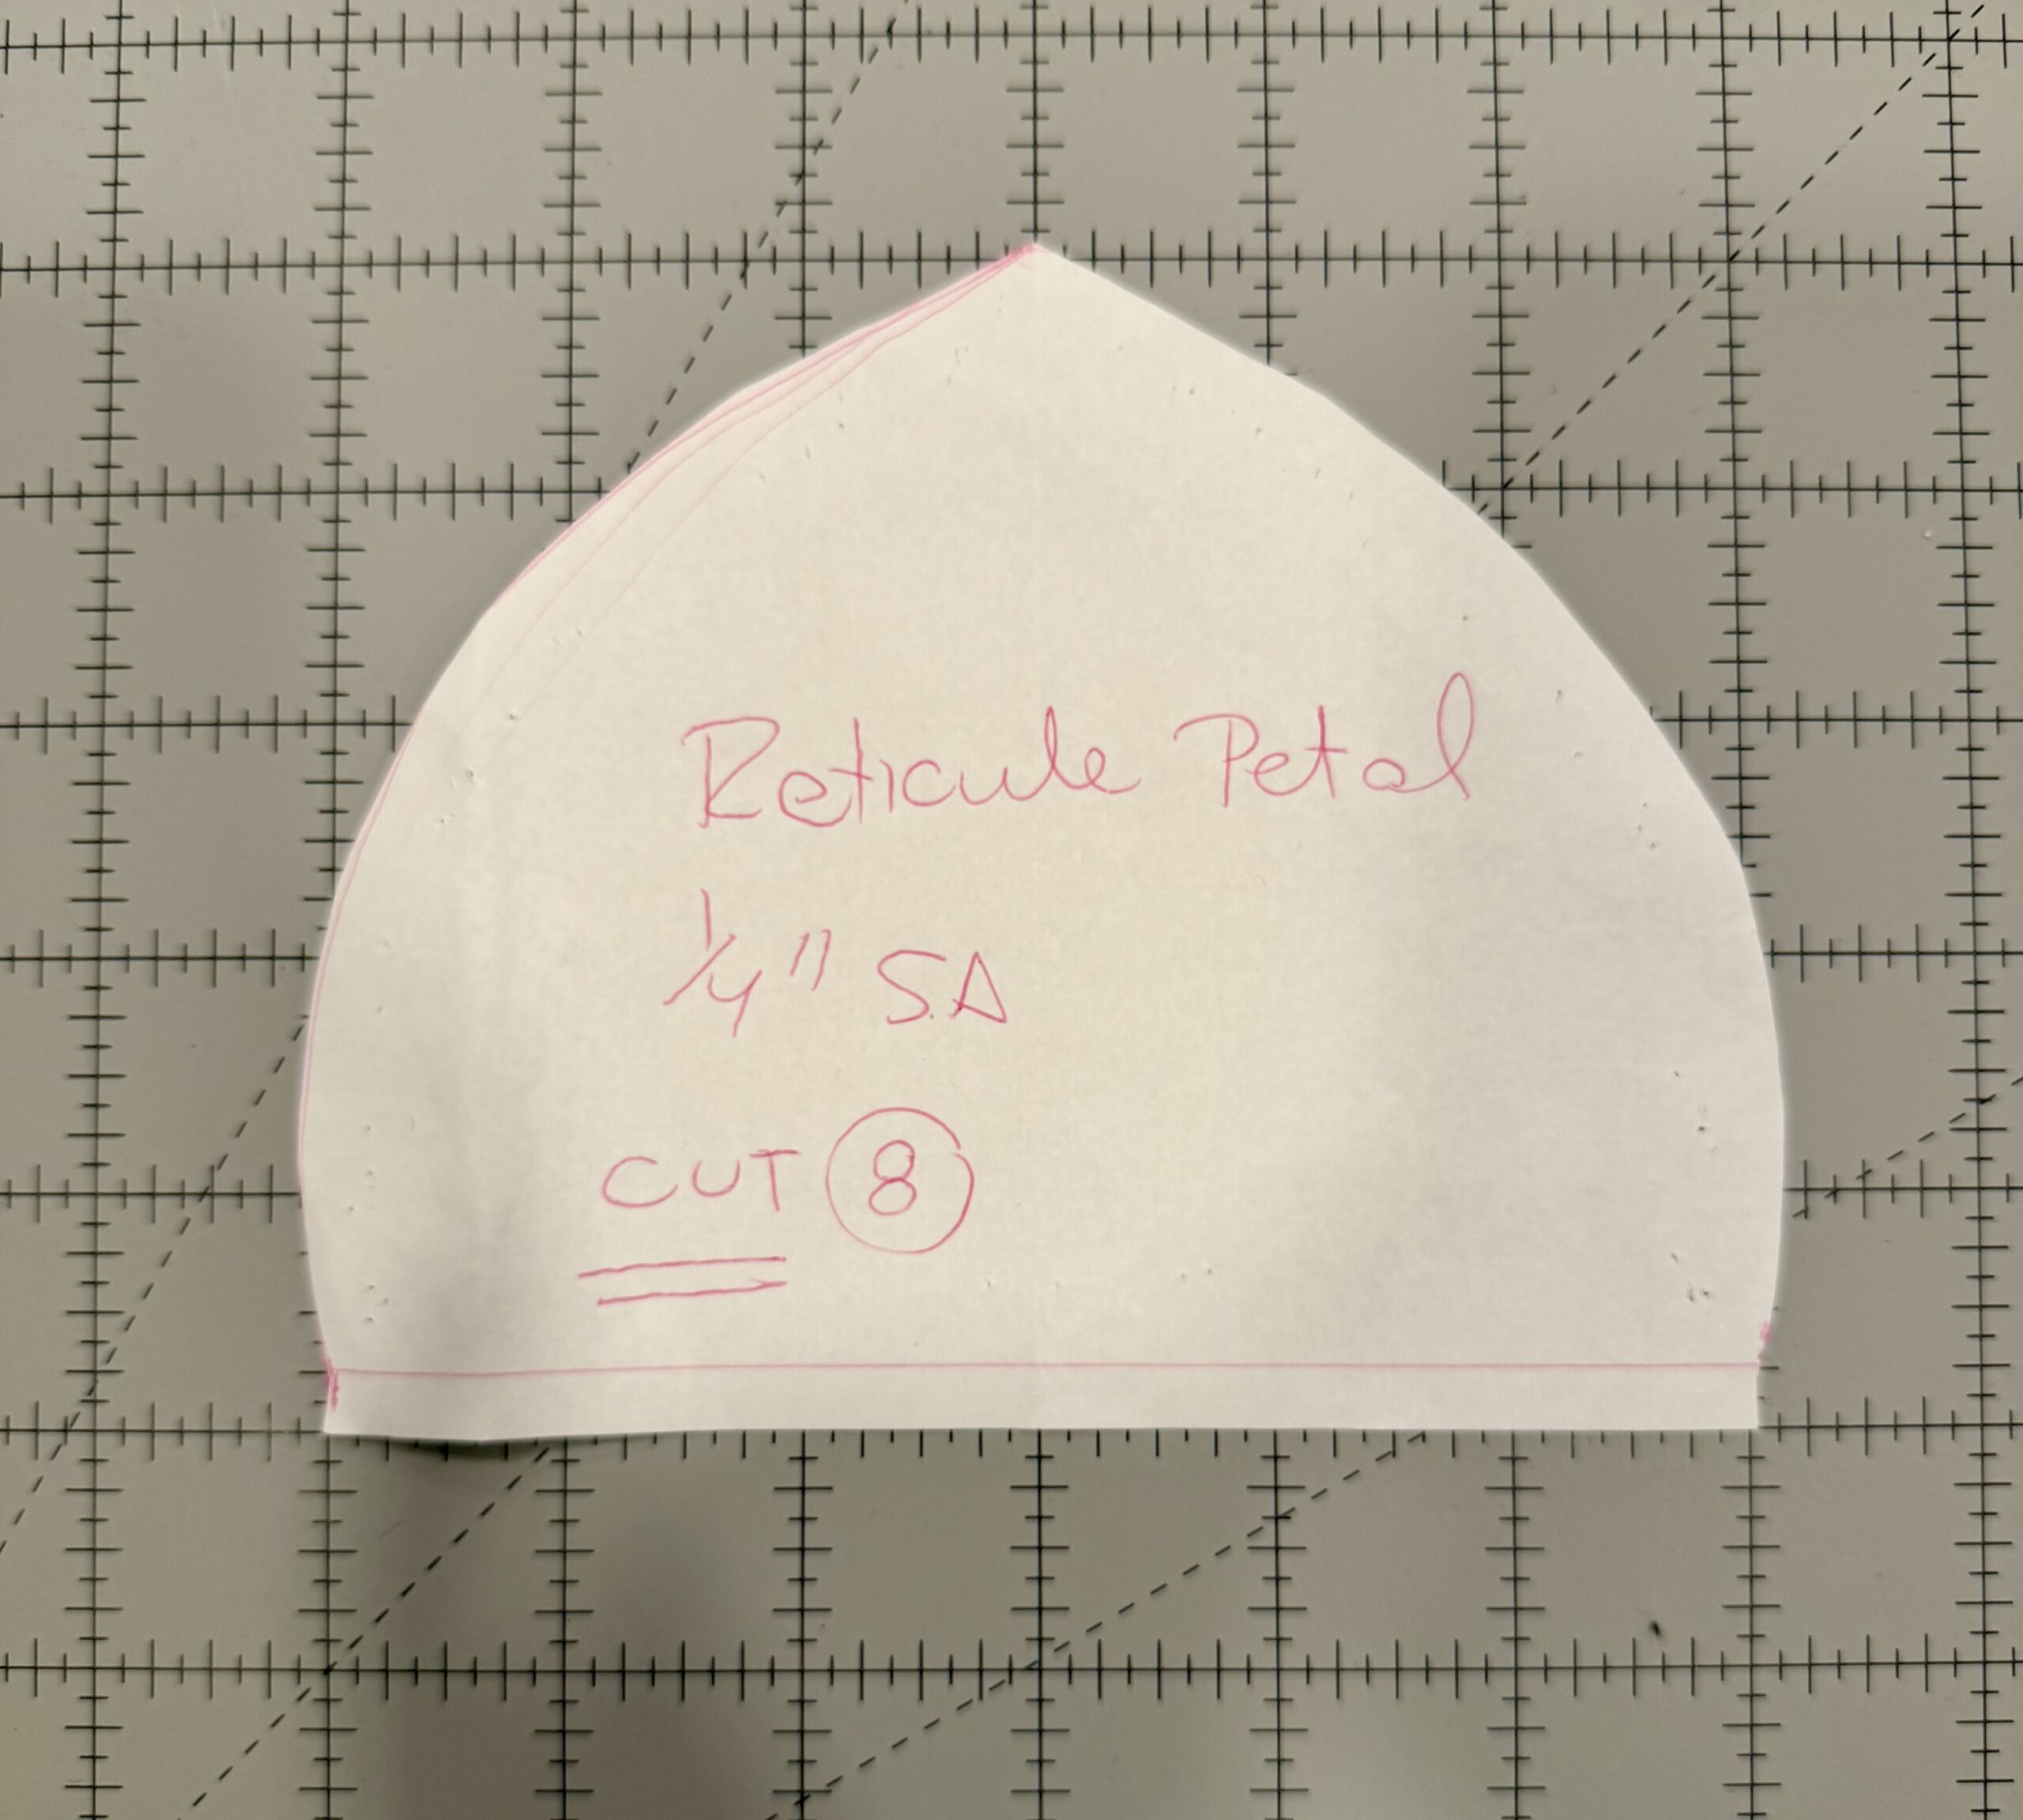
I wanted a nice roomy berry body, so I drew a fat and juicy pentagon shape. My leaf needed to have a flat bottom the same width as the top edge of my berry. I drew a leaf shape short enough that it wouldn’t hang down too far and hide my nice pink berry silk.
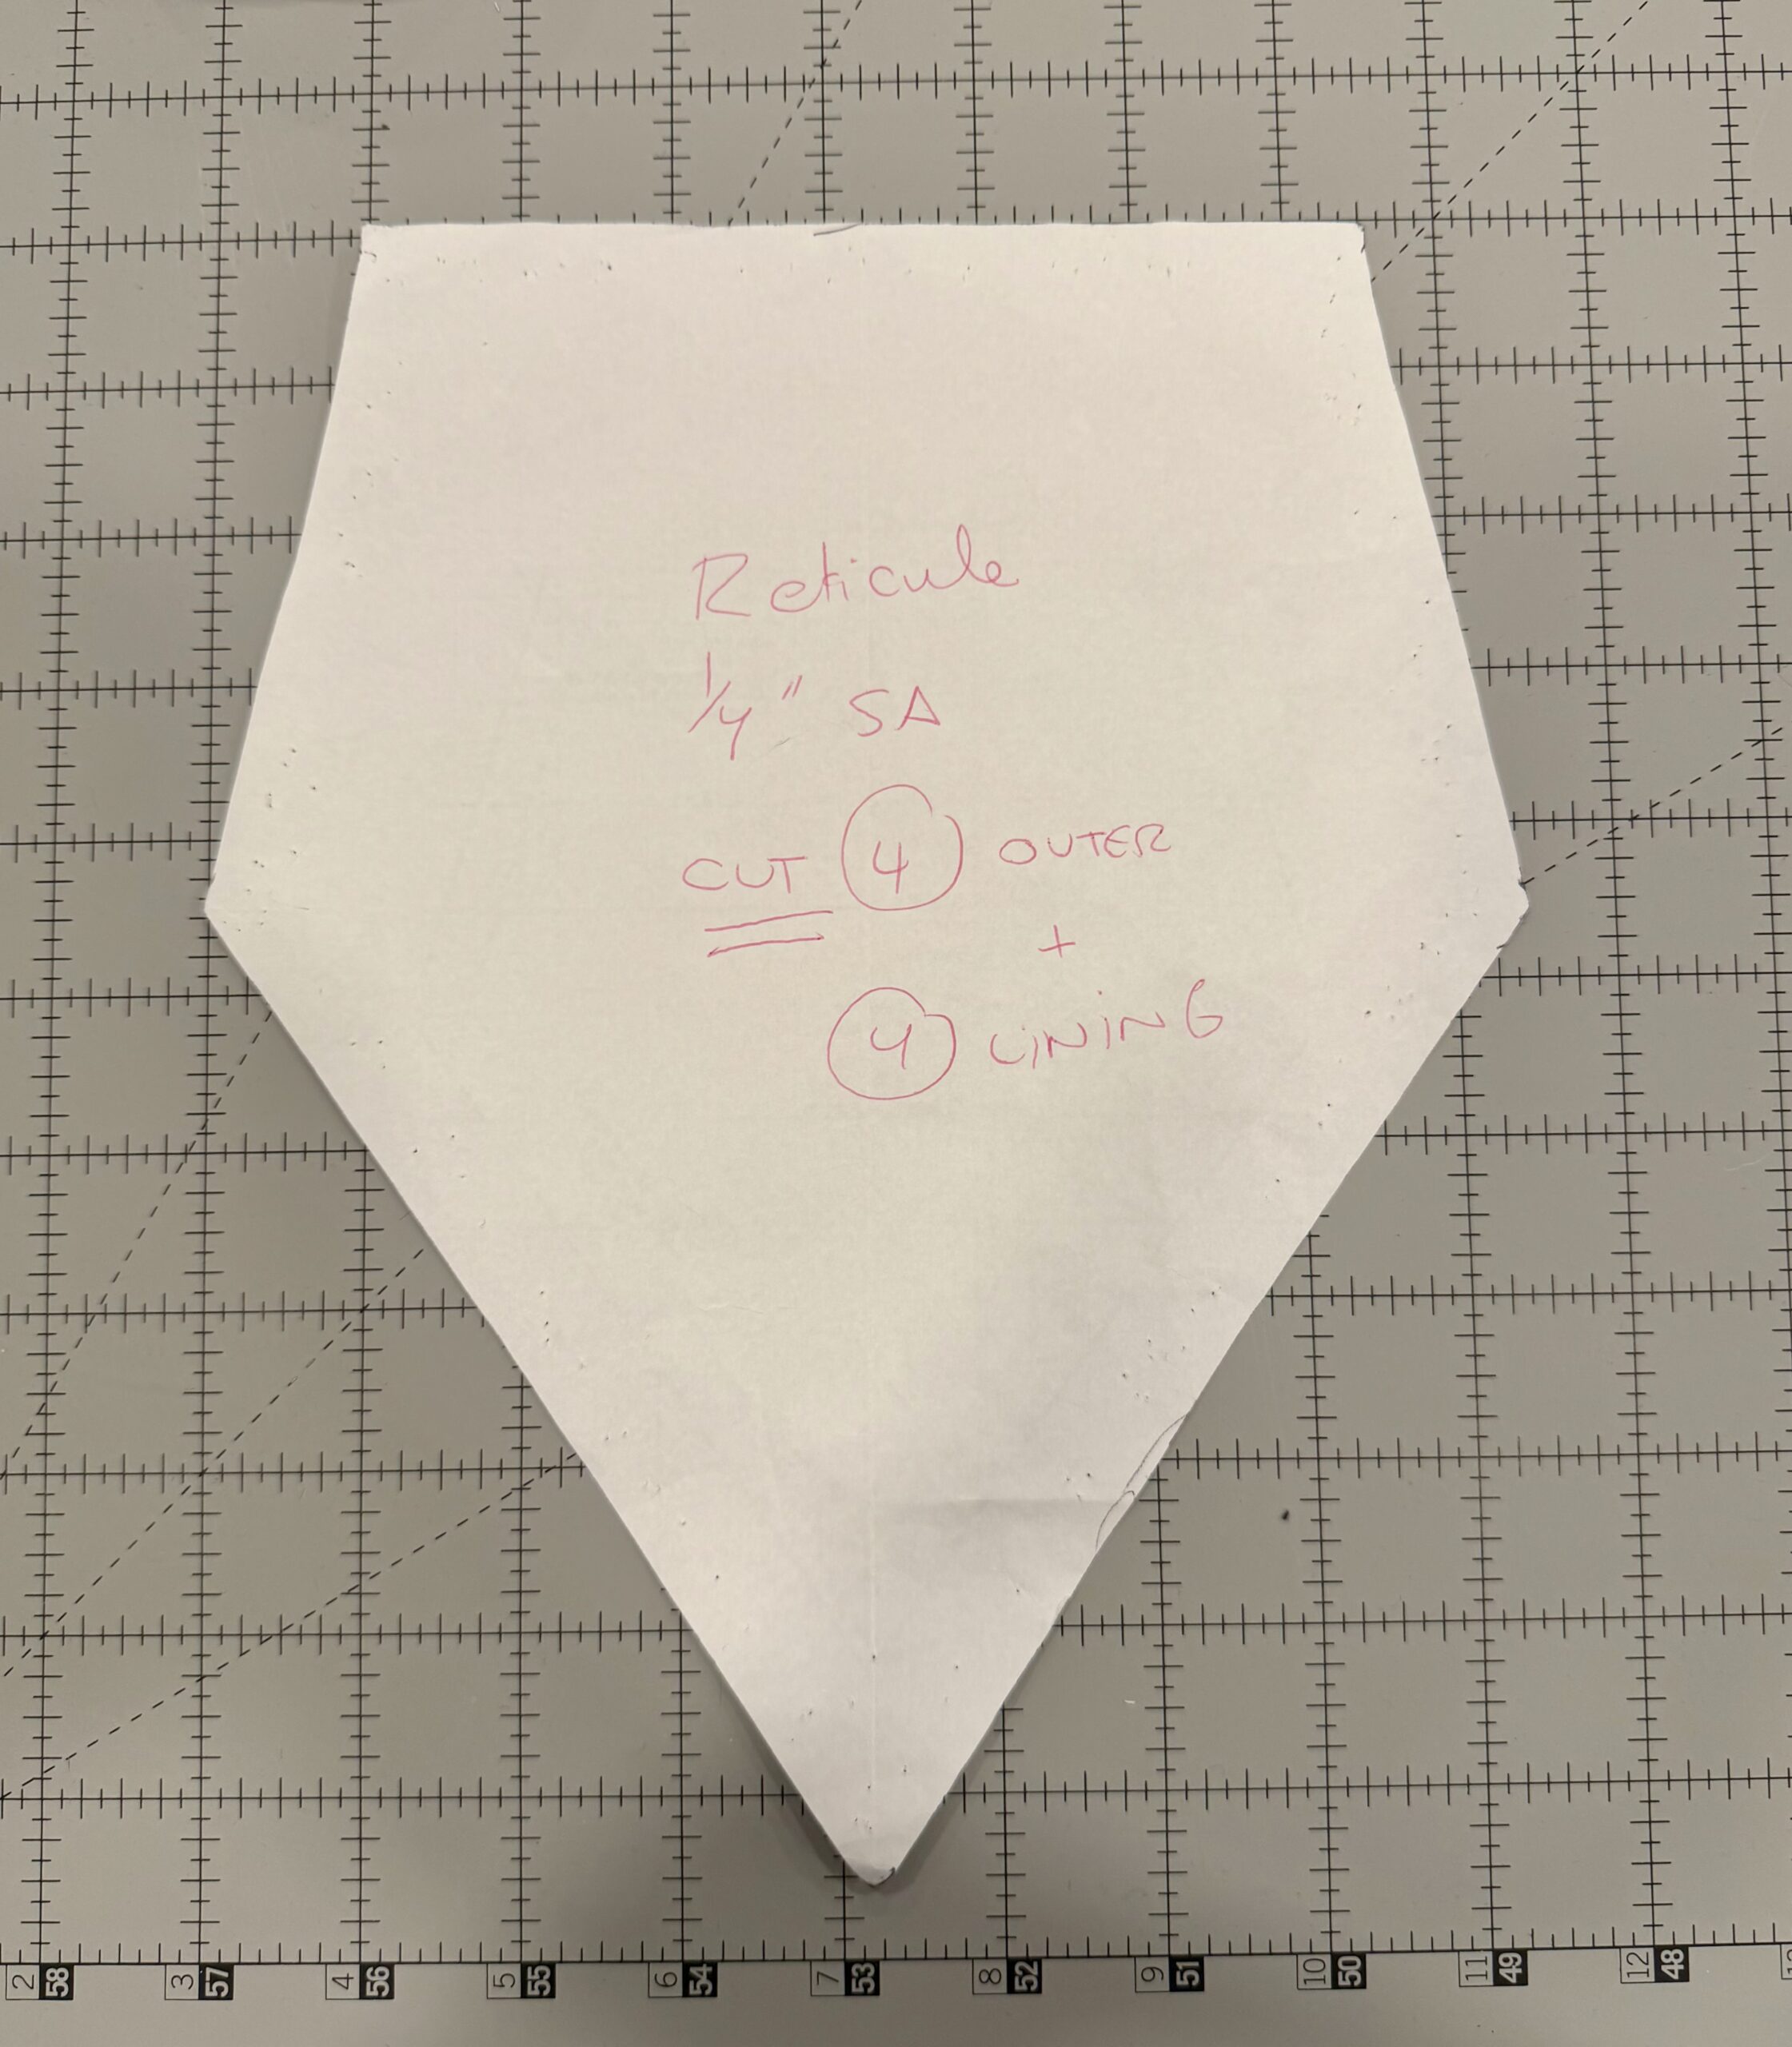
I cut FOUR berry bodies and FOUR lining bodies.
I cut EIGHT leaf panels.
I pinned my leaf panels to my reticule body panels and sewed them together.

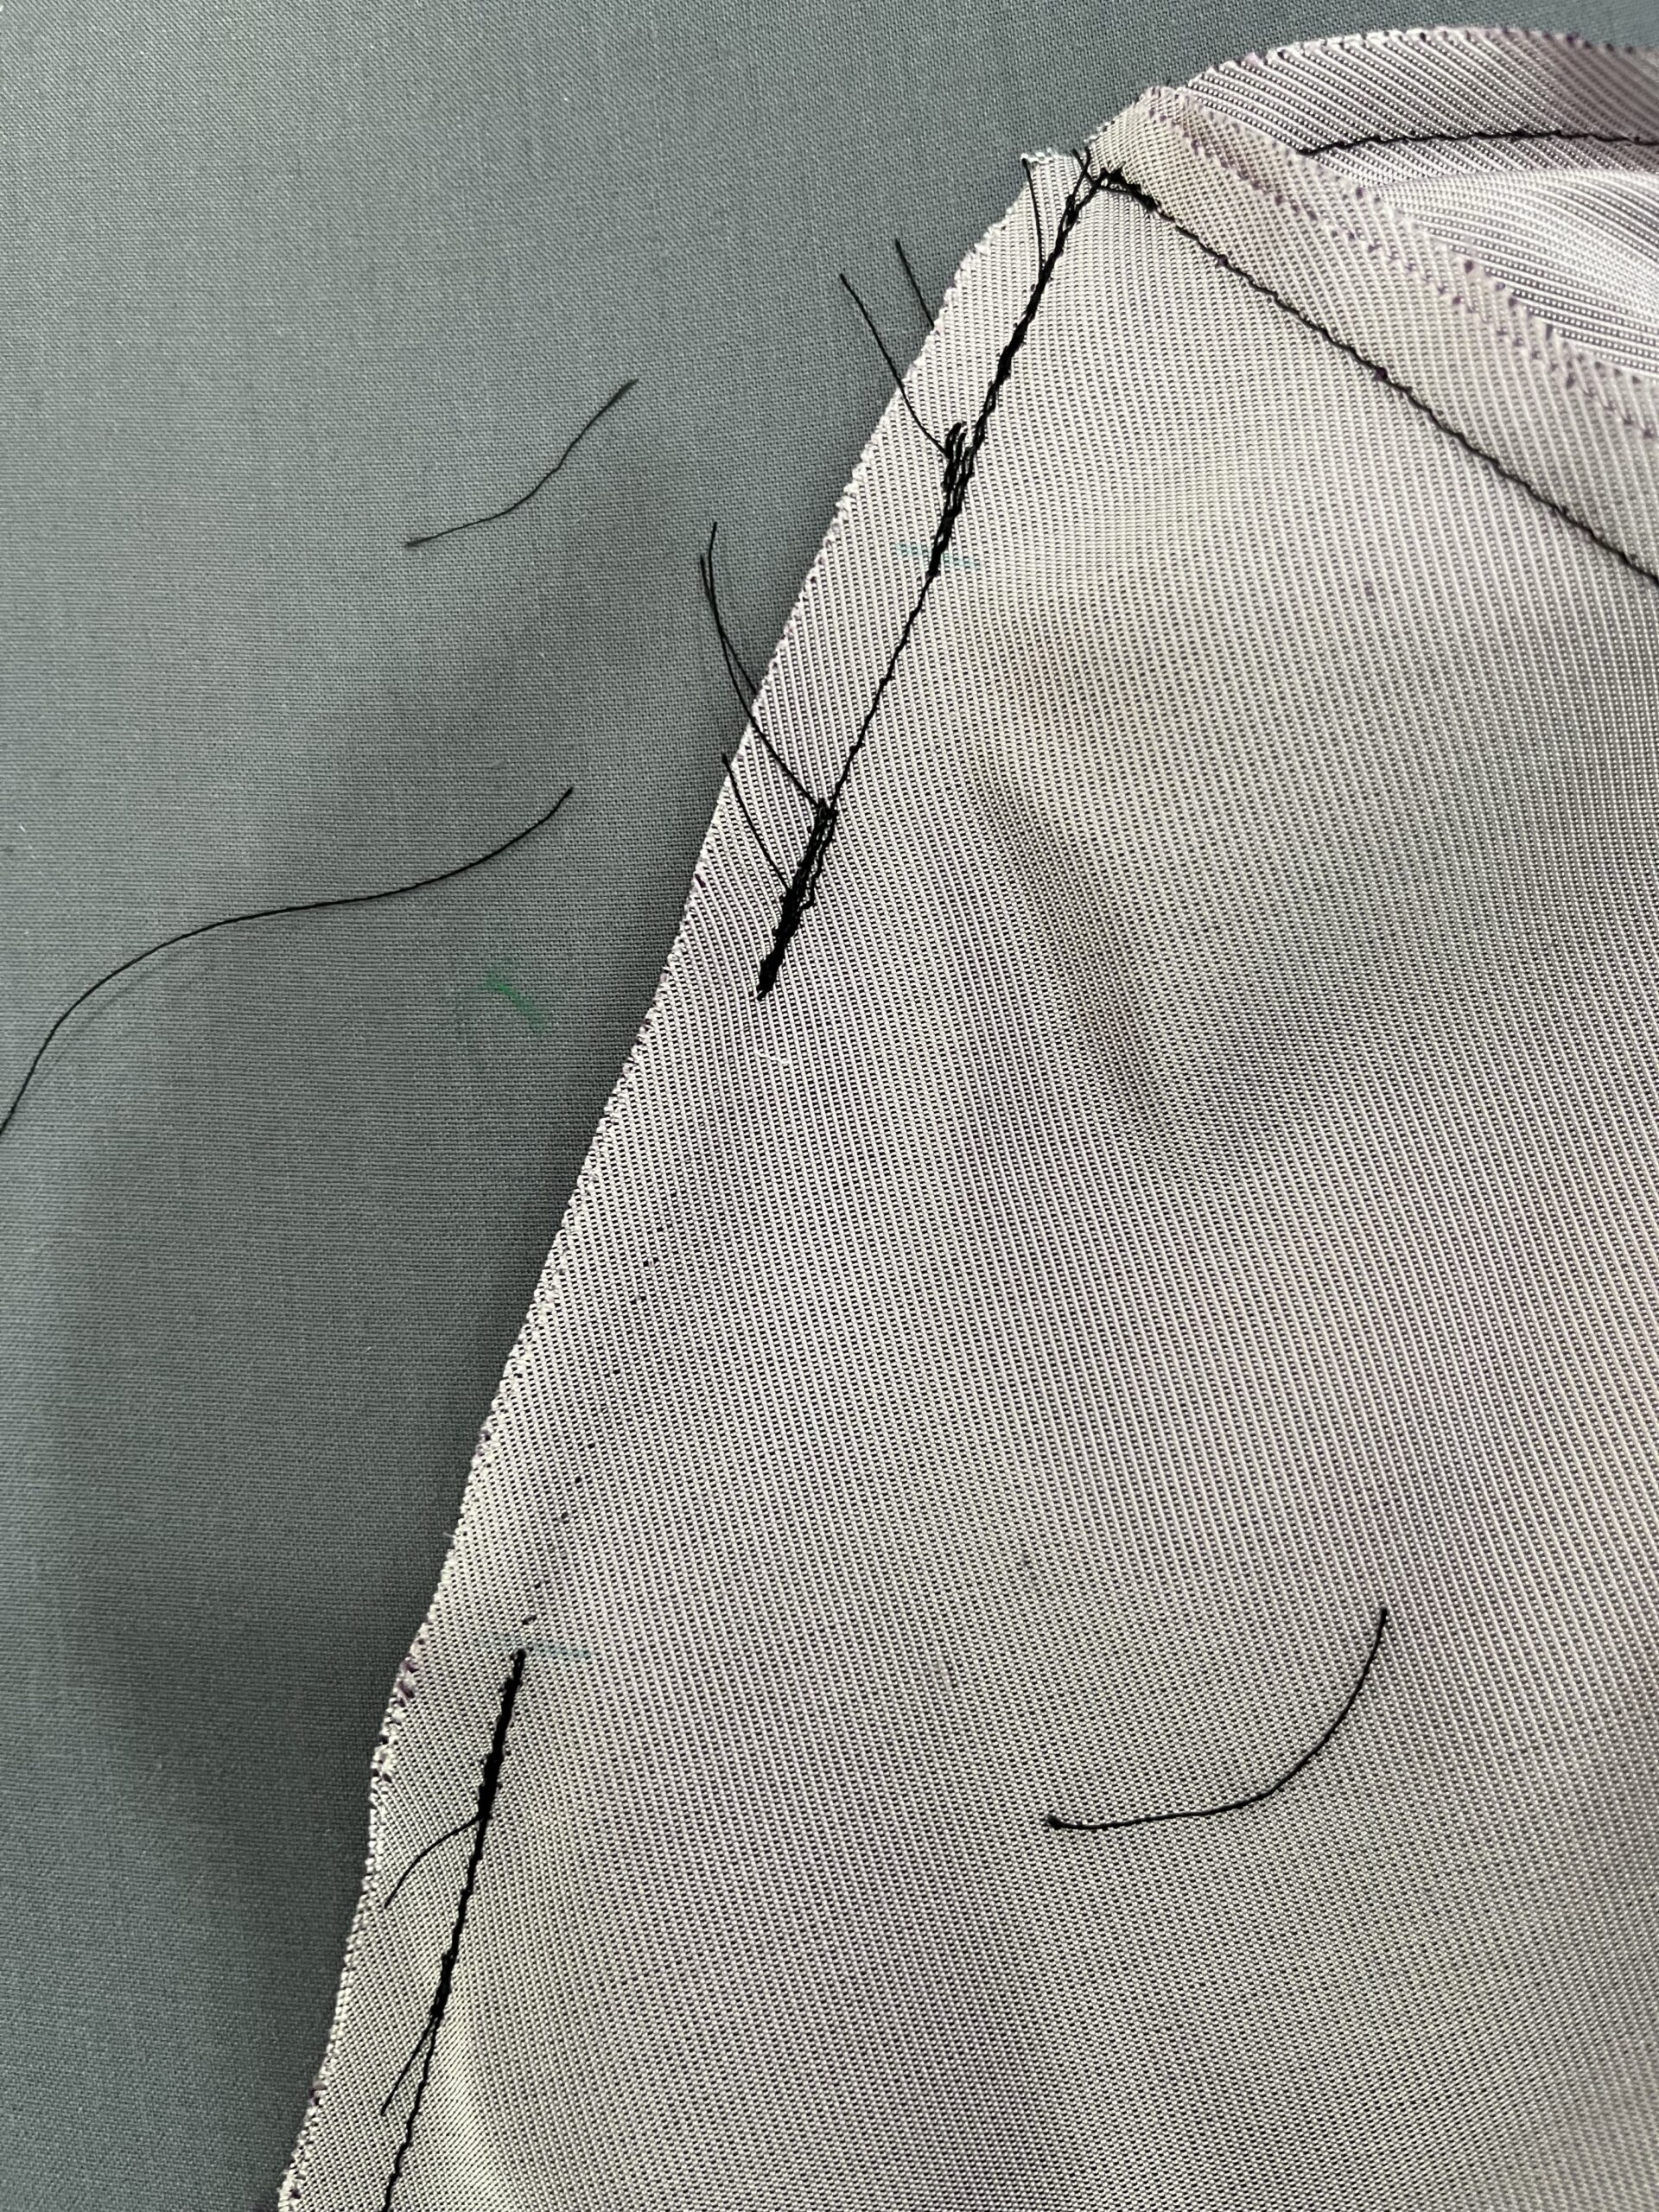
I pressed the seams flat. (Note: Pressing the seams both FLAT and OPEN is VERY important for later on when I join the lining to the outer body.)

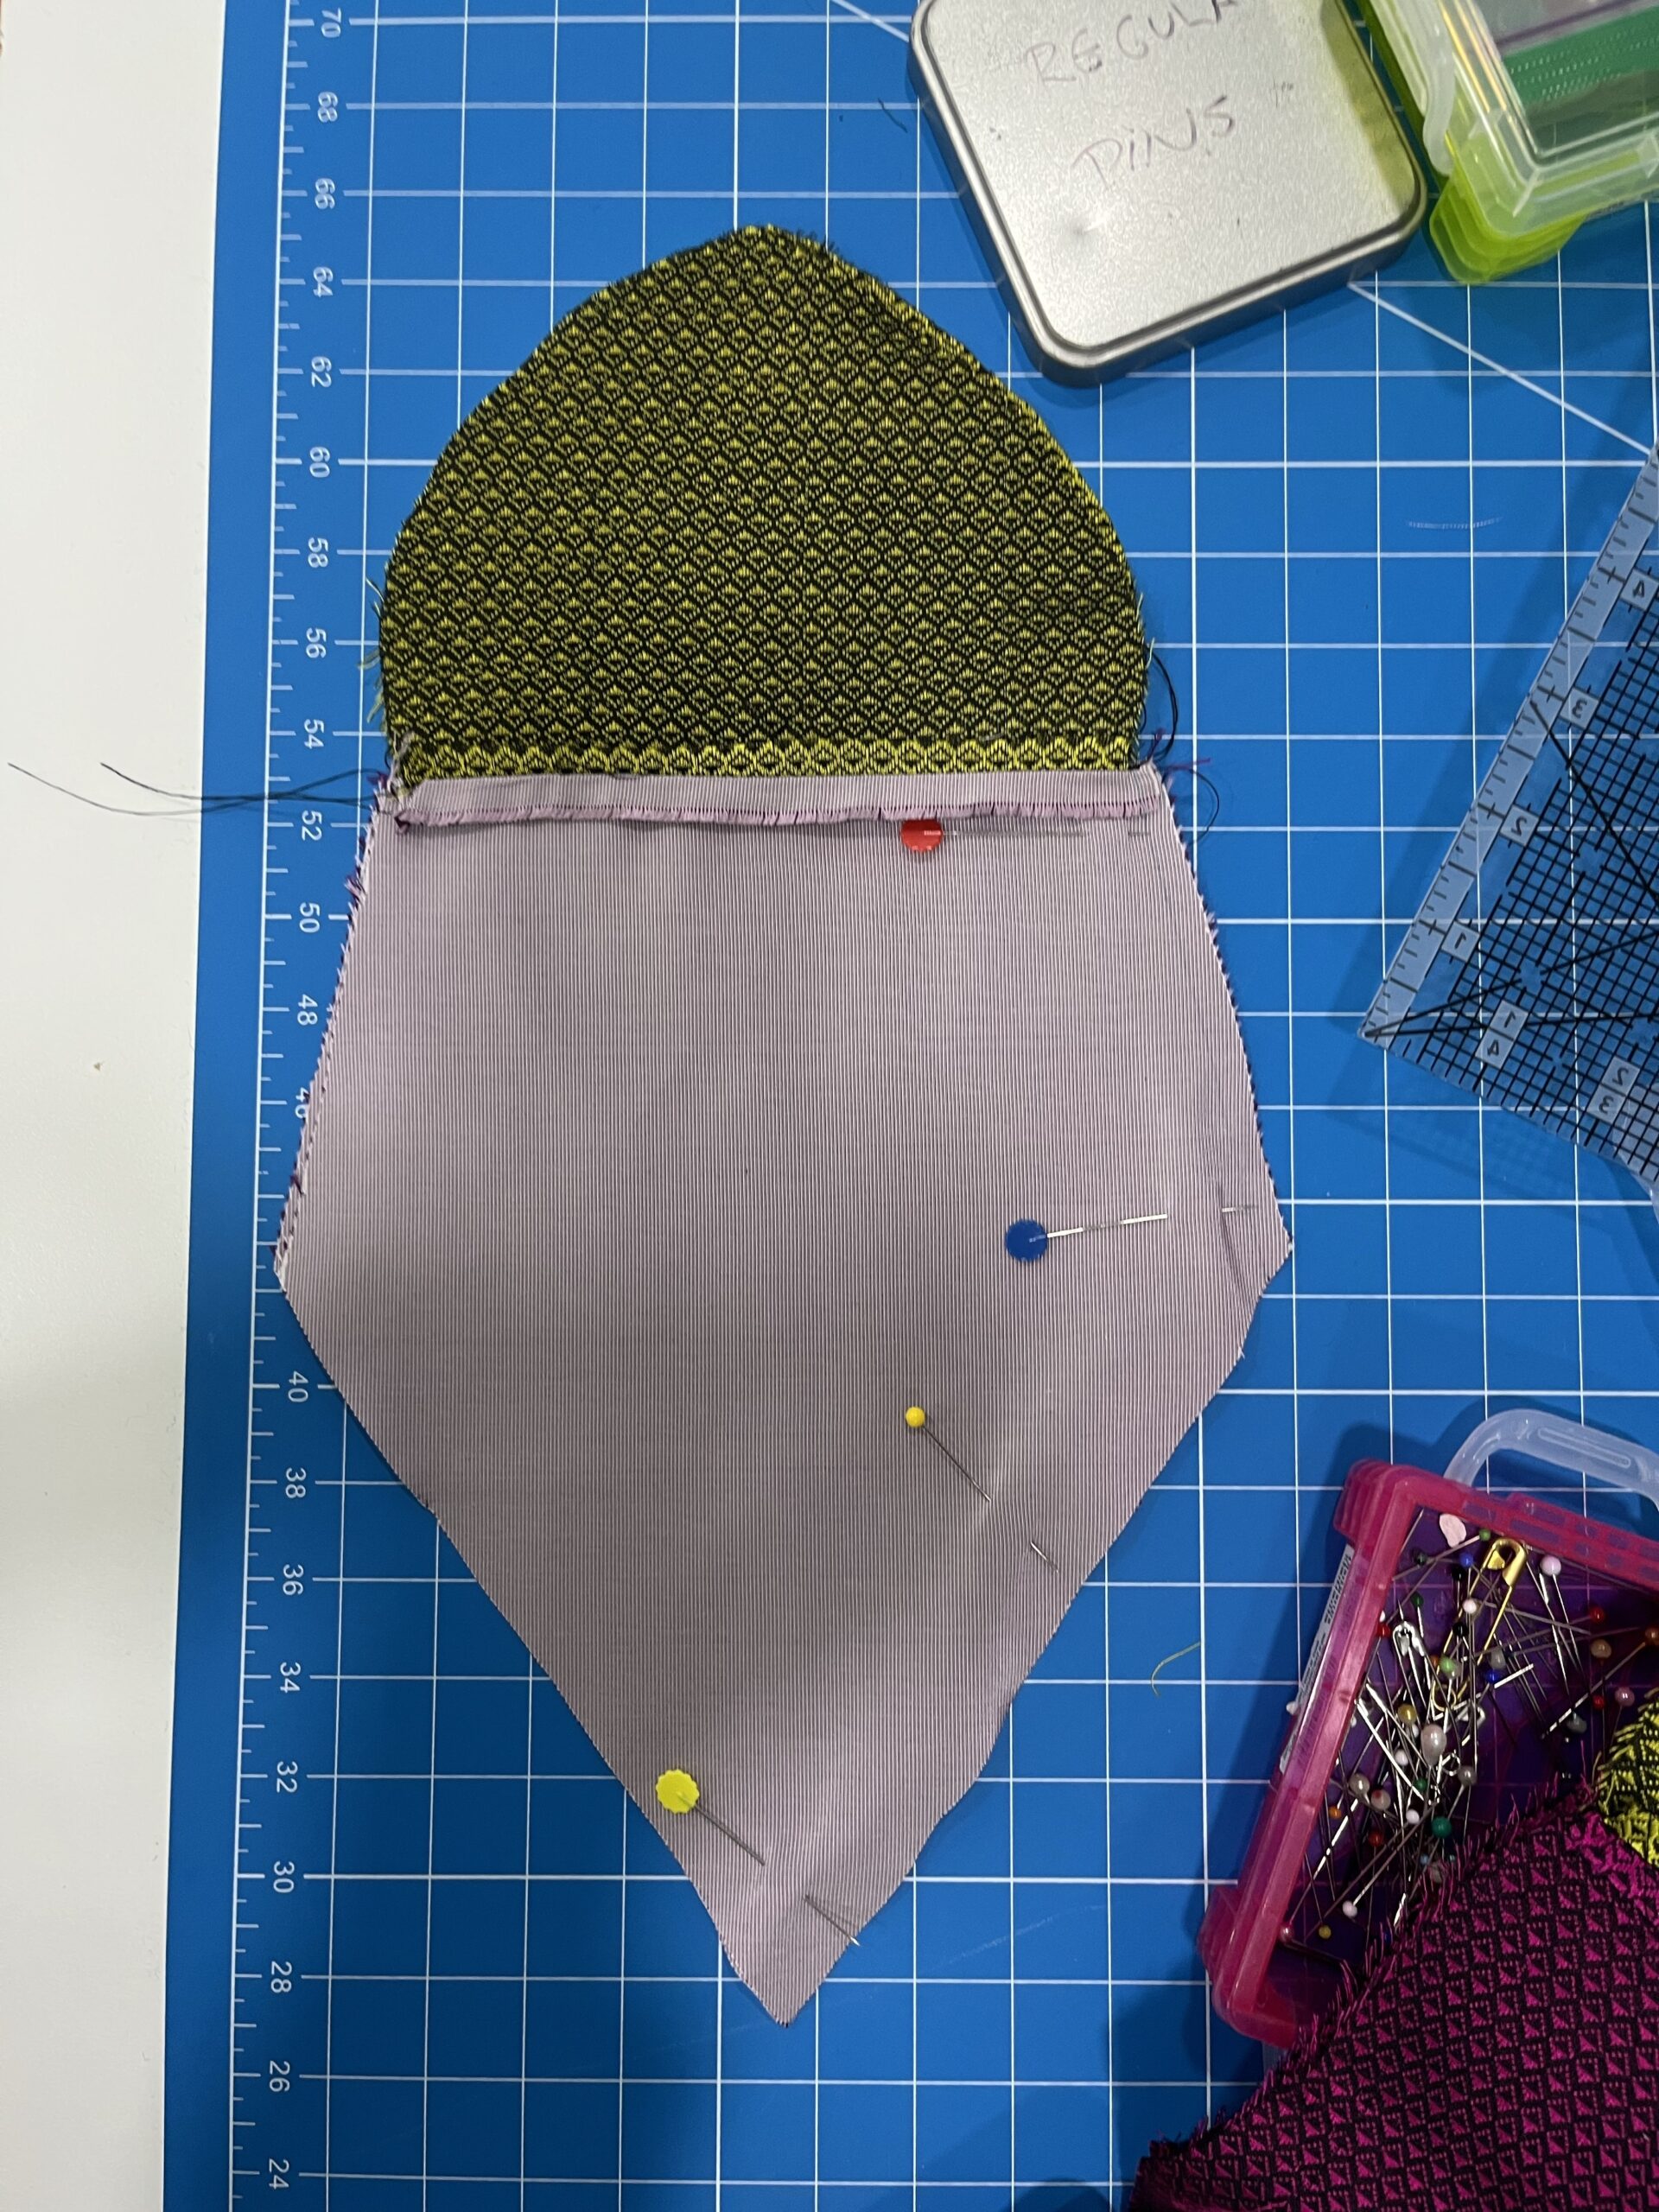
I pinned my outer body panels together – making sure that the leaf/body seams matched from piece to piece.
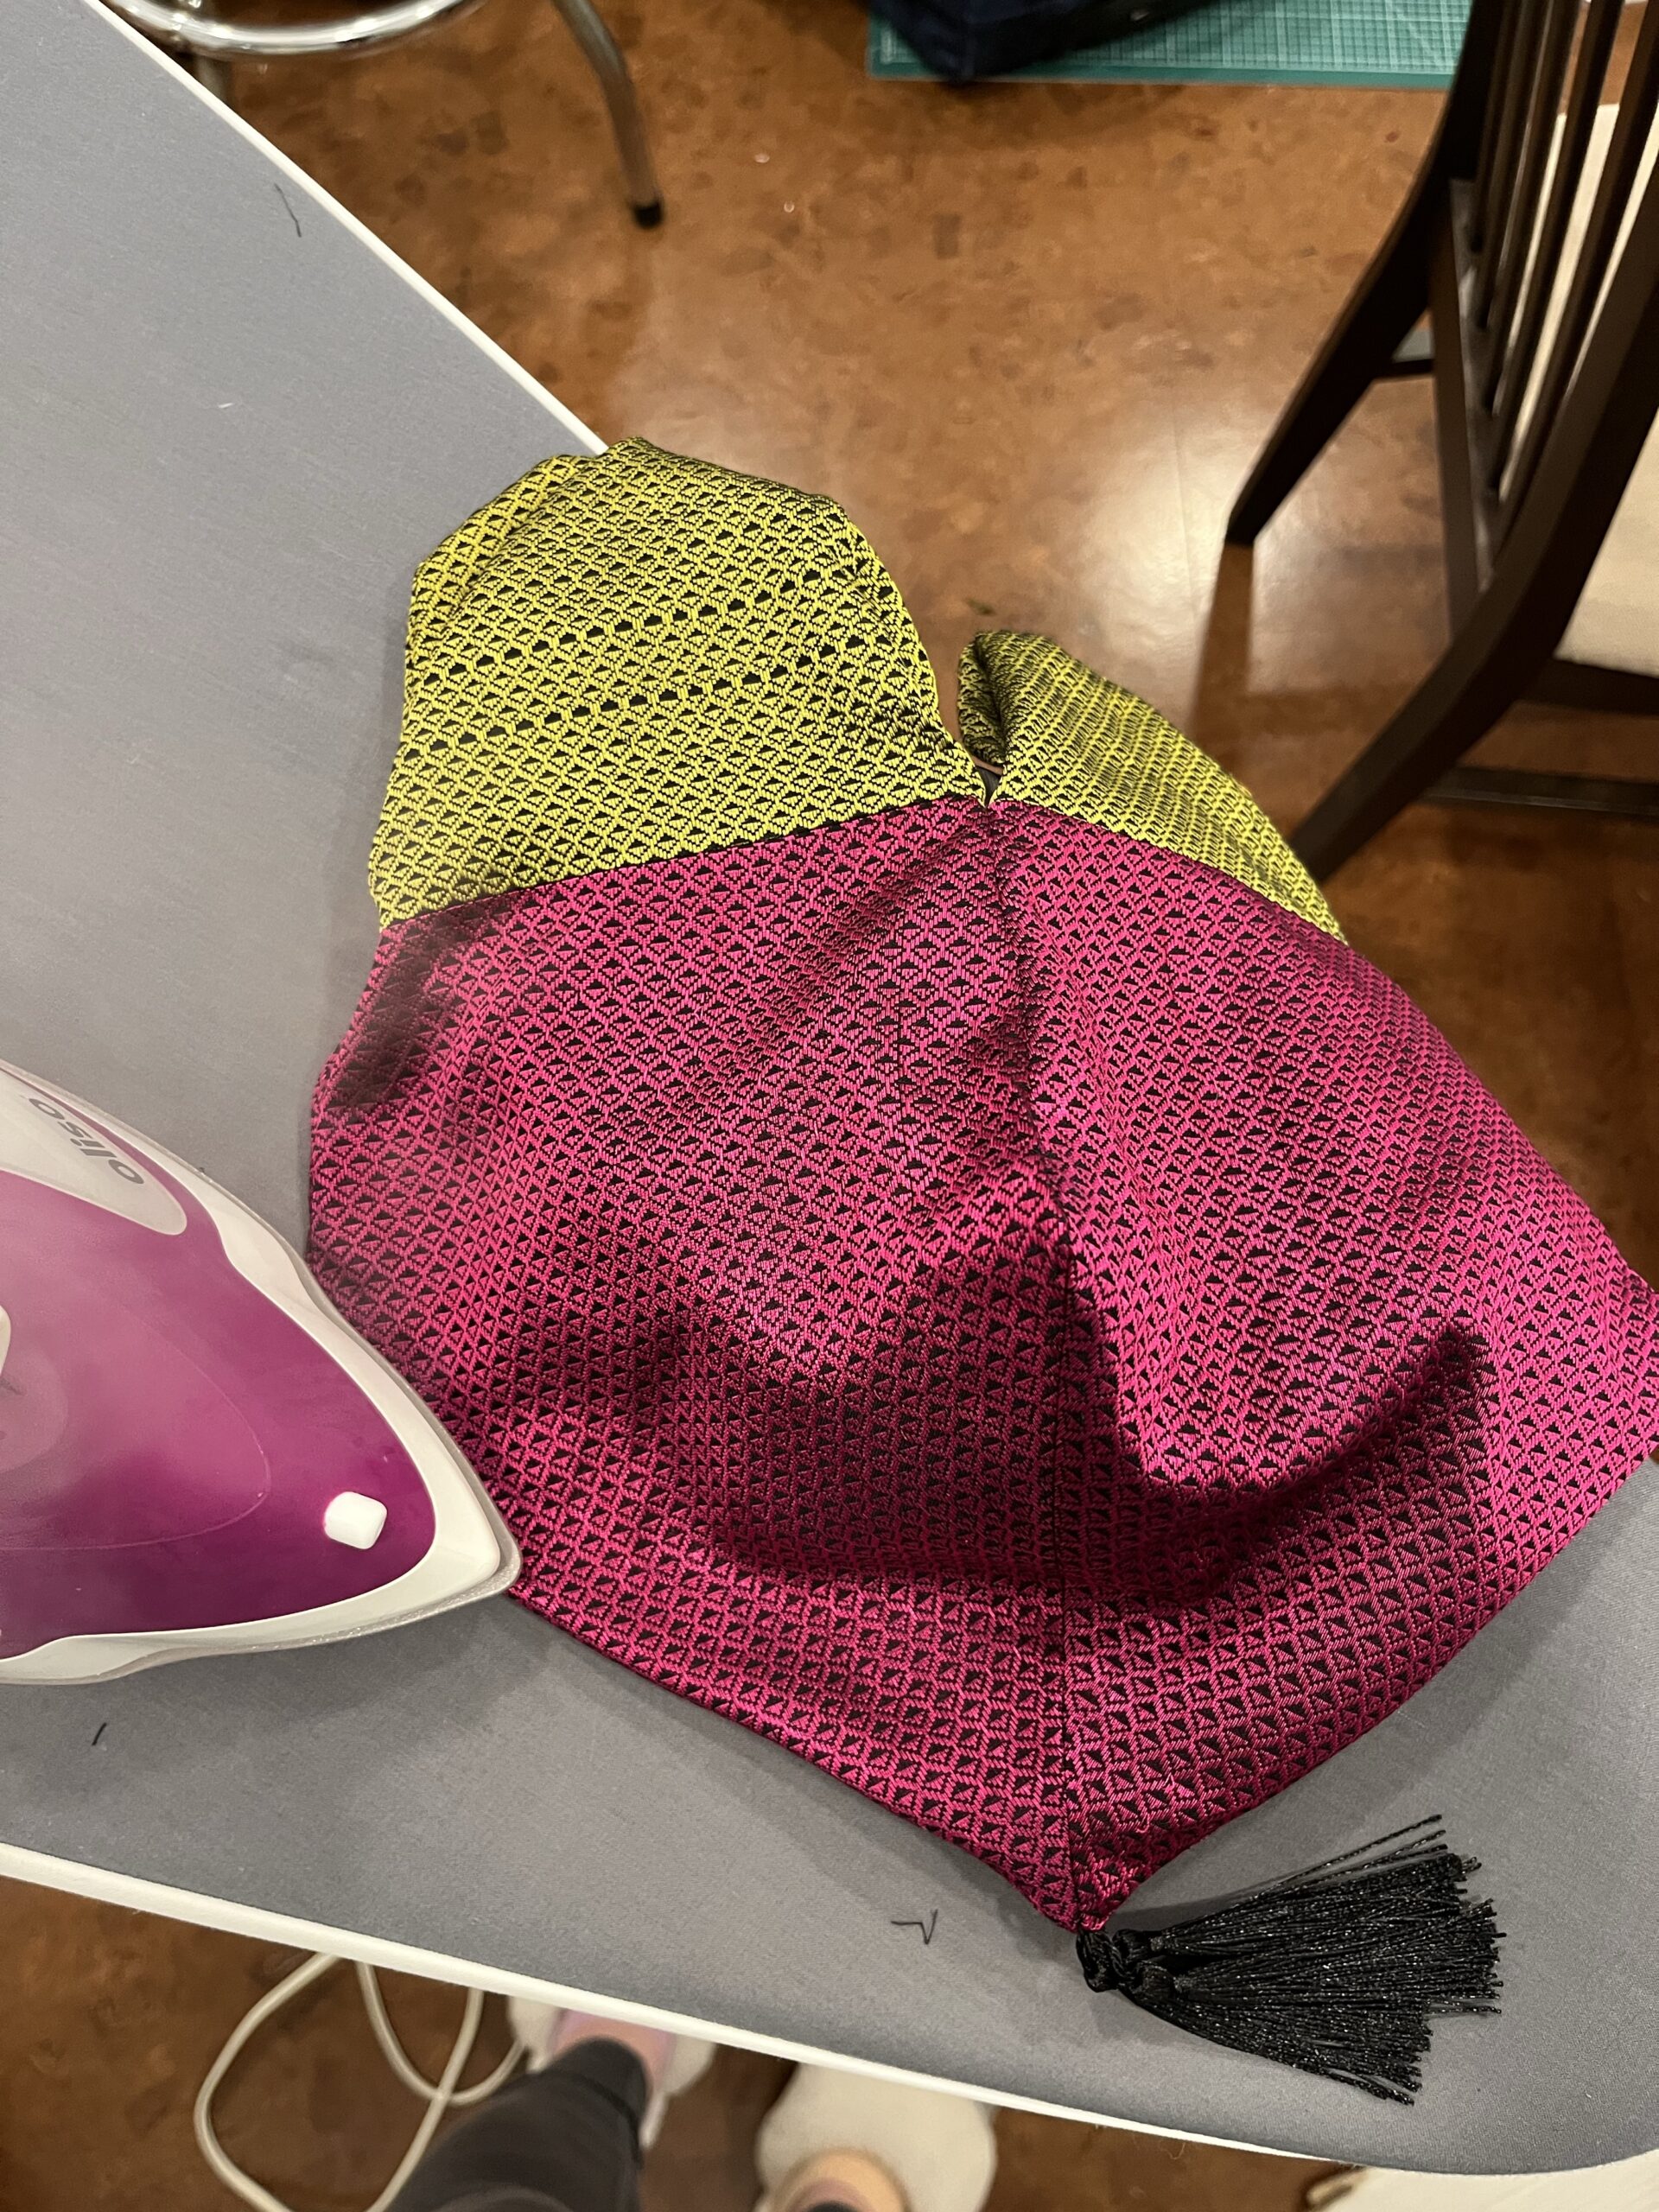
Then I sewed along the sides of the berry body and ONLY the berry body. I did not sew the leaves at this time.

I left a small opening of 2-3 mm (1/8 inch) at the bottom of the berry to insert the tassel.
I only had small tassels, so I bundled several together until I had the mass I wanted. Using a blunt darning needle with a nice wide eye, I fed the cords of the tassels through the hole i had left at the base of the outer body, and from the inside I stitched them in place.
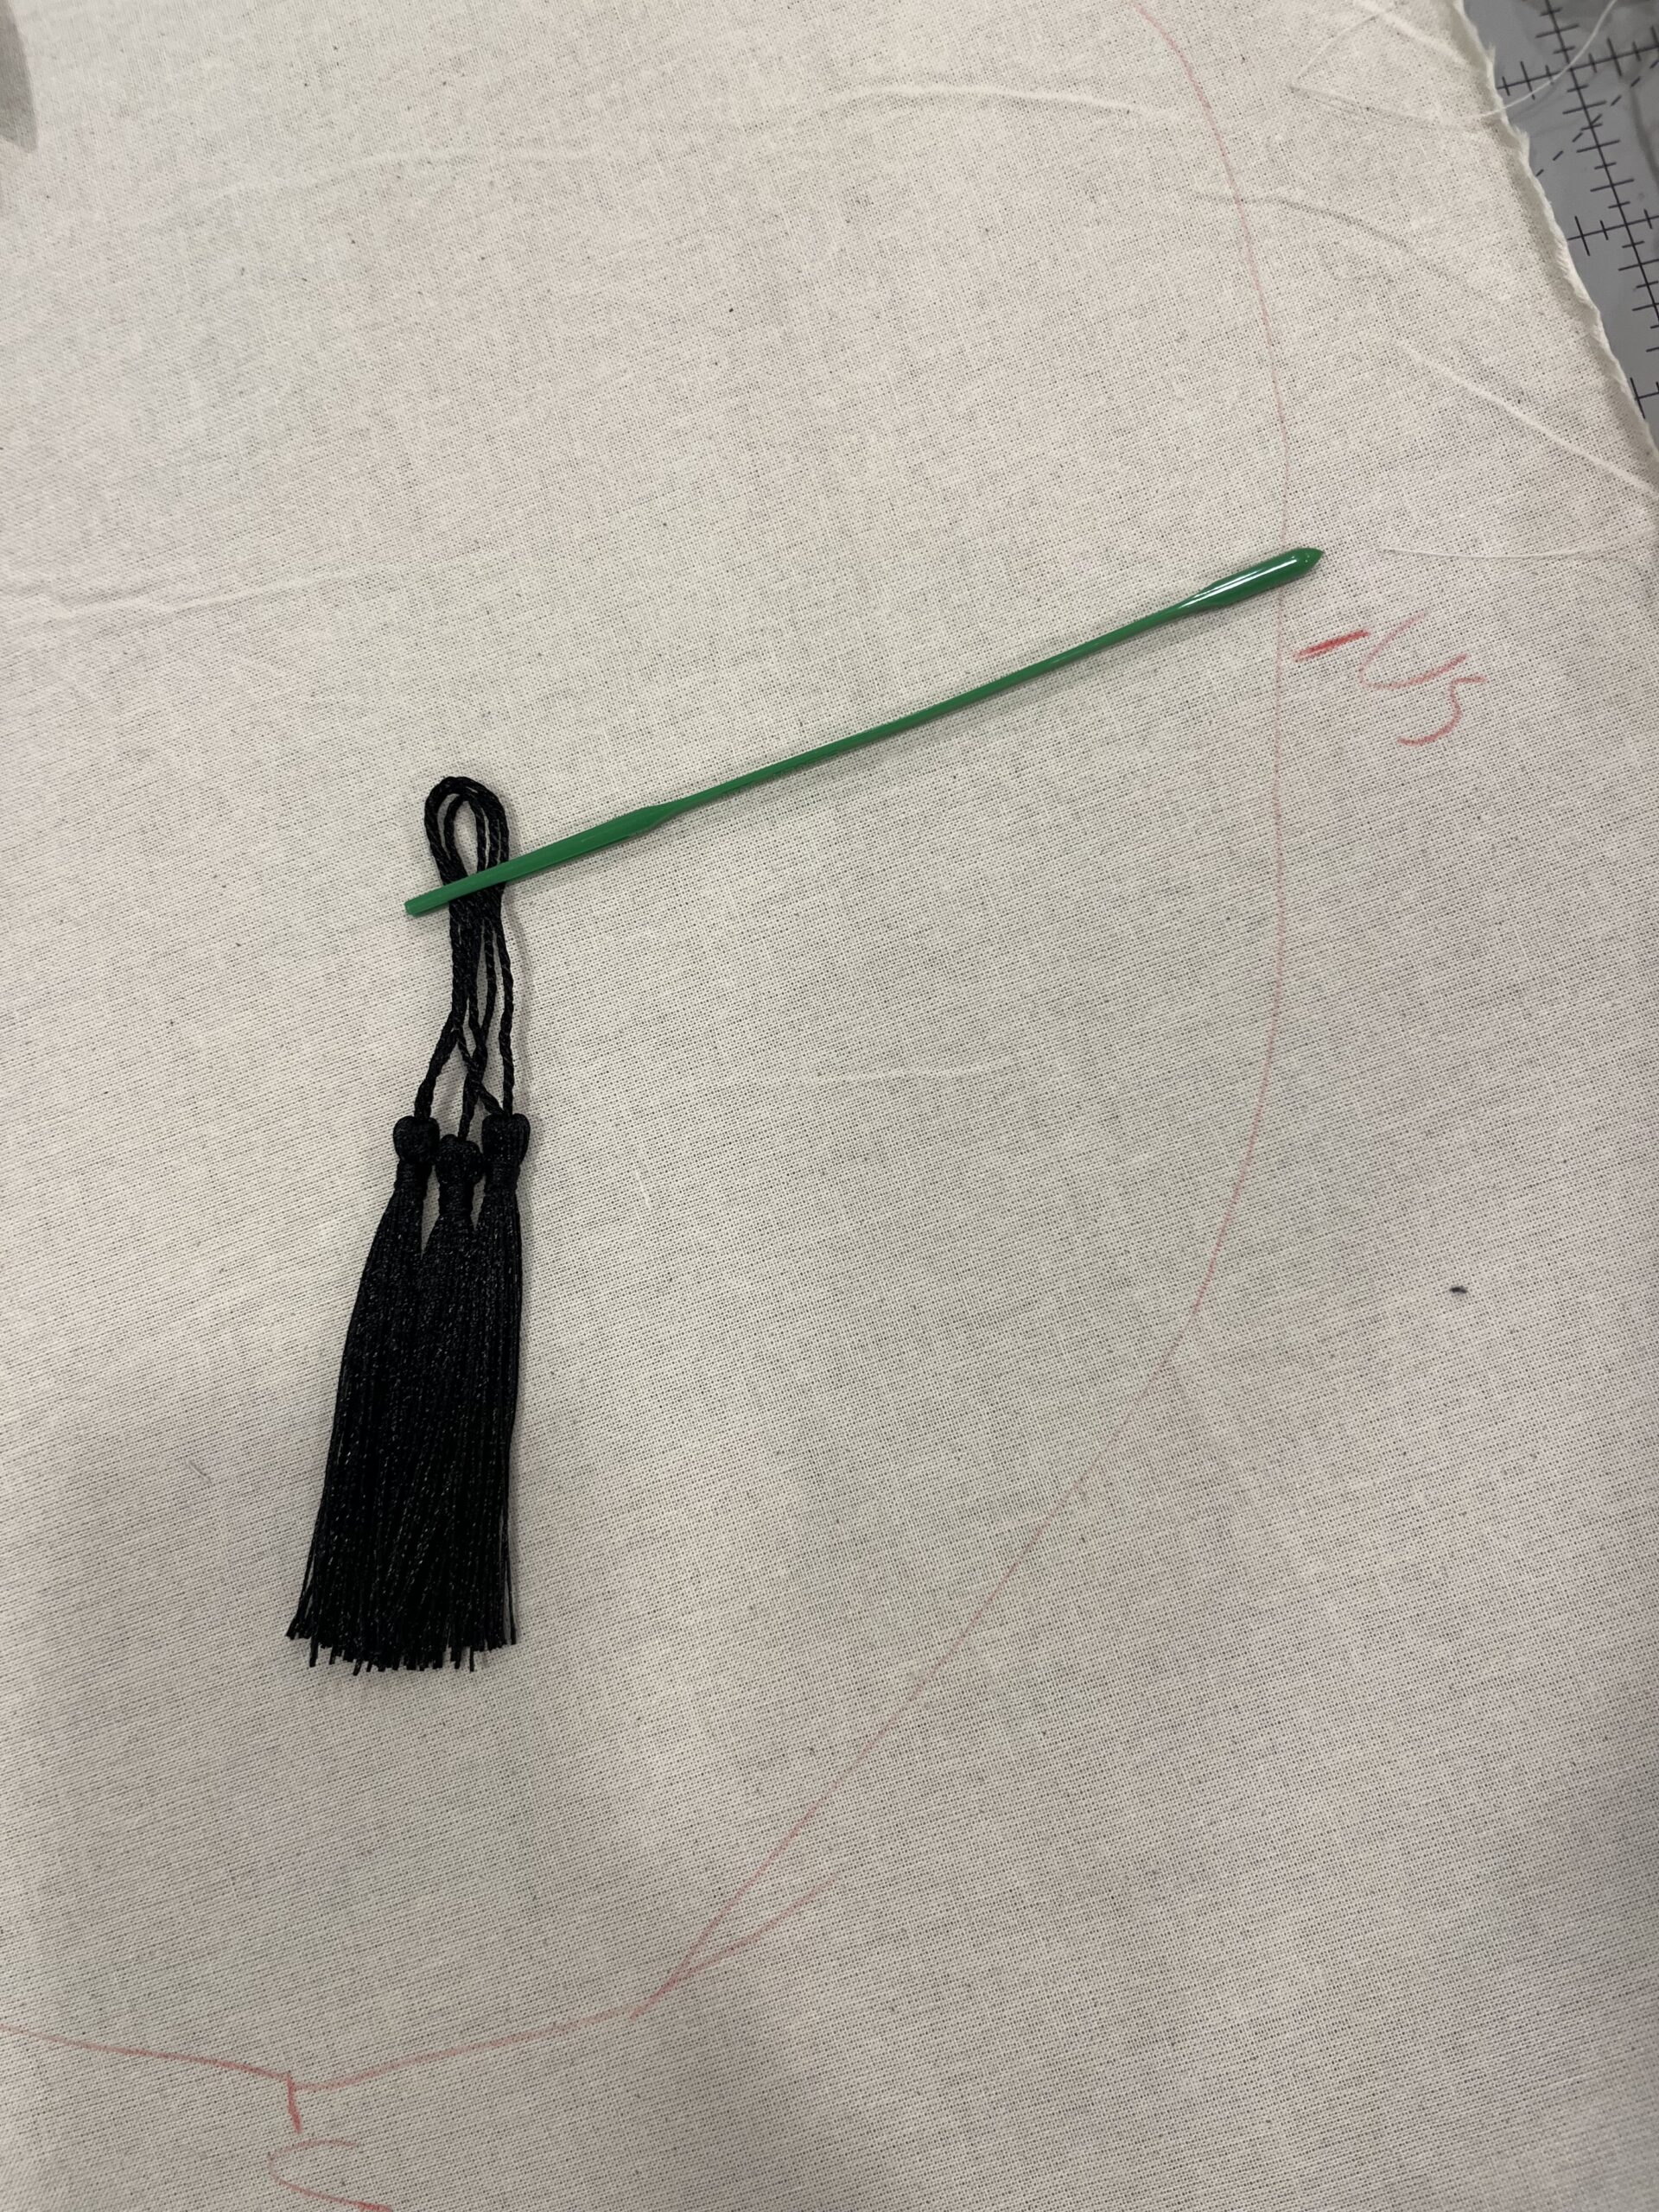

(Note: these photos are taken from a different reticule, just to show you how it works!)
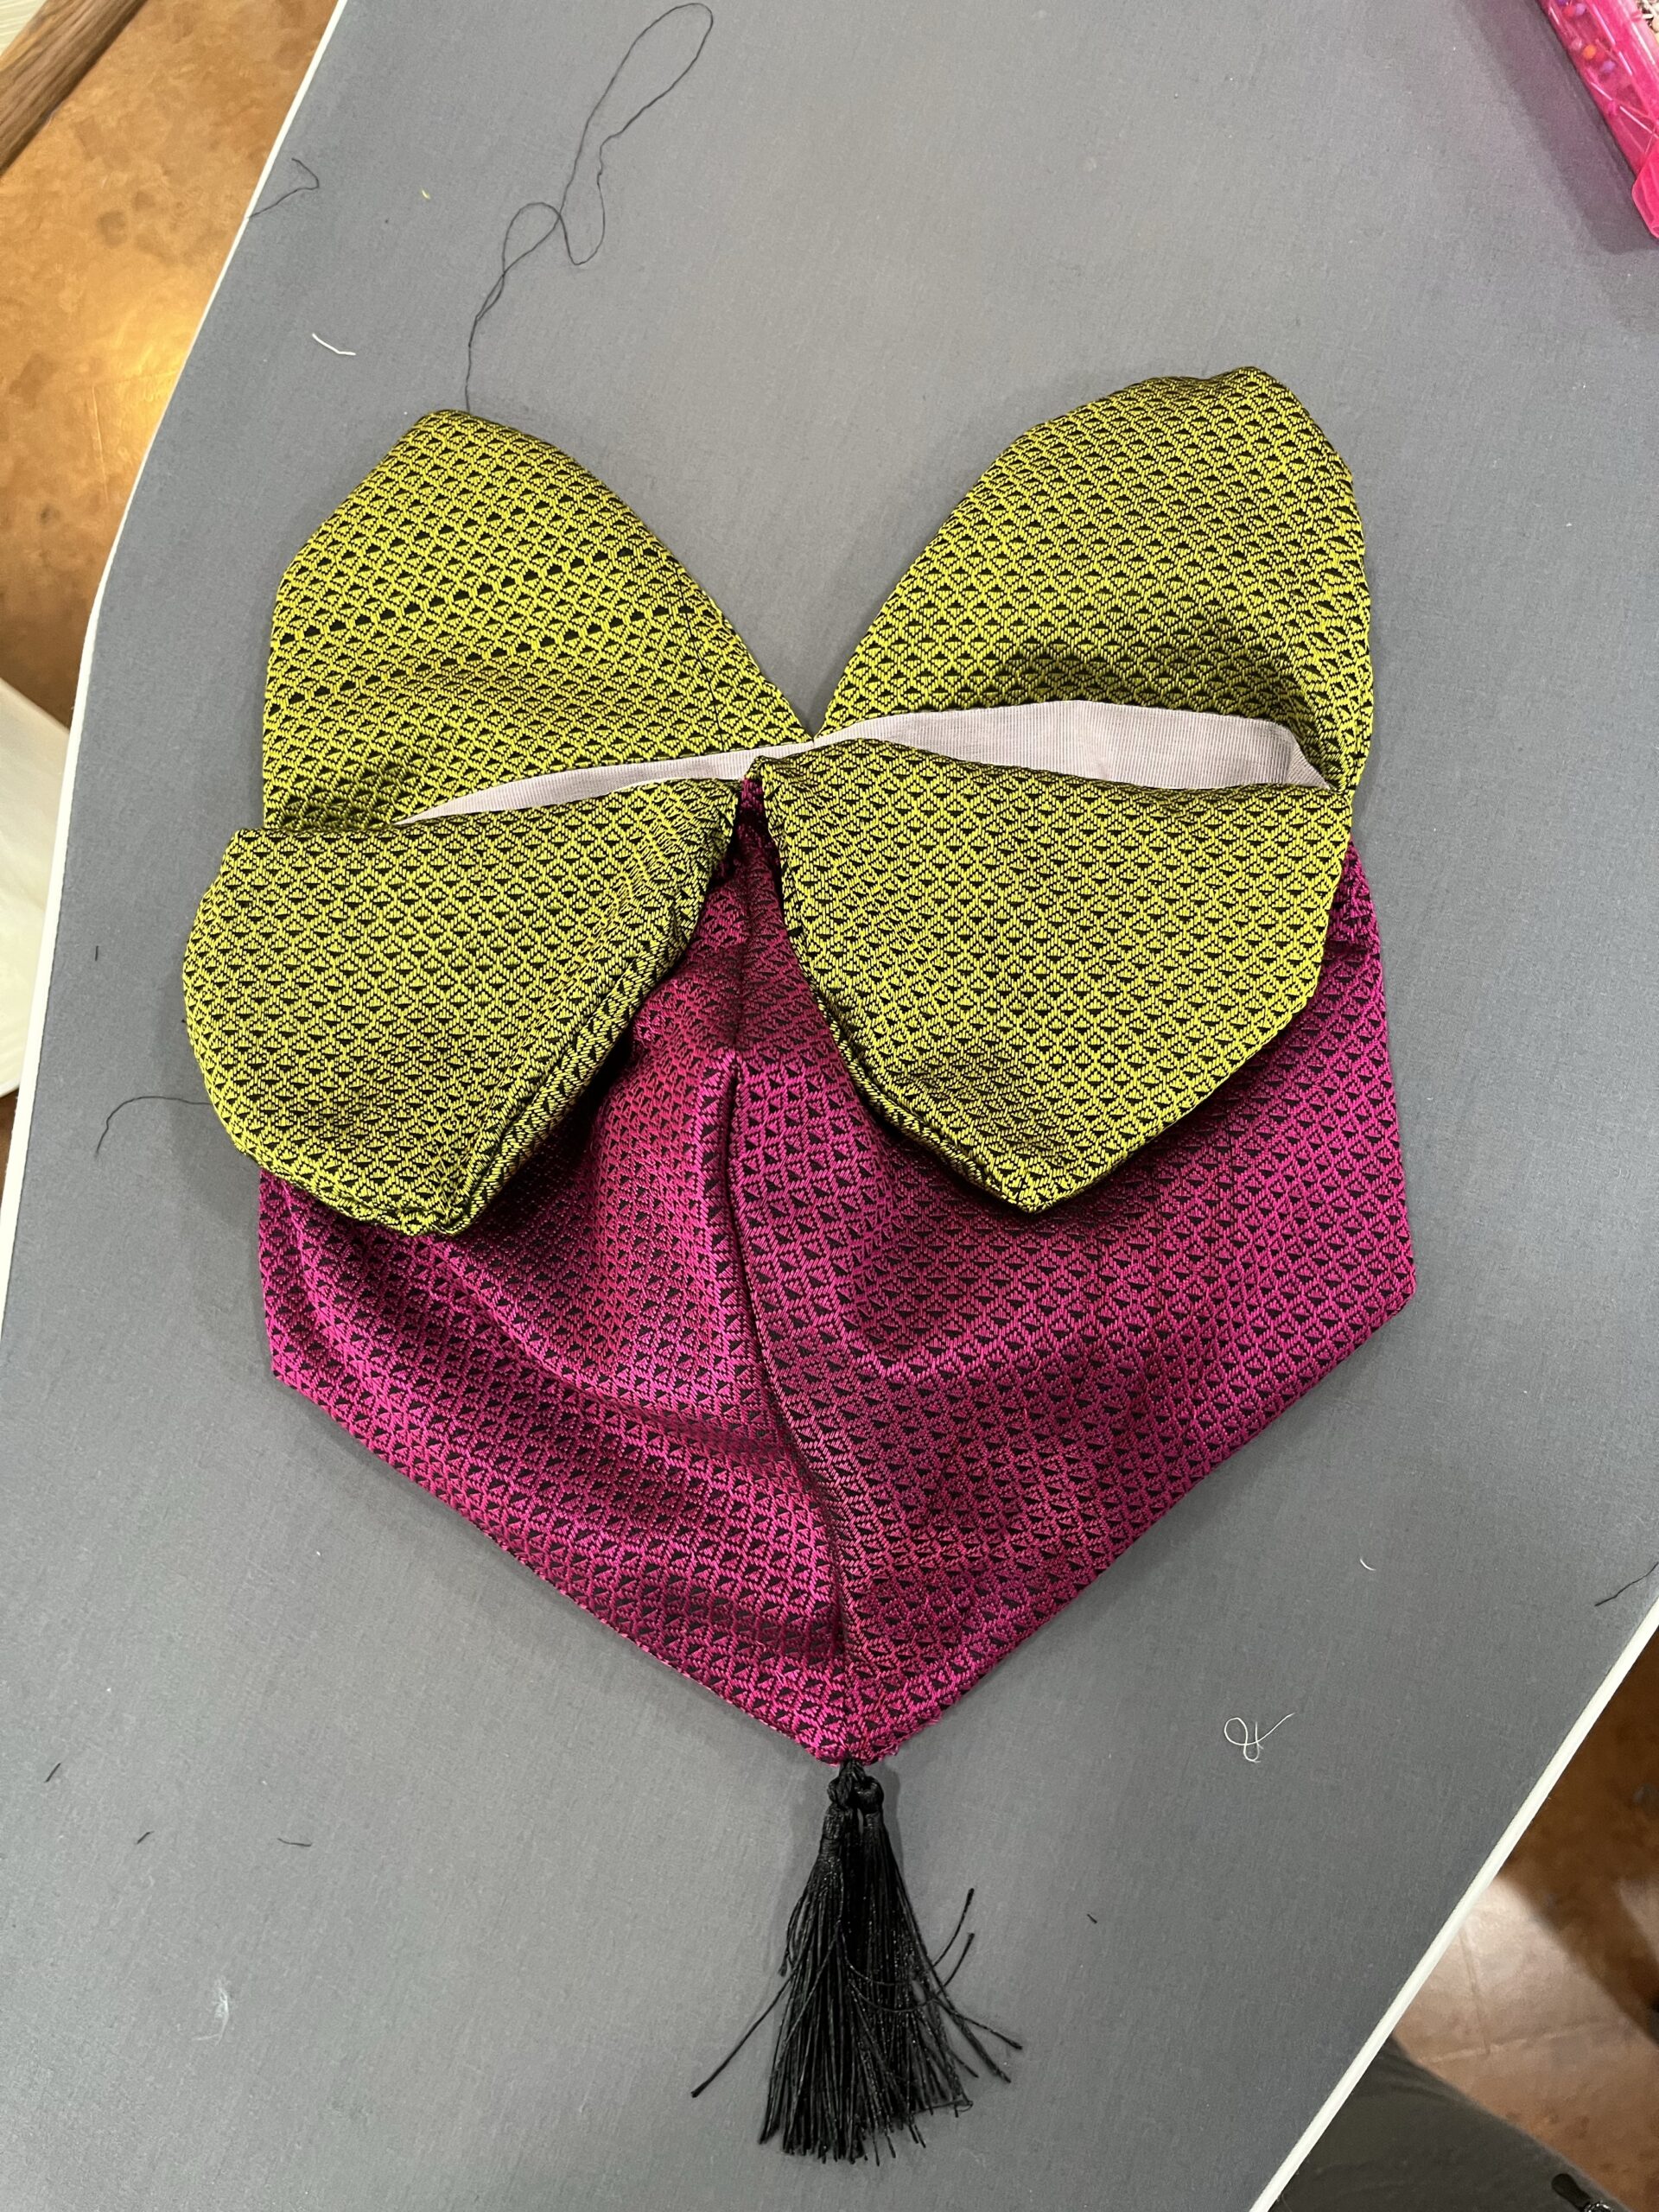
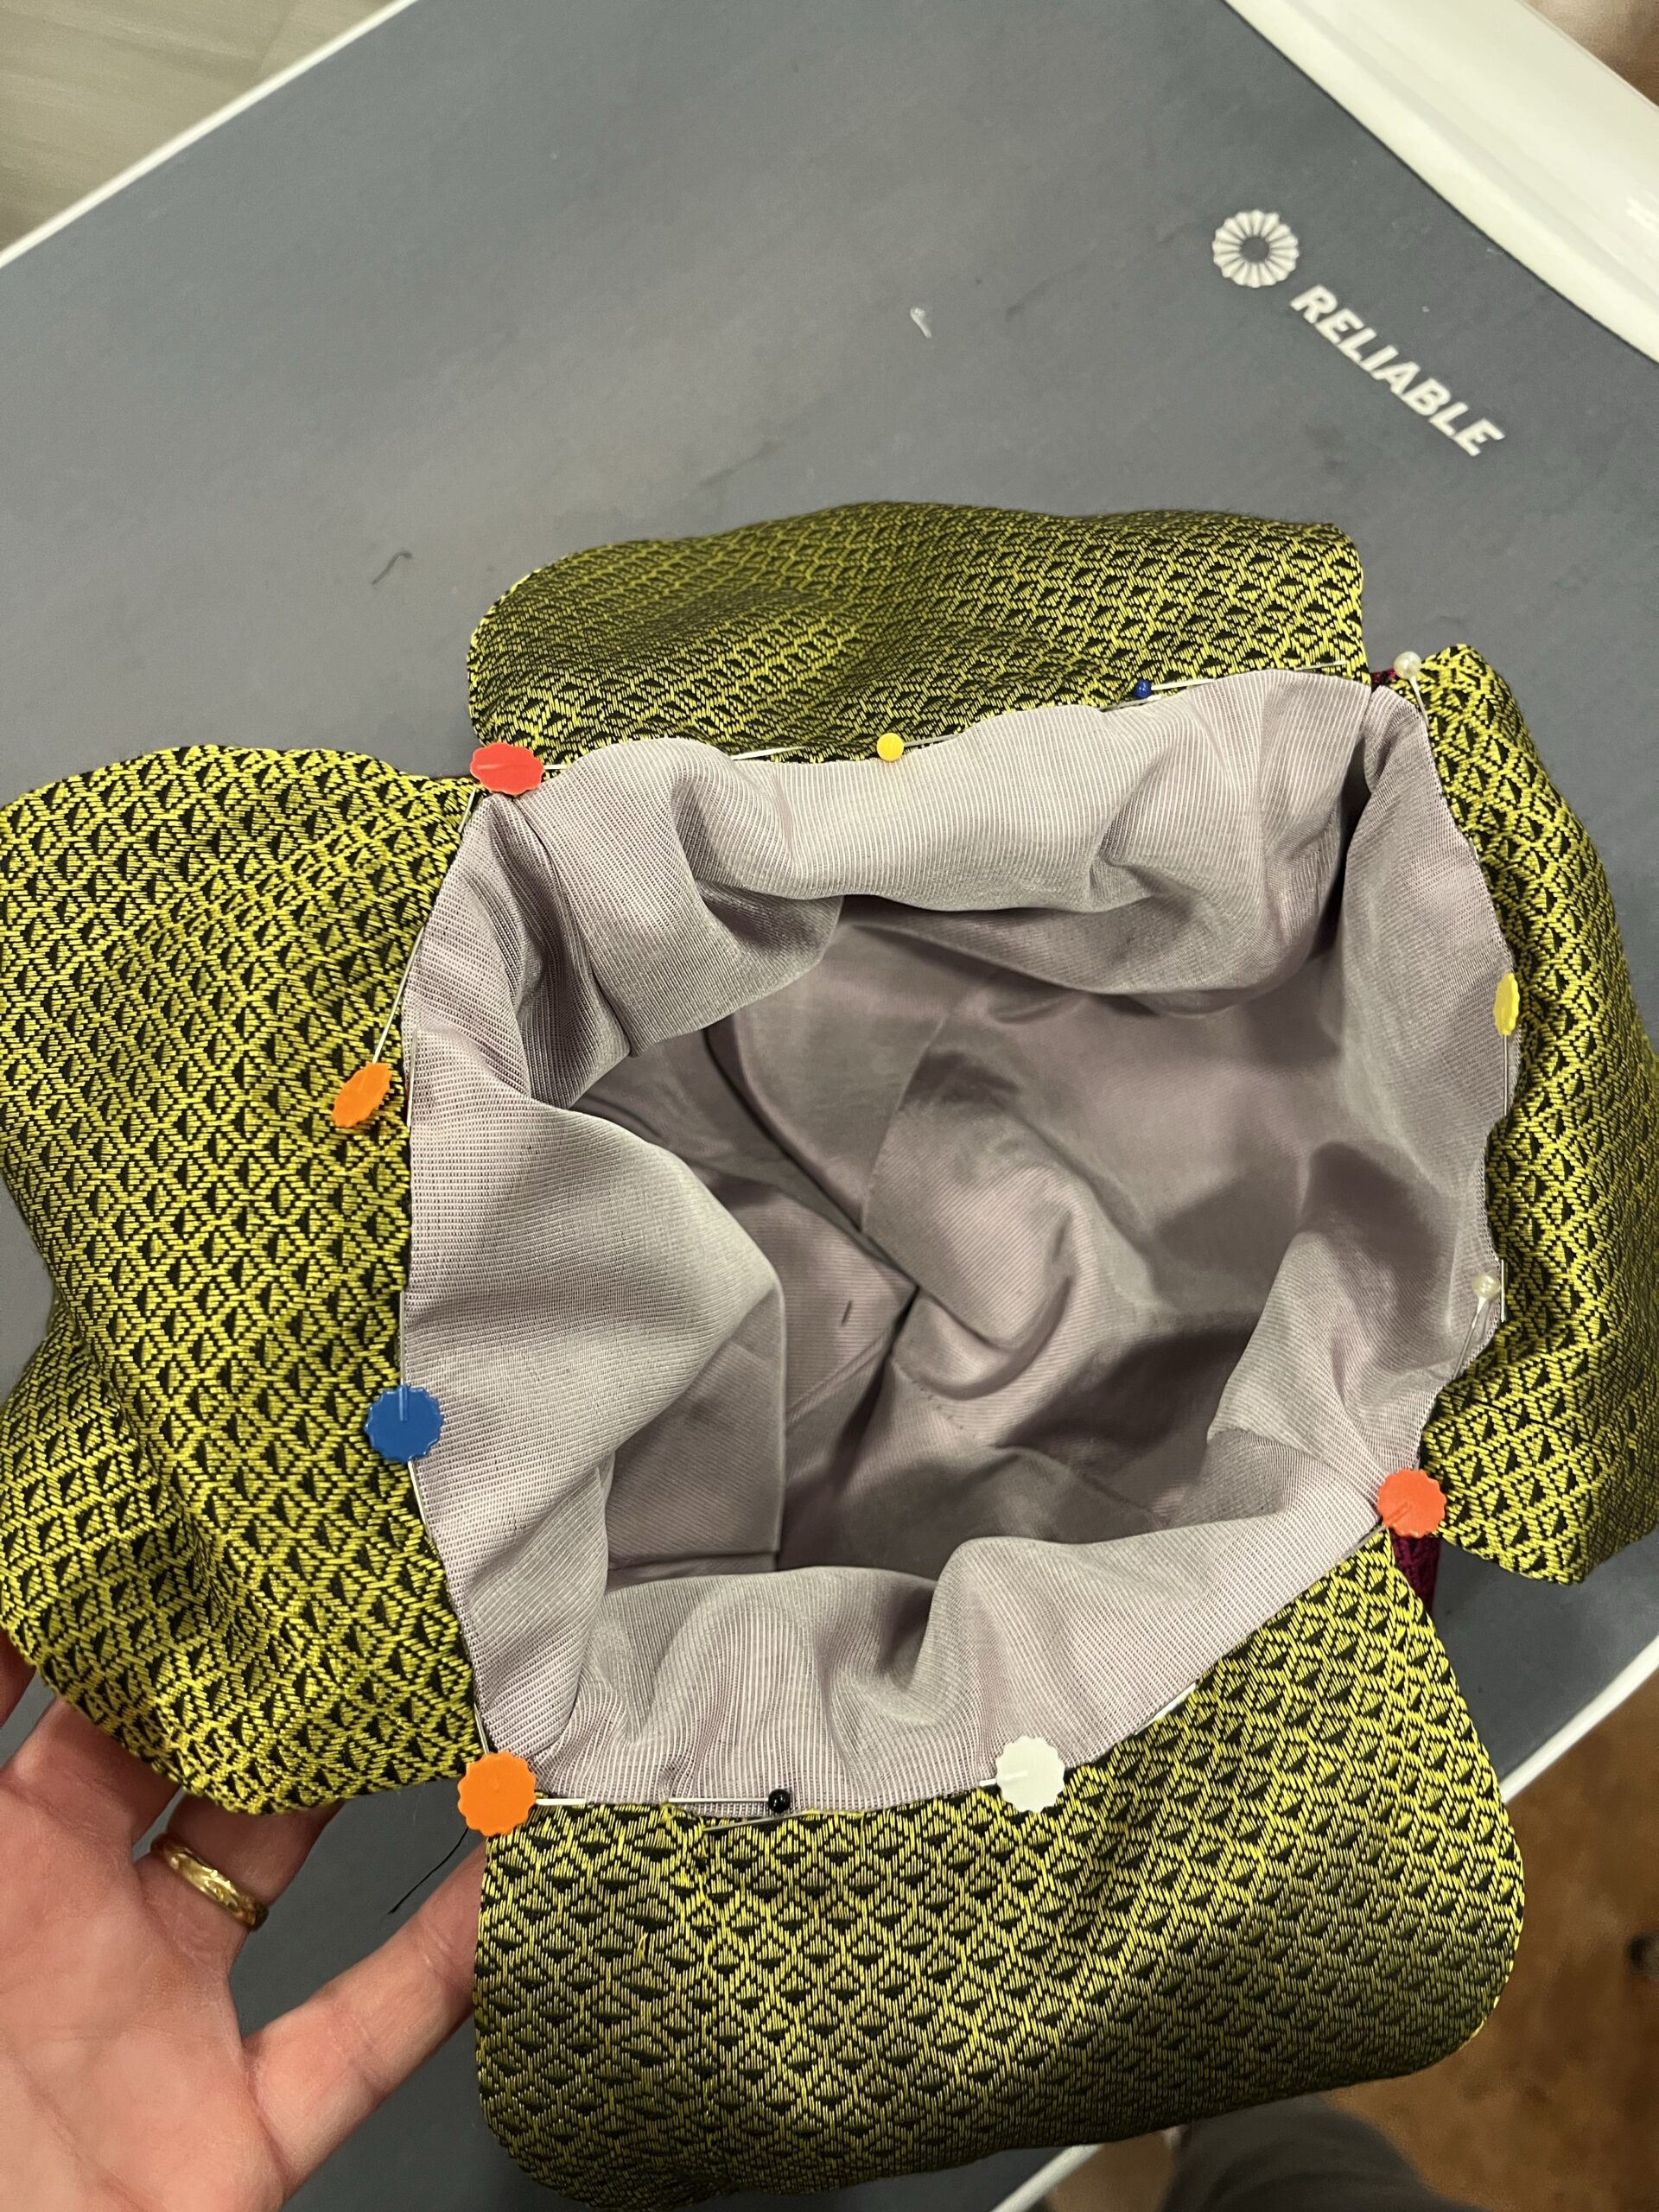
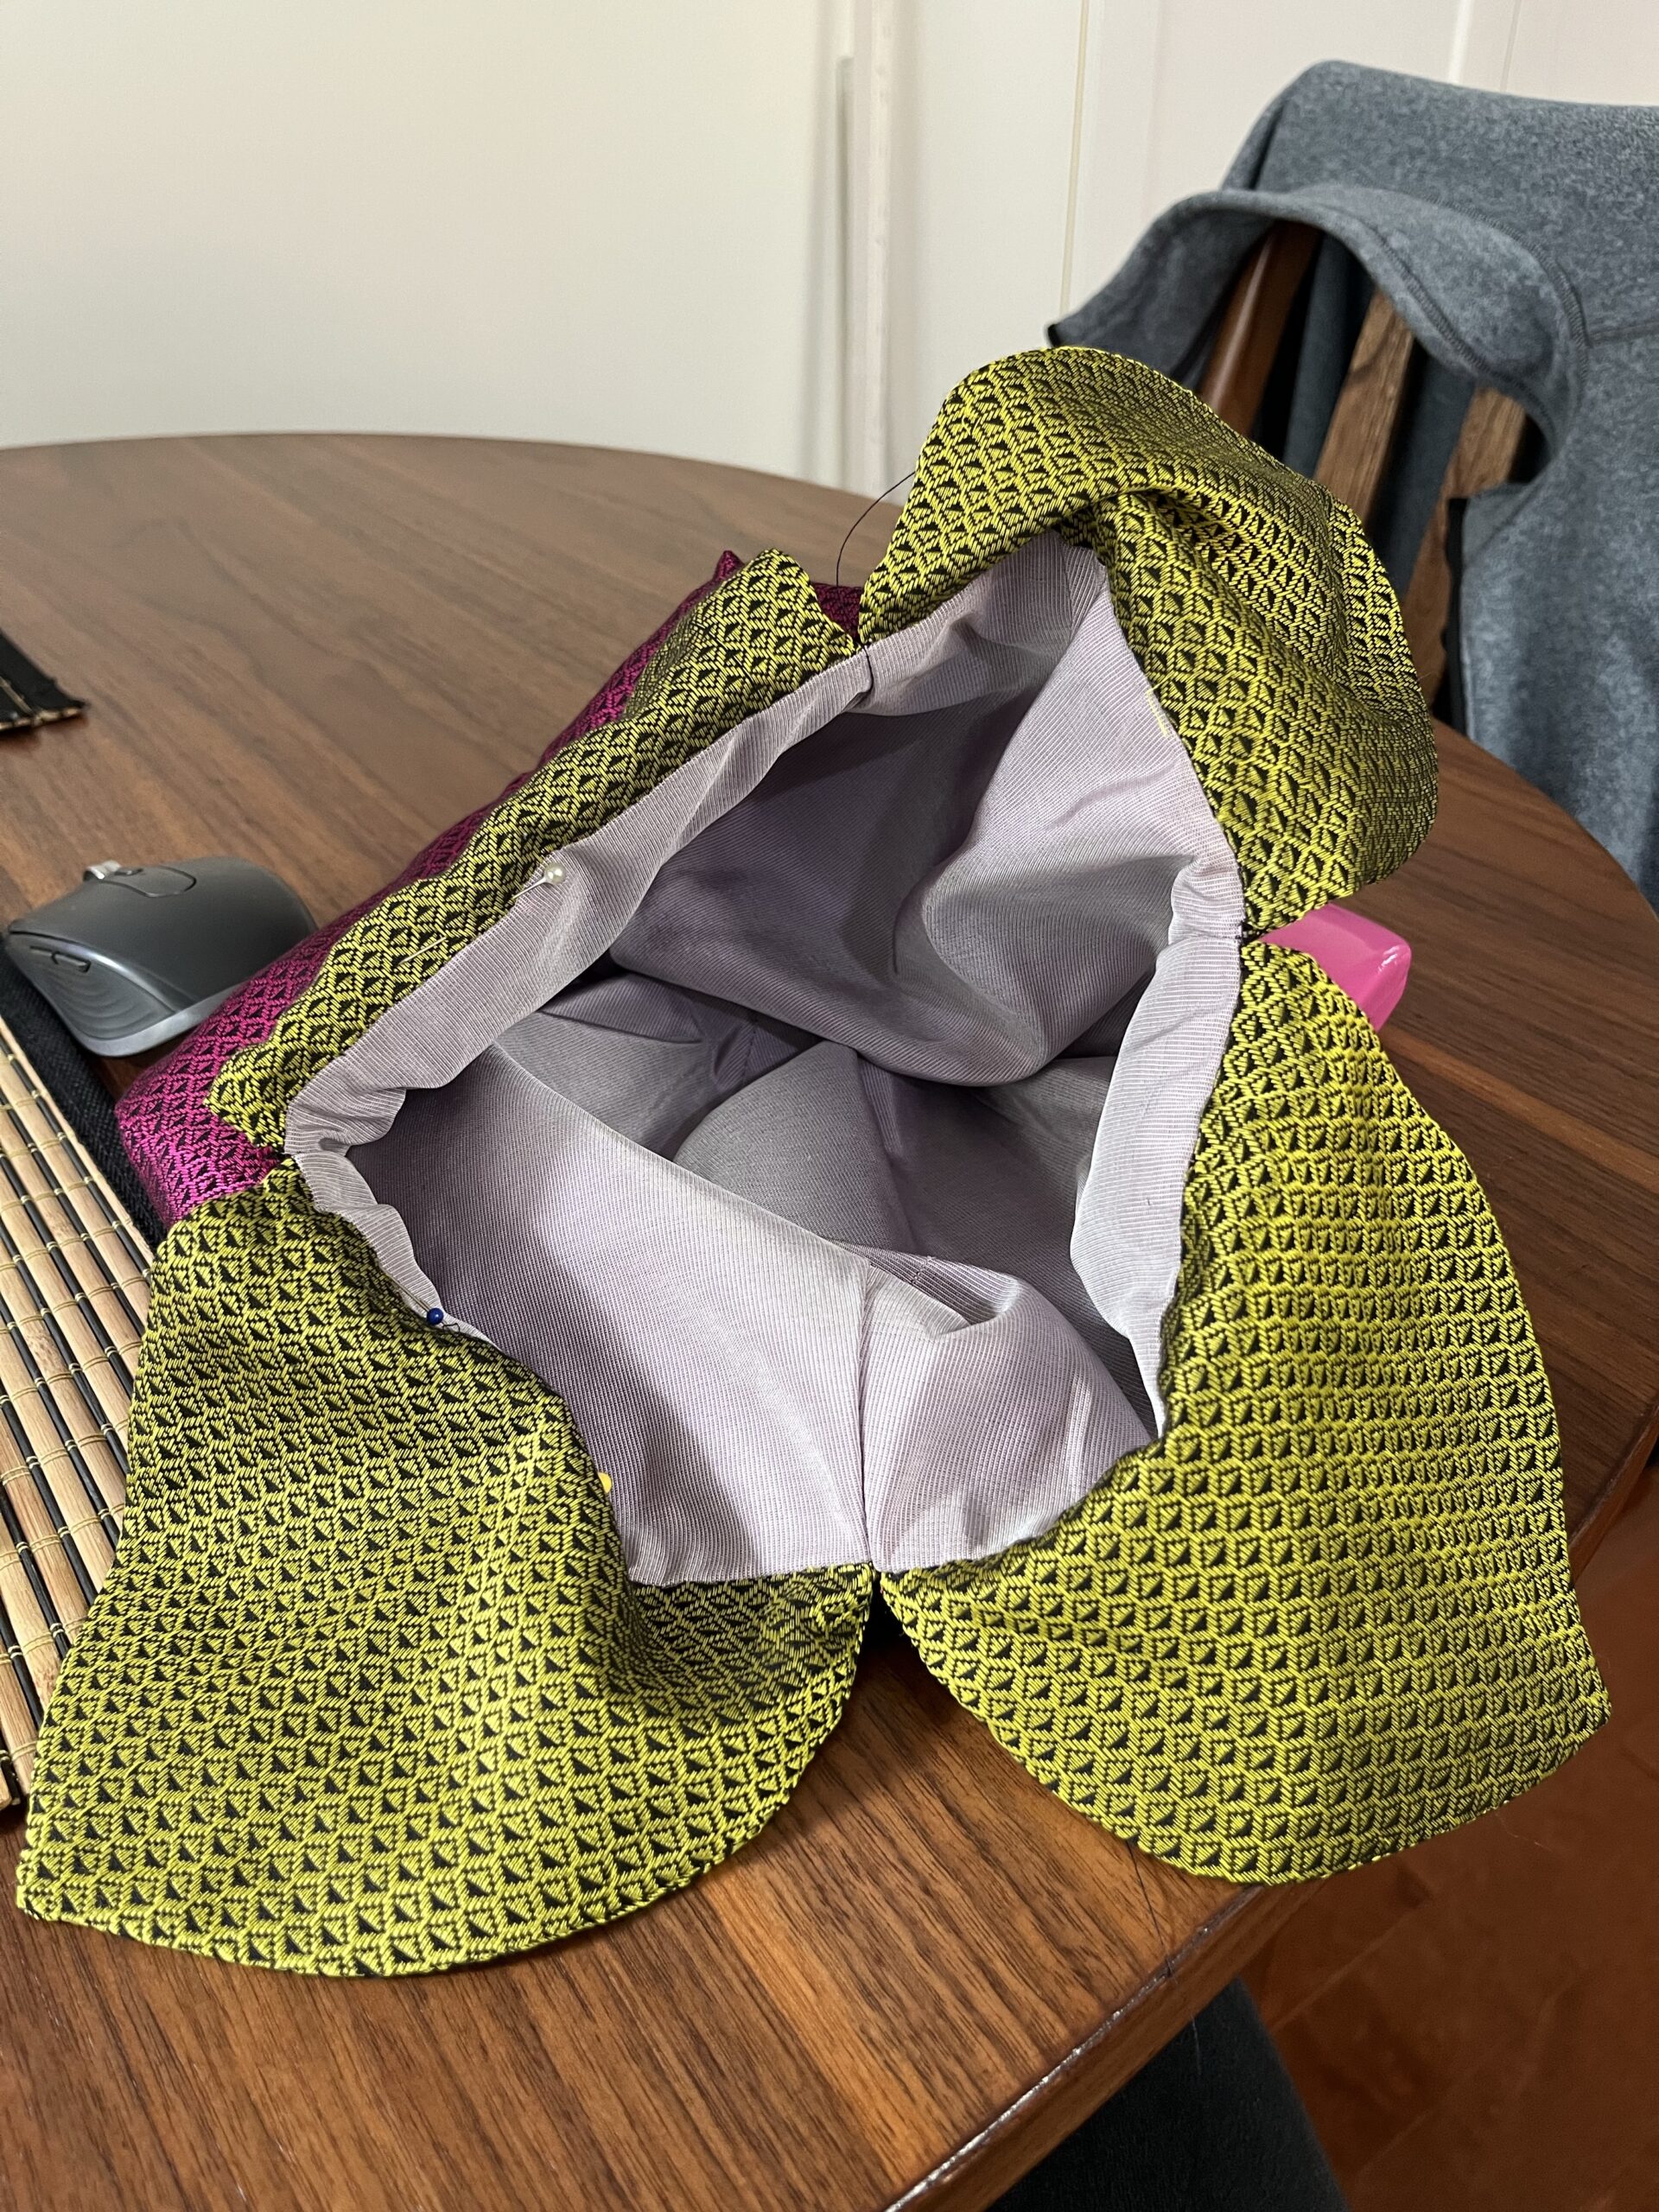
I sewed my lining pieces together the same way as I had sewn the berry body.

On one side seam I left 5 cm (2 inches) open so that I could turn the reticule right side out later on.
With right sides together, I lined up the leaf/berry seams of both body and lining and pinned the leaves of the body to the leaves of the lining.
I sewed them together. Then I turned the reticule right side out through the hole I had left in the lining and whipped the hole in the lining shut.
I pressed all of my seams – making the edges of the leaves crisp, and ironing points into the corners of the berry body.

Suddenly my pieces had become an actual THING – a raspberry regency reticule!

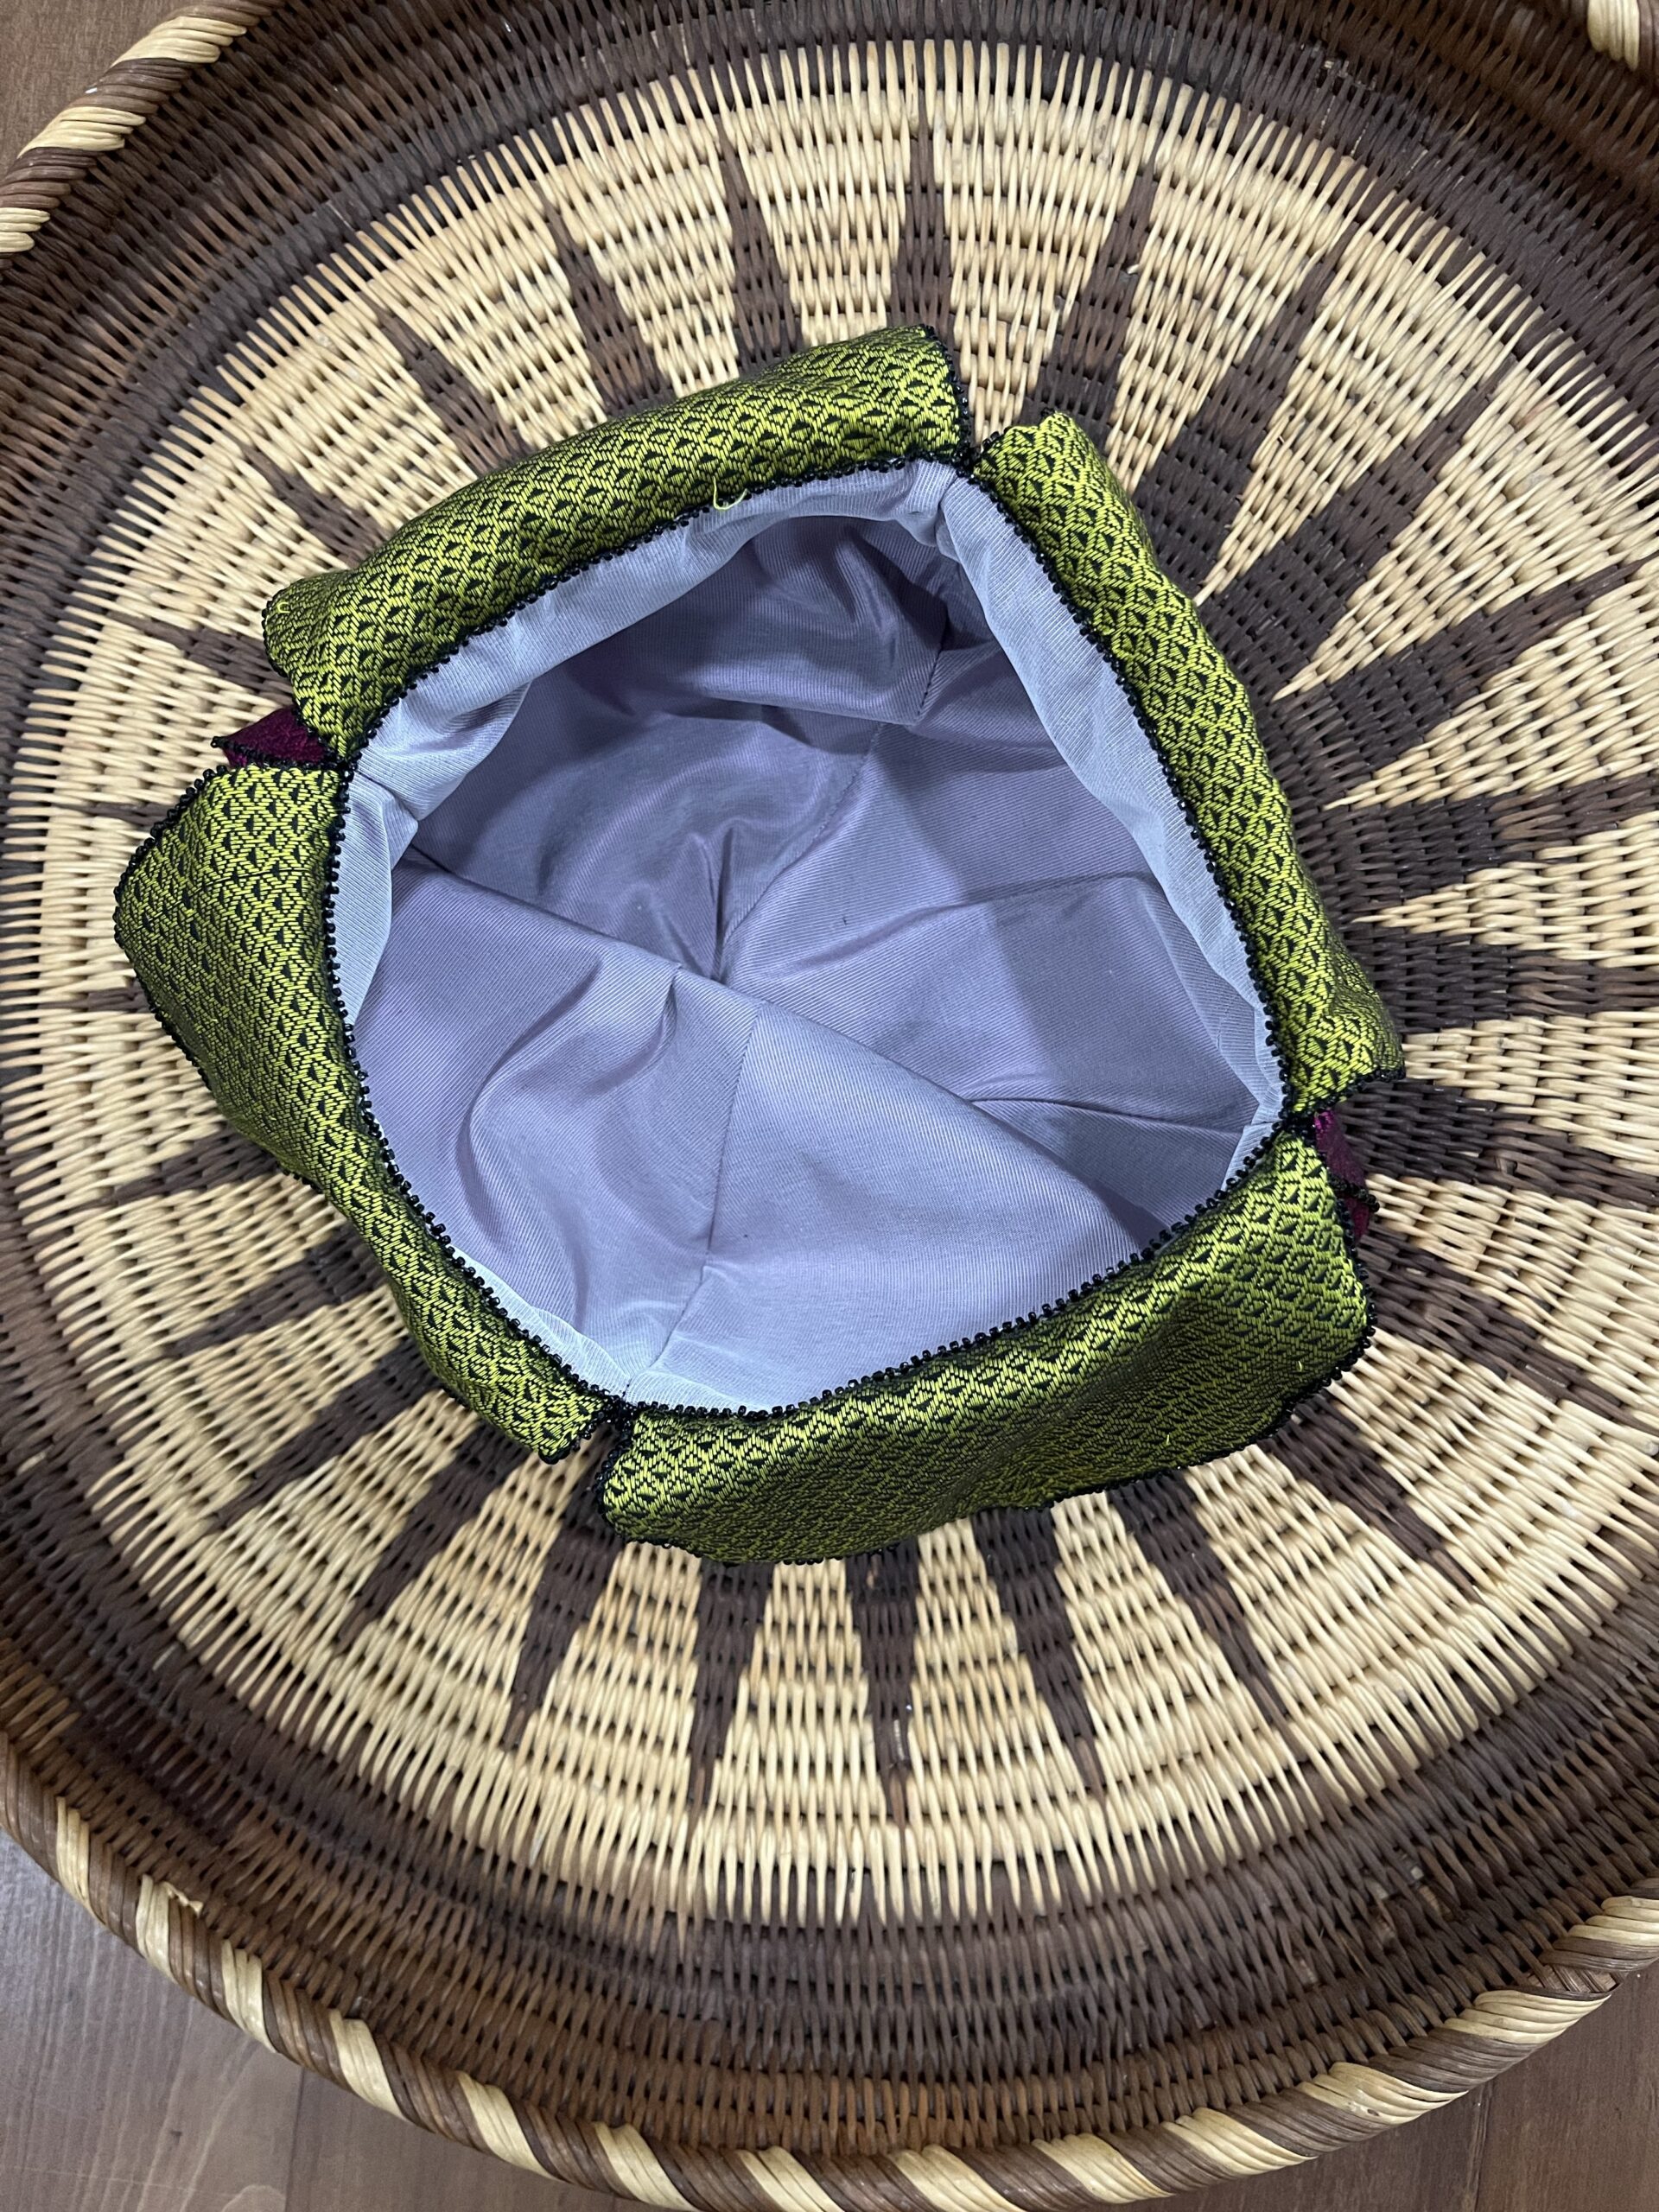
Once again I very carefully lined up those leaf/berry seam points. With a needle and thread, I stitched in the ditch (aka along the stitched seam) by hand all the way around the reticule opening. This invisible seam maintains the shape of the berry, stopping the lining from slithering out of sync with the outer body.
Note: This stitching was made a possible by my having pressed those berry/leaf seams flat and open back when I first stitched the leaves and body panels together!
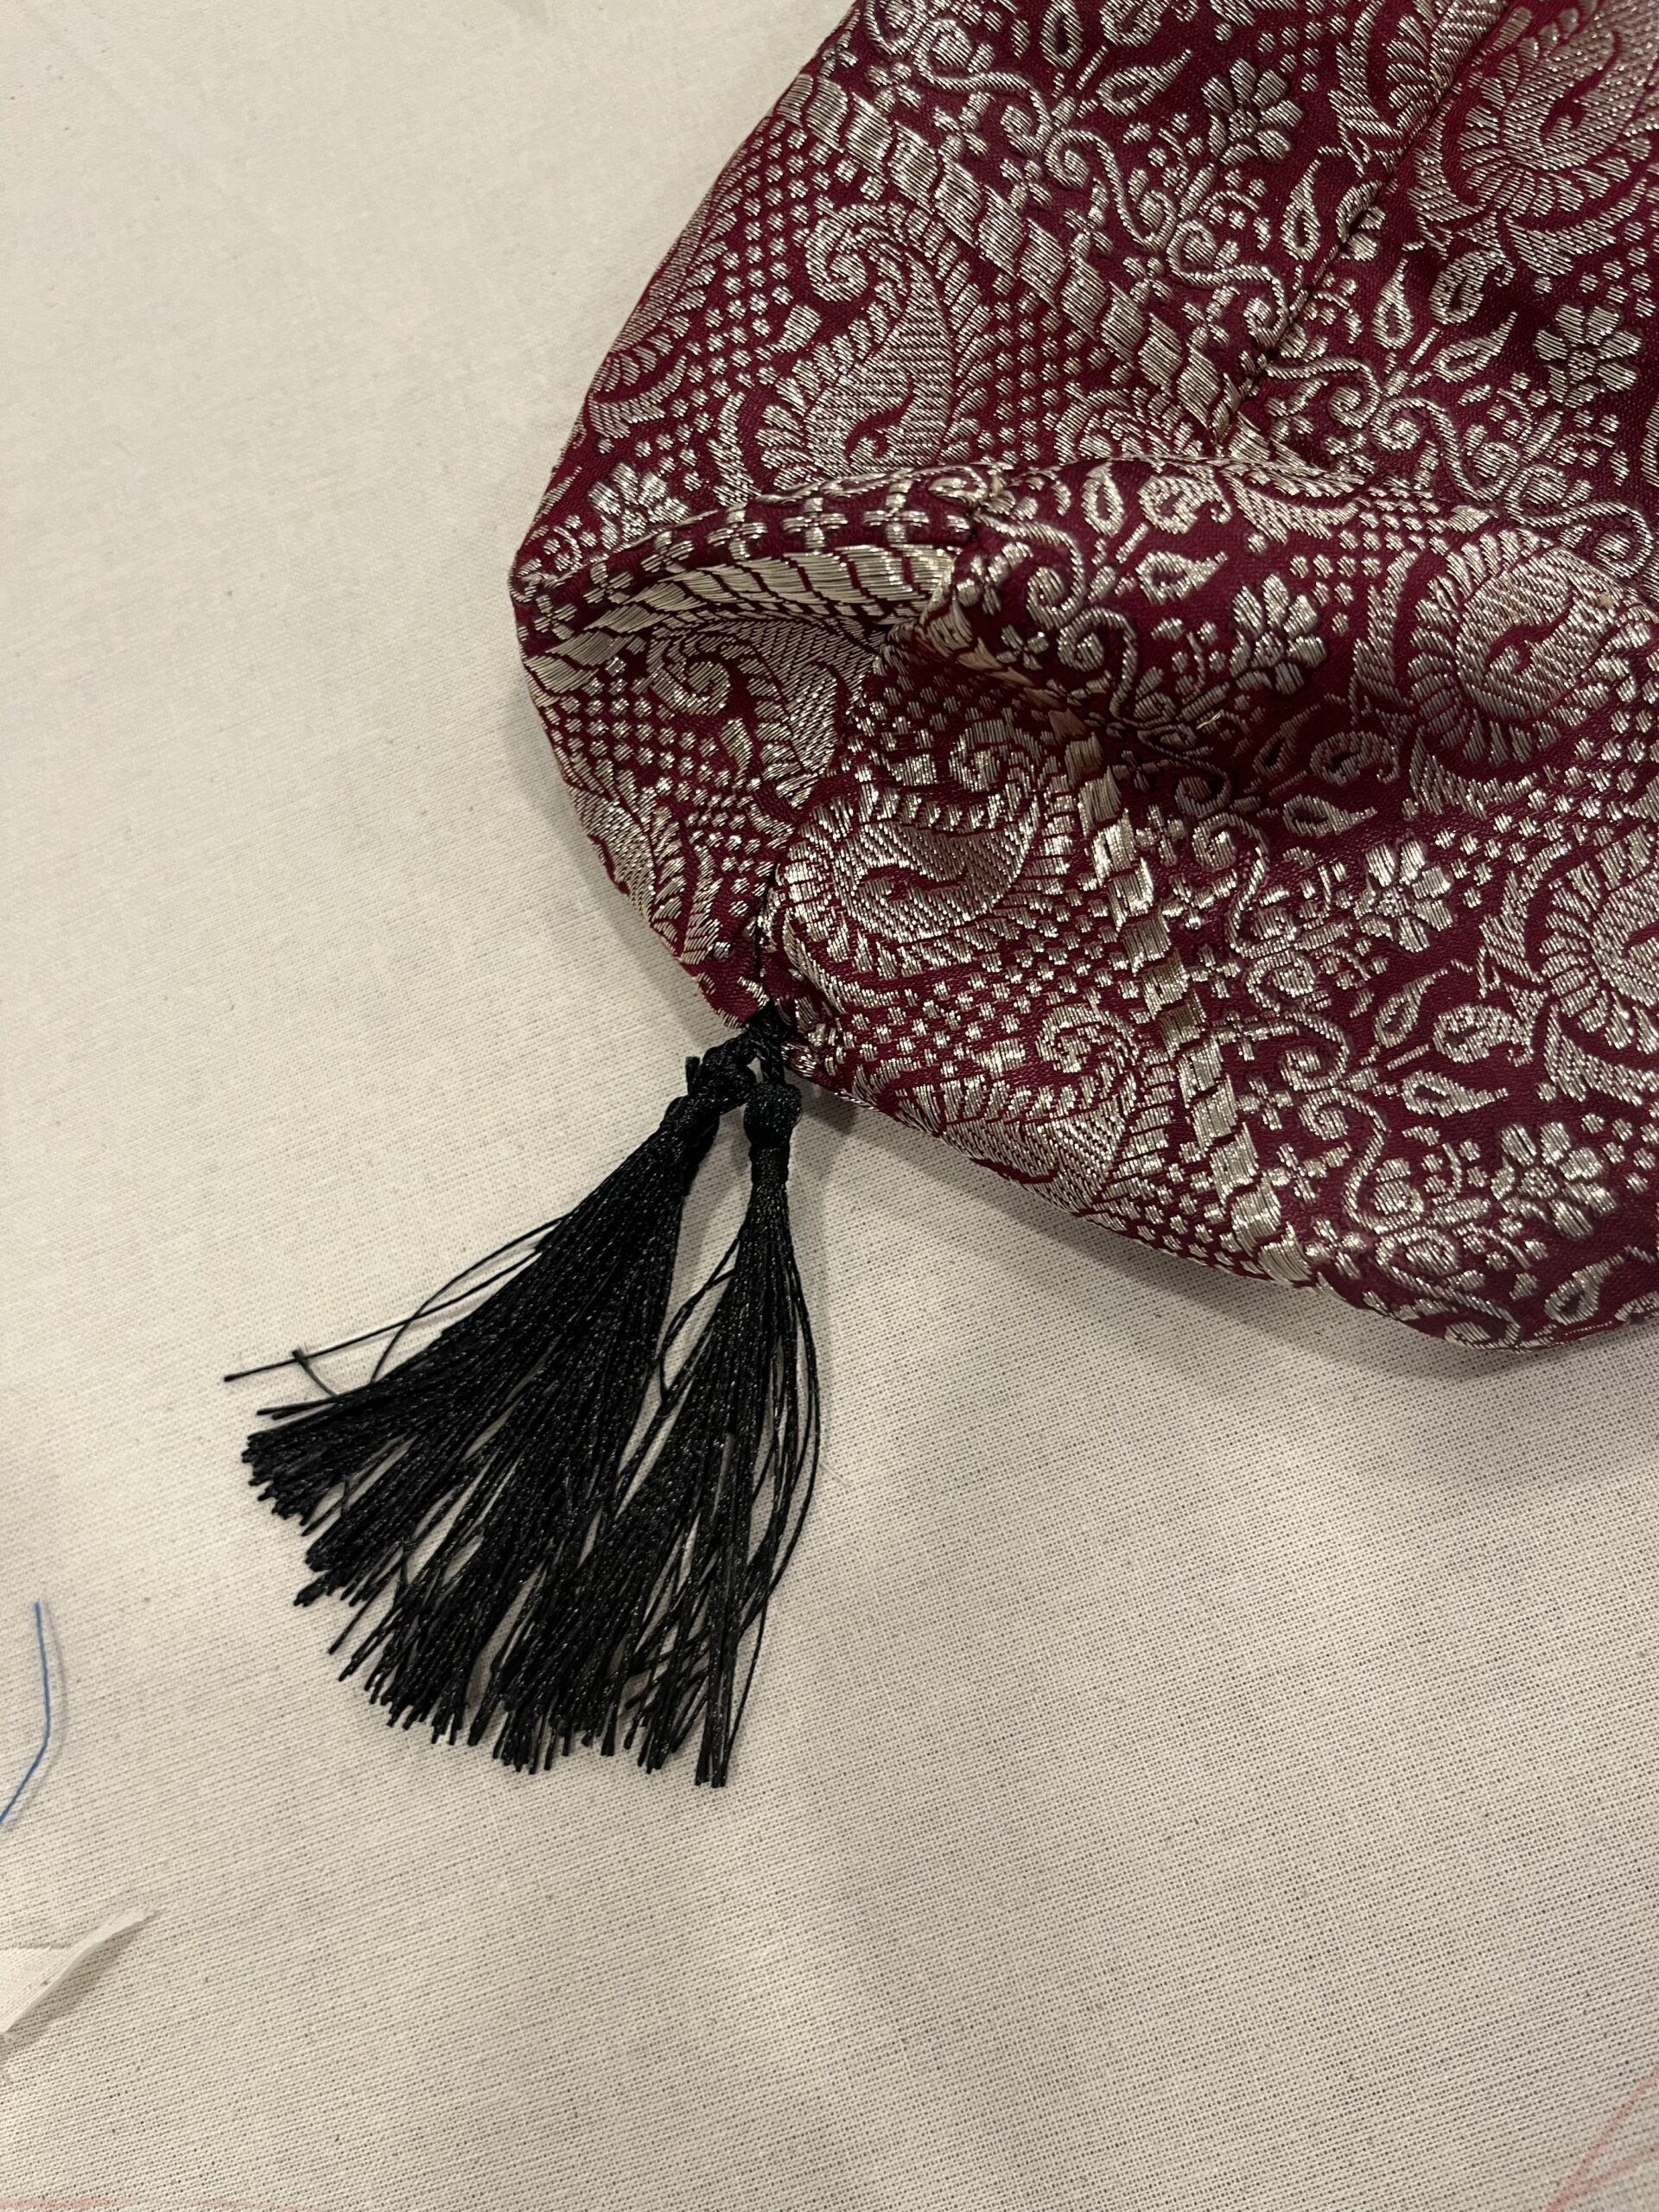
The points in the berry seams tended to flop about and fold in on themselves. I needed something to help maintain their shape. One option was a small tassel at each point. Another was a fat glass bead. I also likedthe idea of beading all the way along the berry body seams, and remembered that in my stash I had a packet of antique Victorian beaded trim!
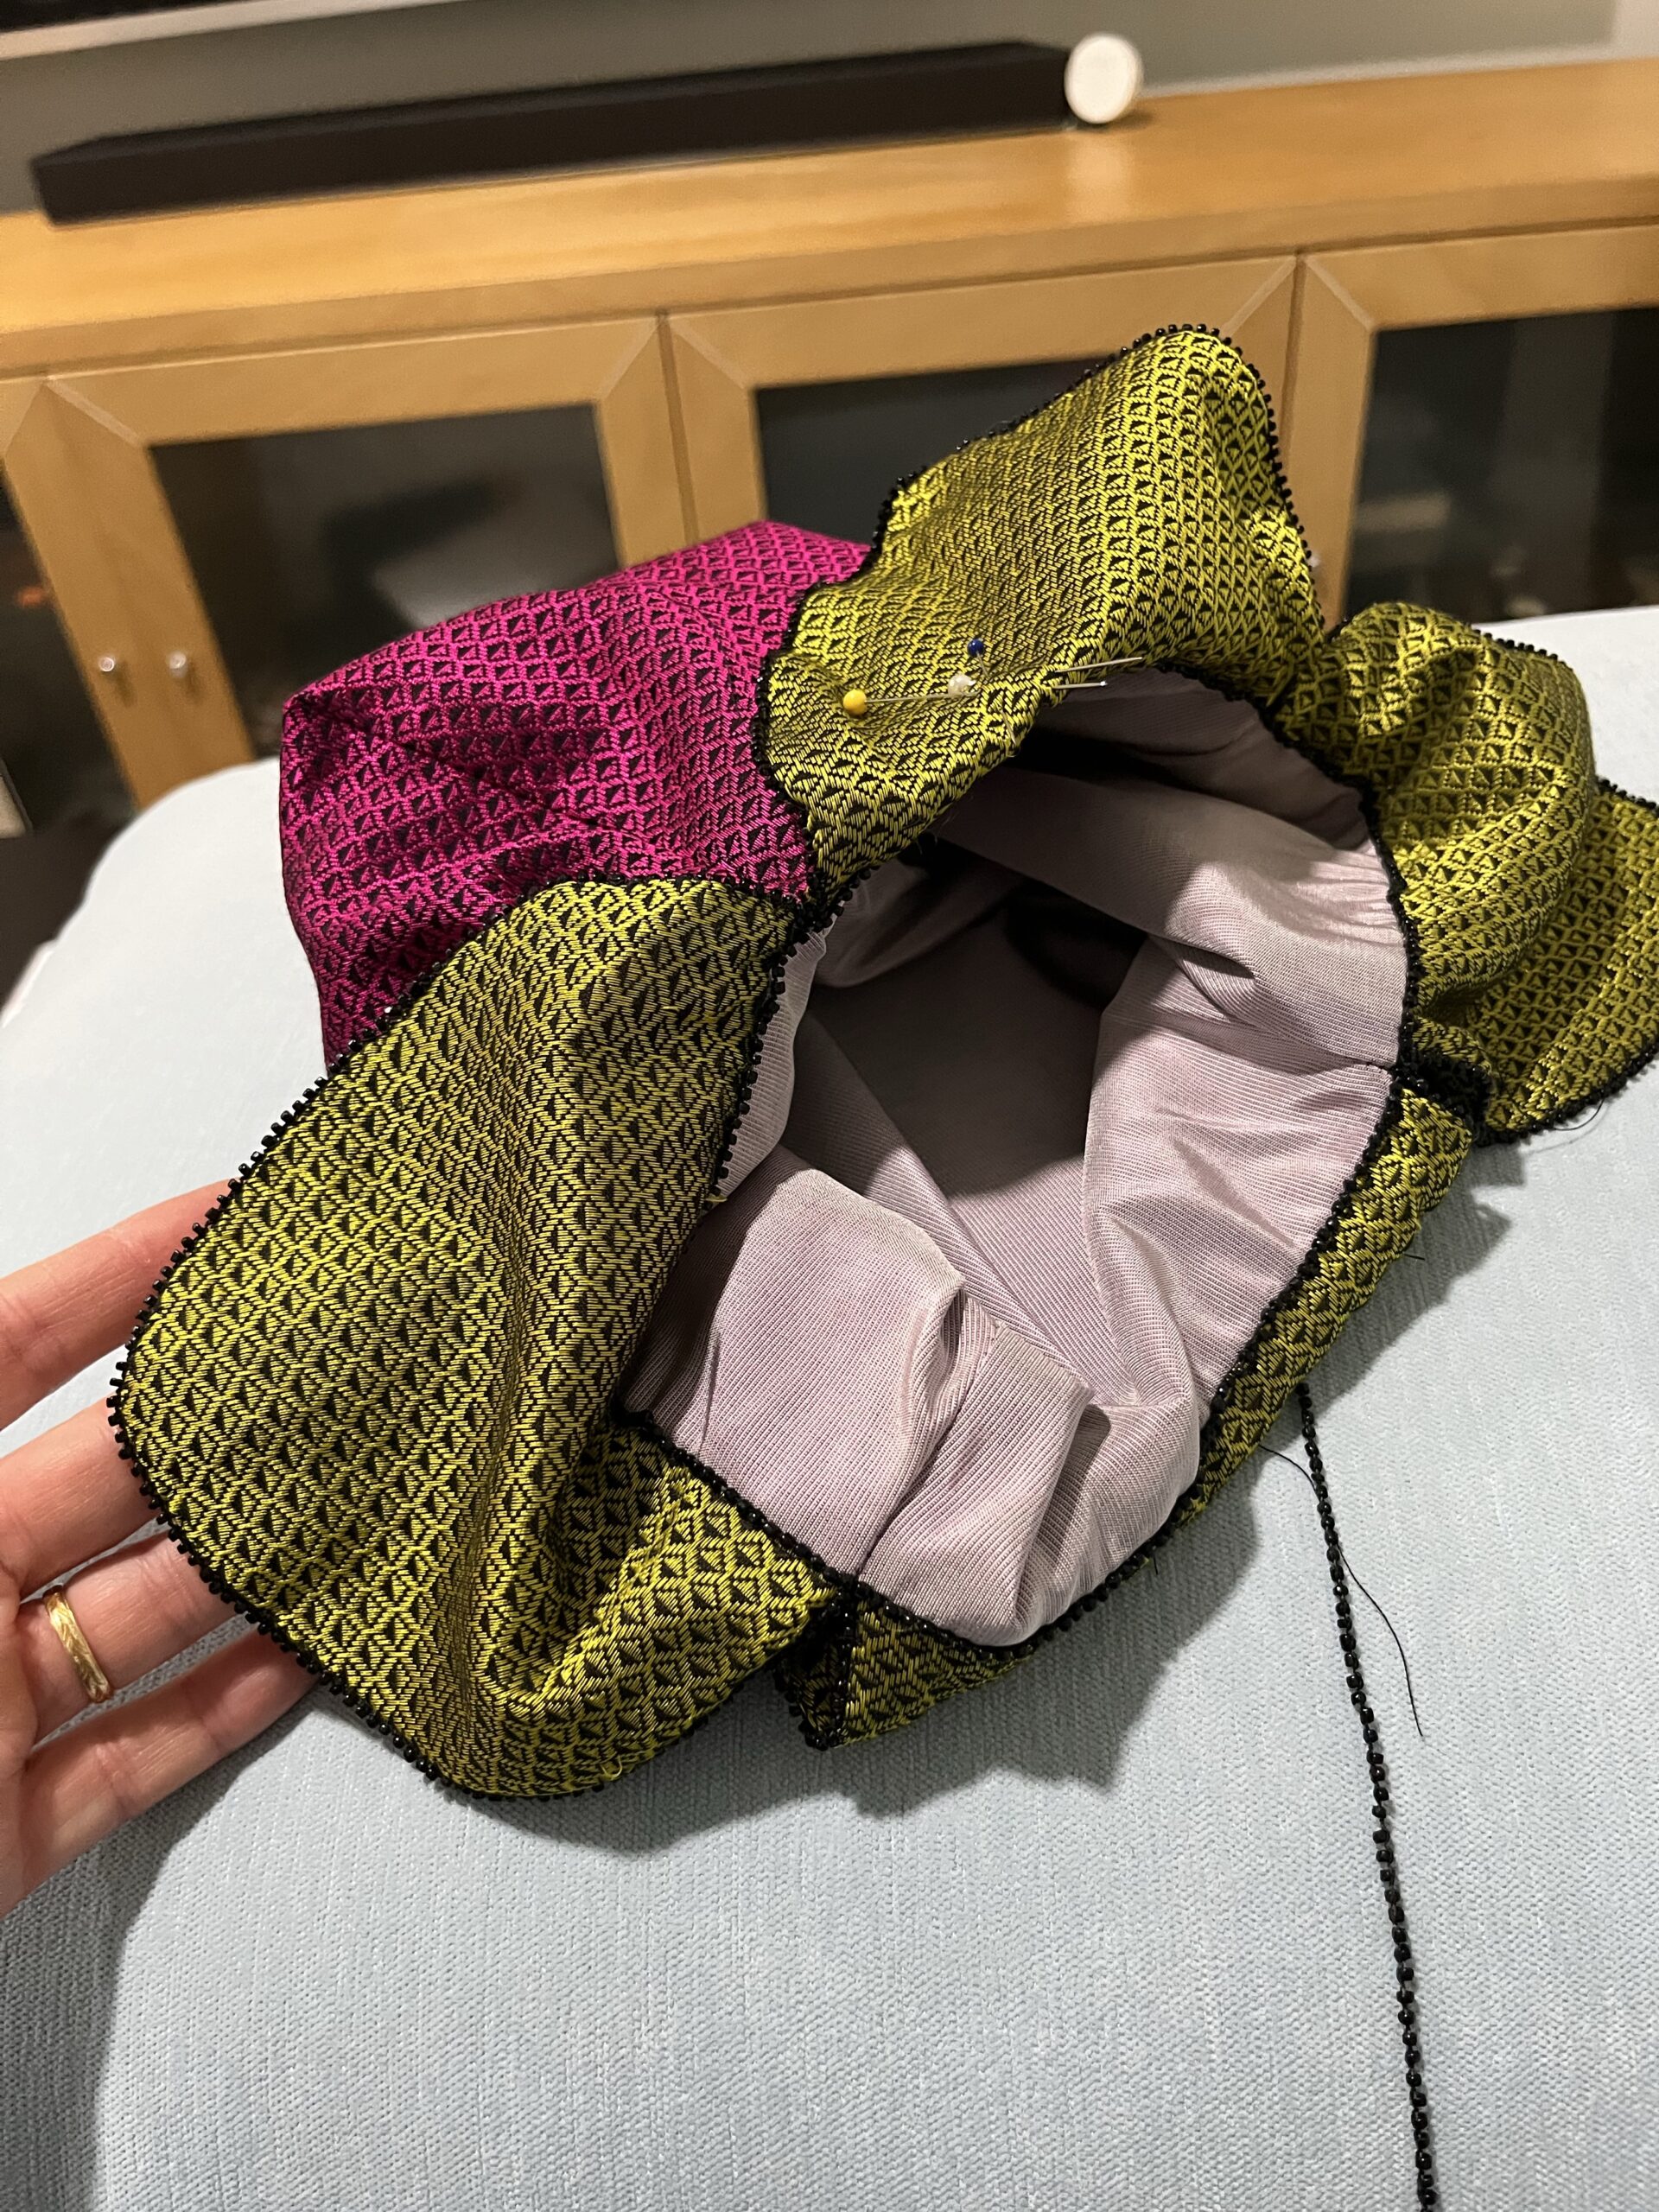
I spent the next few evenings couching the black beaded trim along every seam of the reticule, catching the trim every 2-3 beads and locking it down with thread.

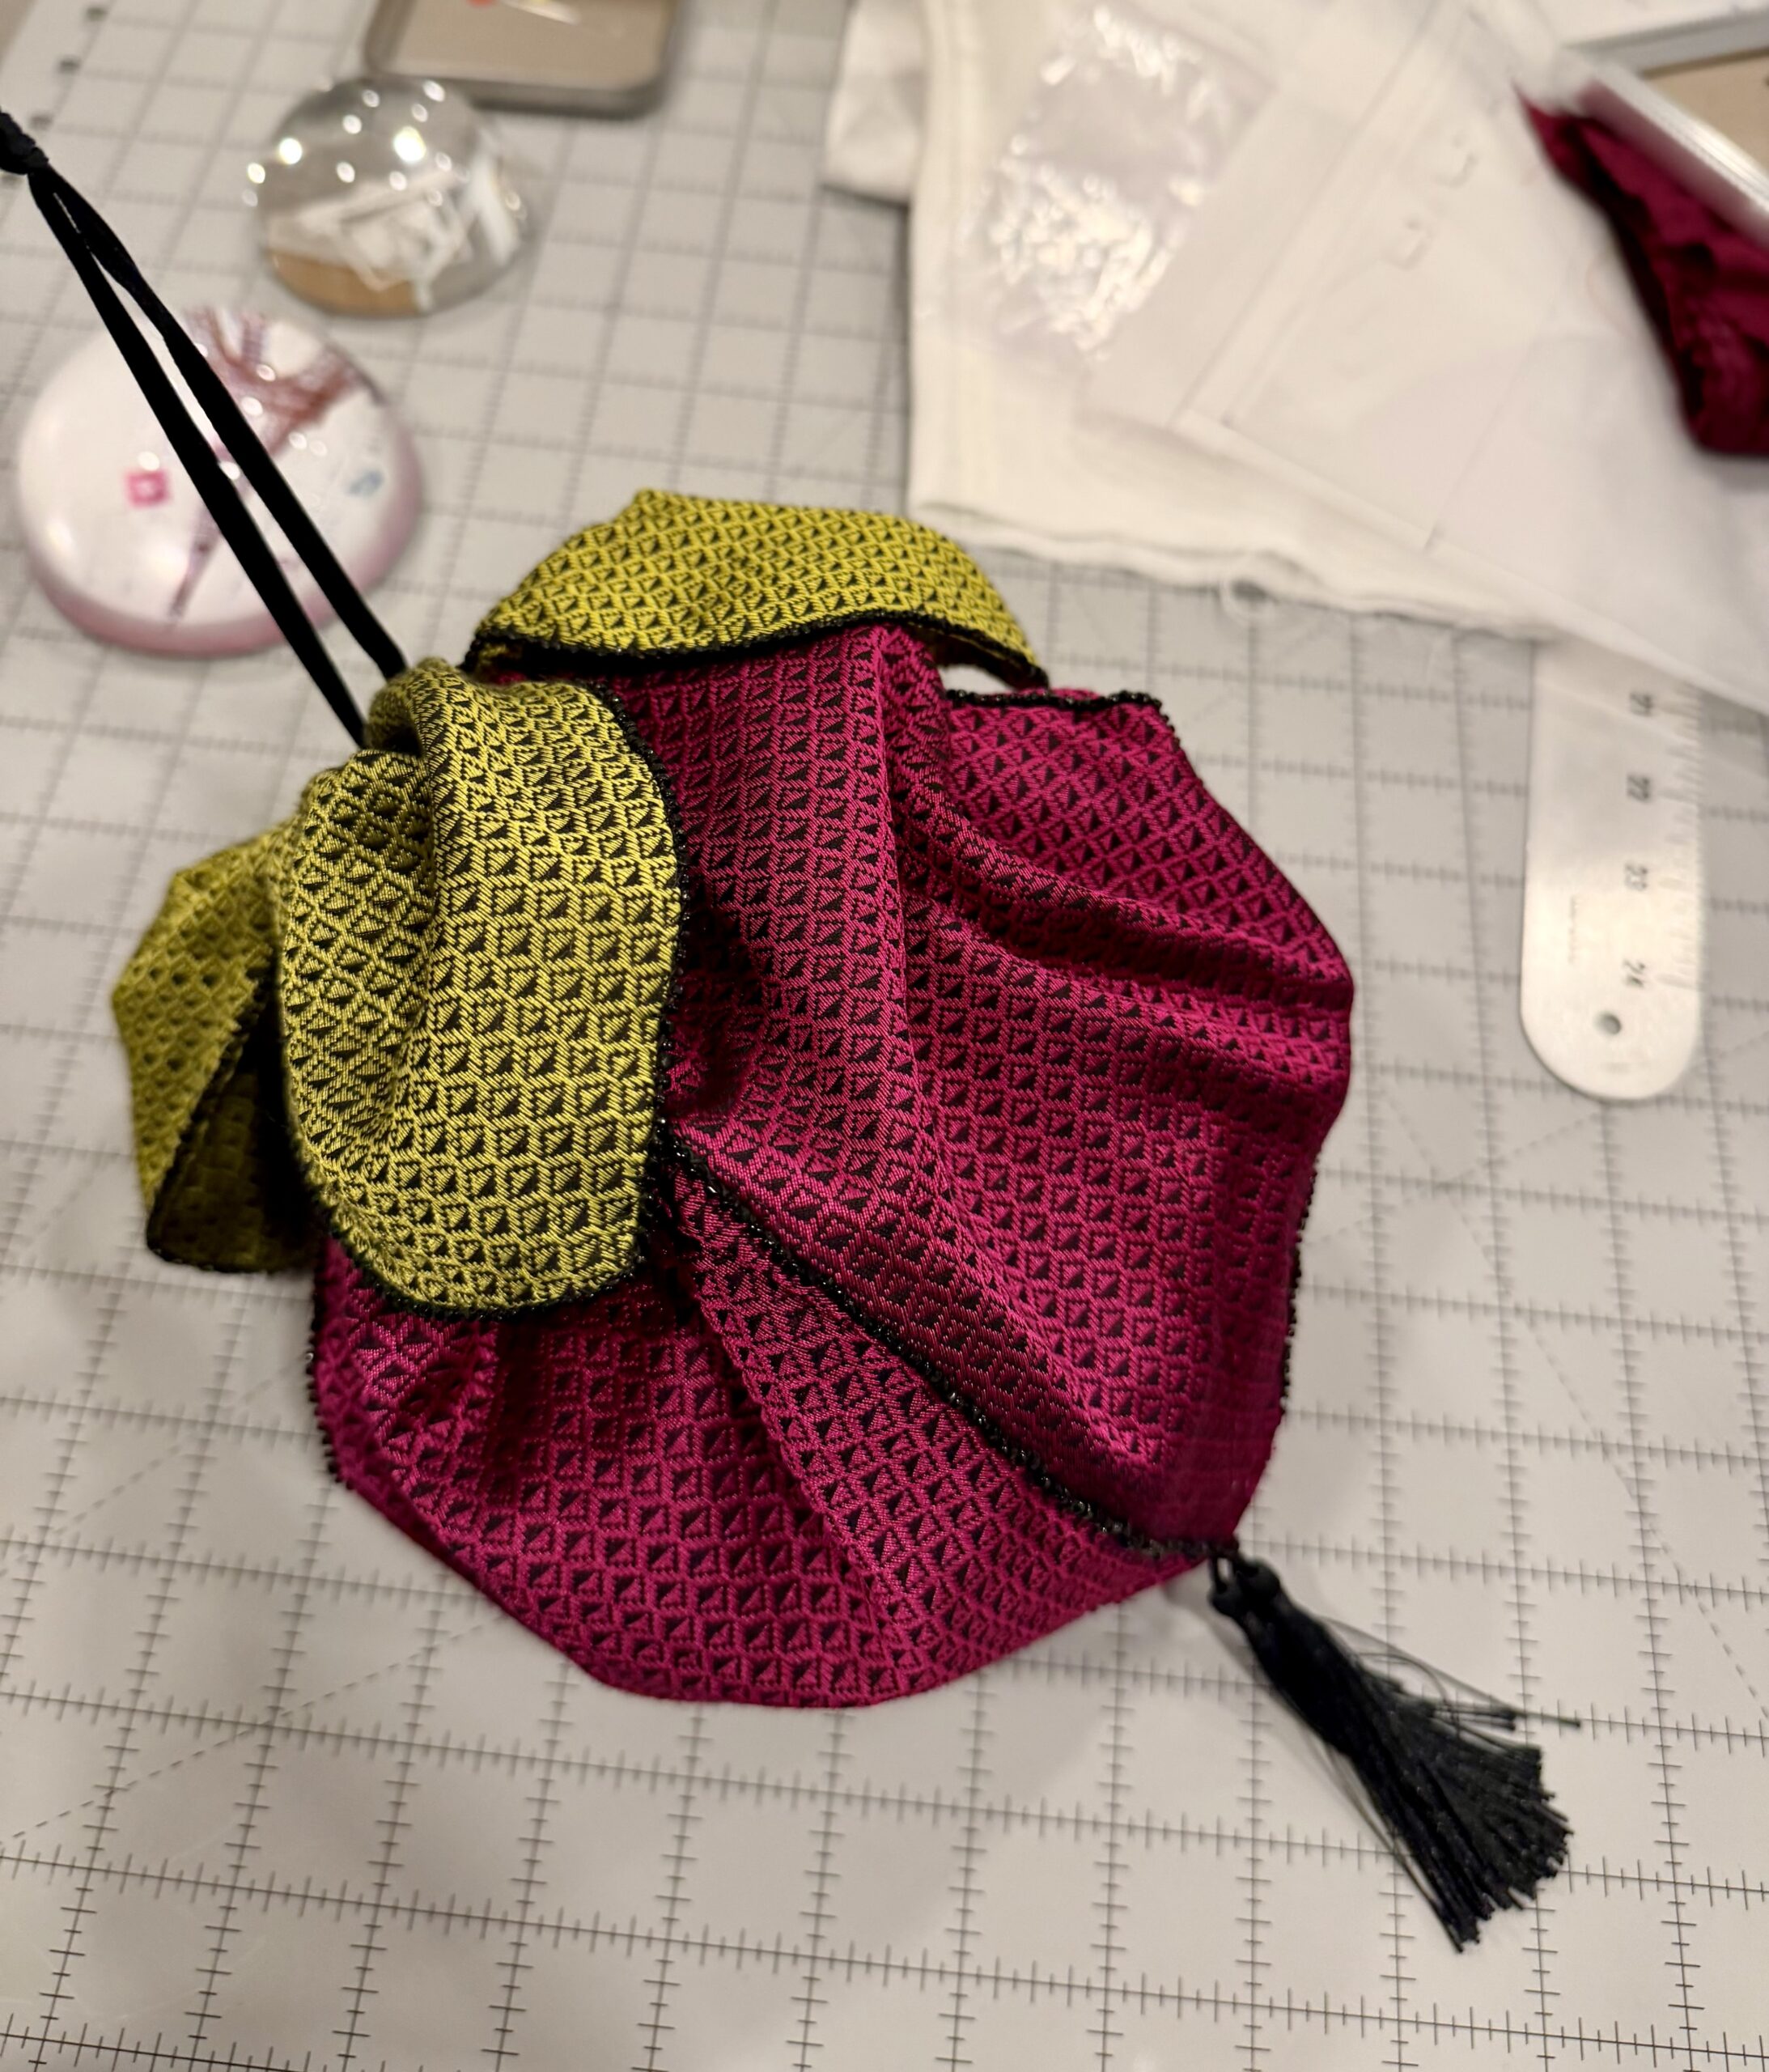
The last step was to make a closure. Rather than a drawstring bunching up the opening, I wanted a gentle folding process. I had seen an antique piece that used rings instead of a drawstring channel and reckoned that a set of rings would create exactly the effect that i wanted. Finding sturdy metal rings painted black was a somewhat tricky – eventually I had success by ordering sets of metal brassiere findings! I tried a few sizes, and settled on a very small o-ring with an internal 6mm diameter.
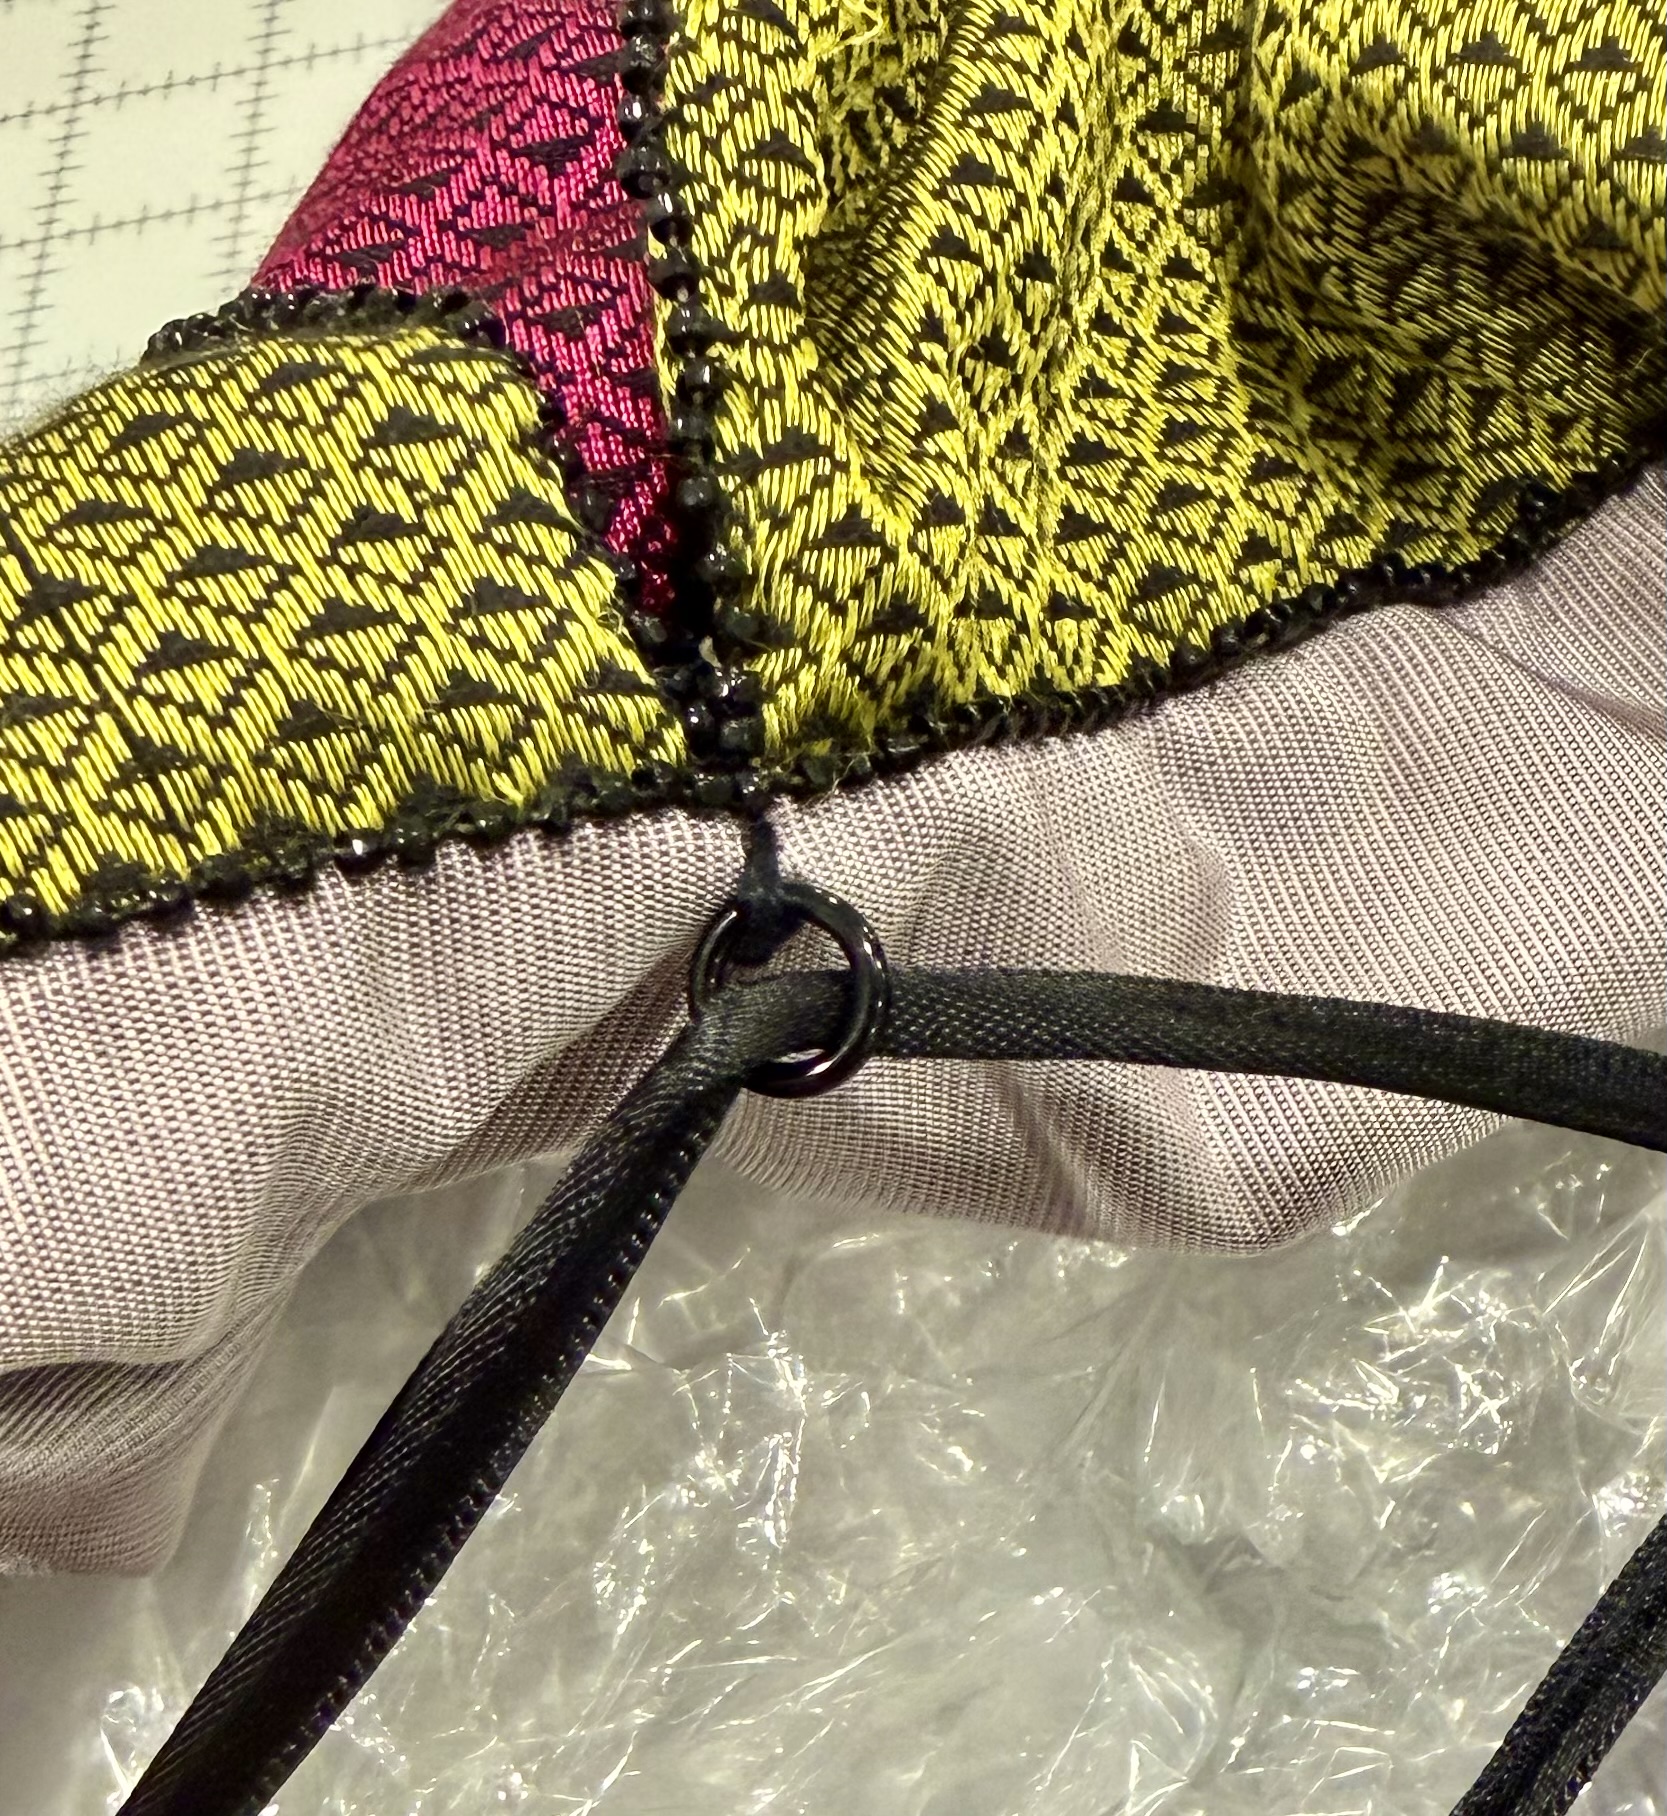
I threaded a black satin ribbon through the rings and drew it up, and without strain or drama the reticule folded itself into a perfect berry shape.
Voila, a reticule!
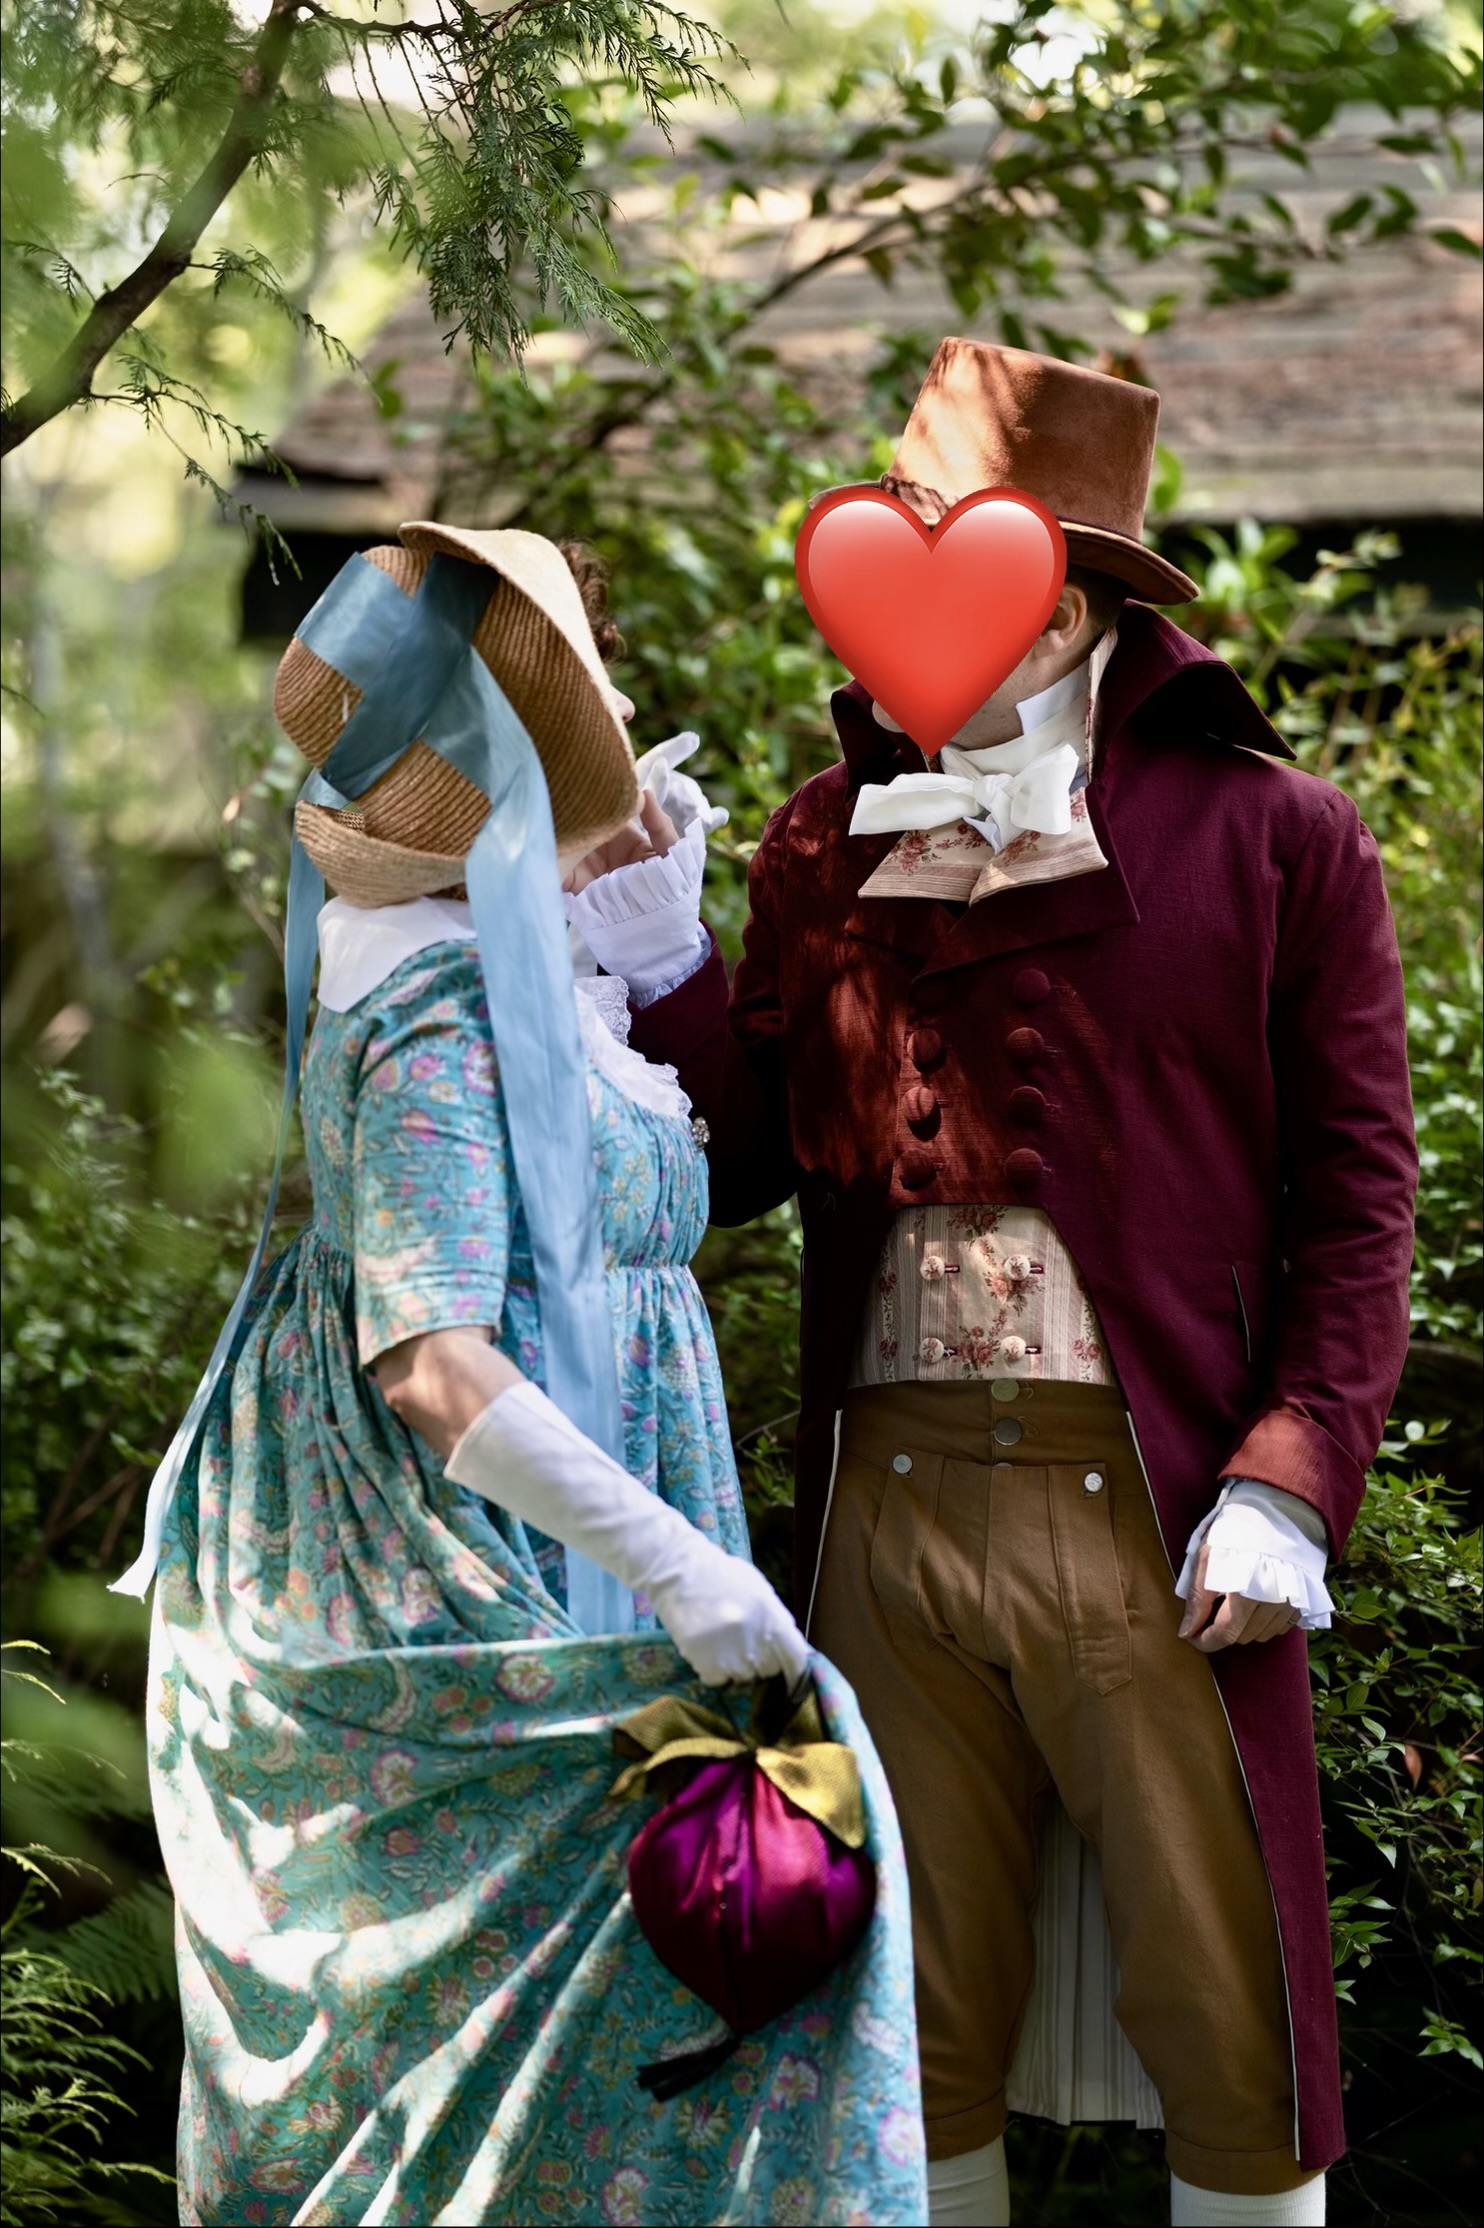
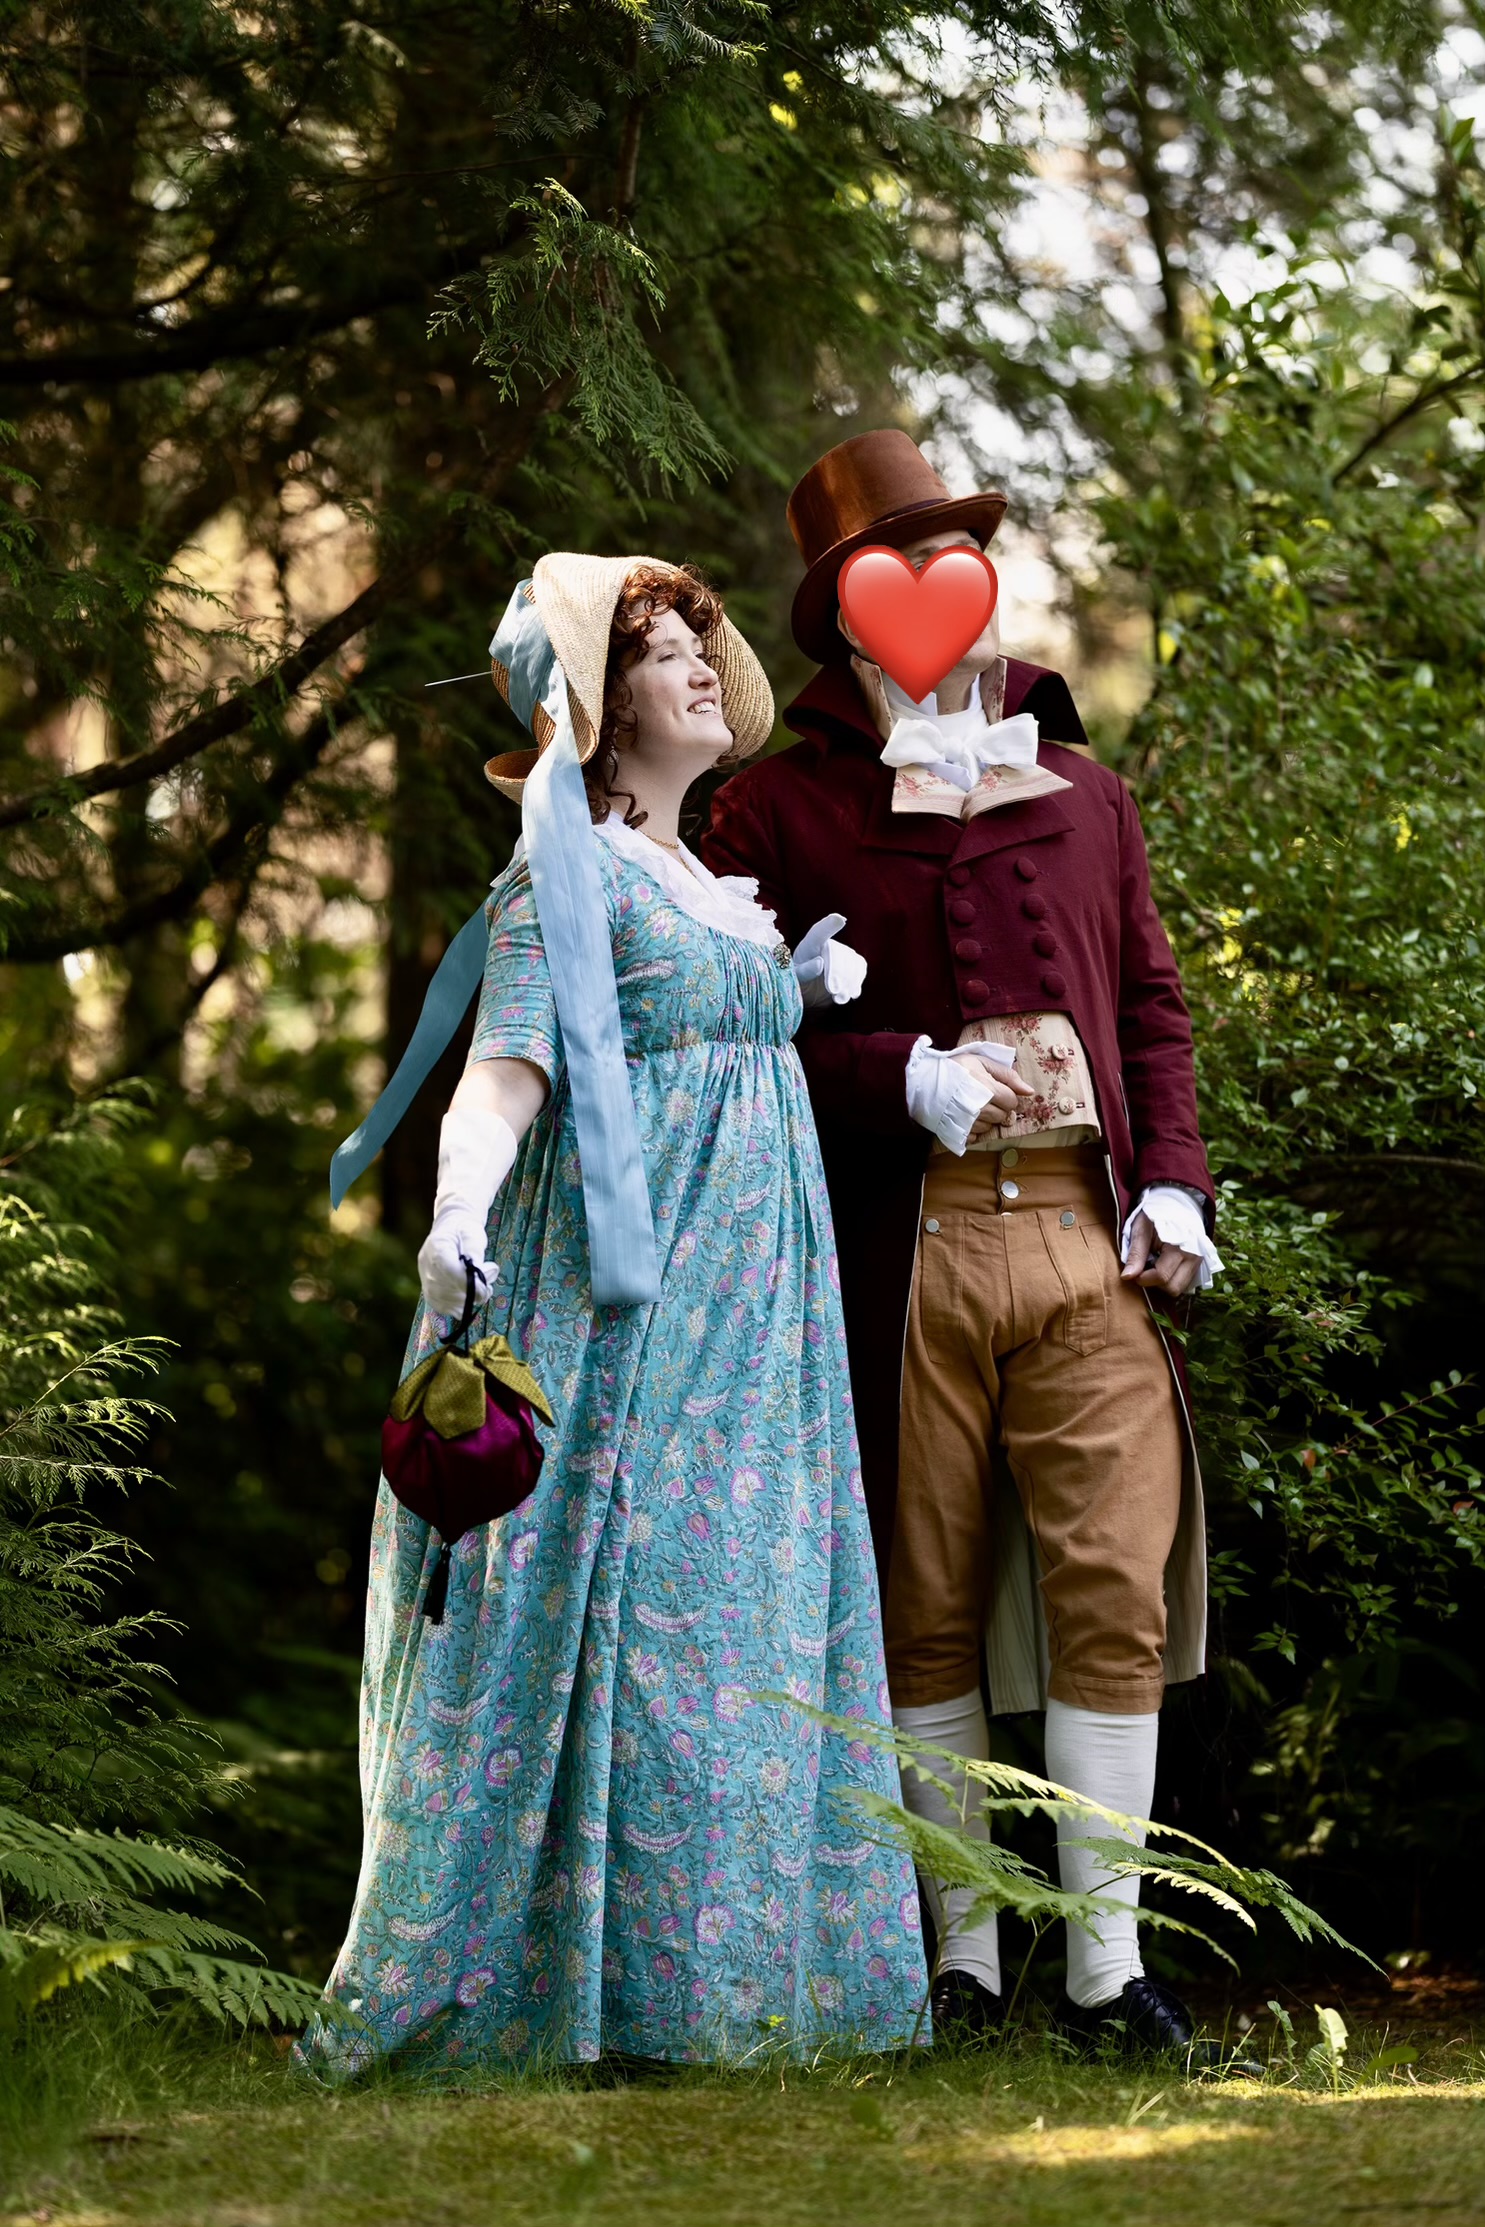
And that’s it – my tutorial for a raspberry regency reticule! I carried this reticule to a promenade with the Hemwick Regency Society in June, wearing it with my green floral 1790s round gown and Spanish hat!