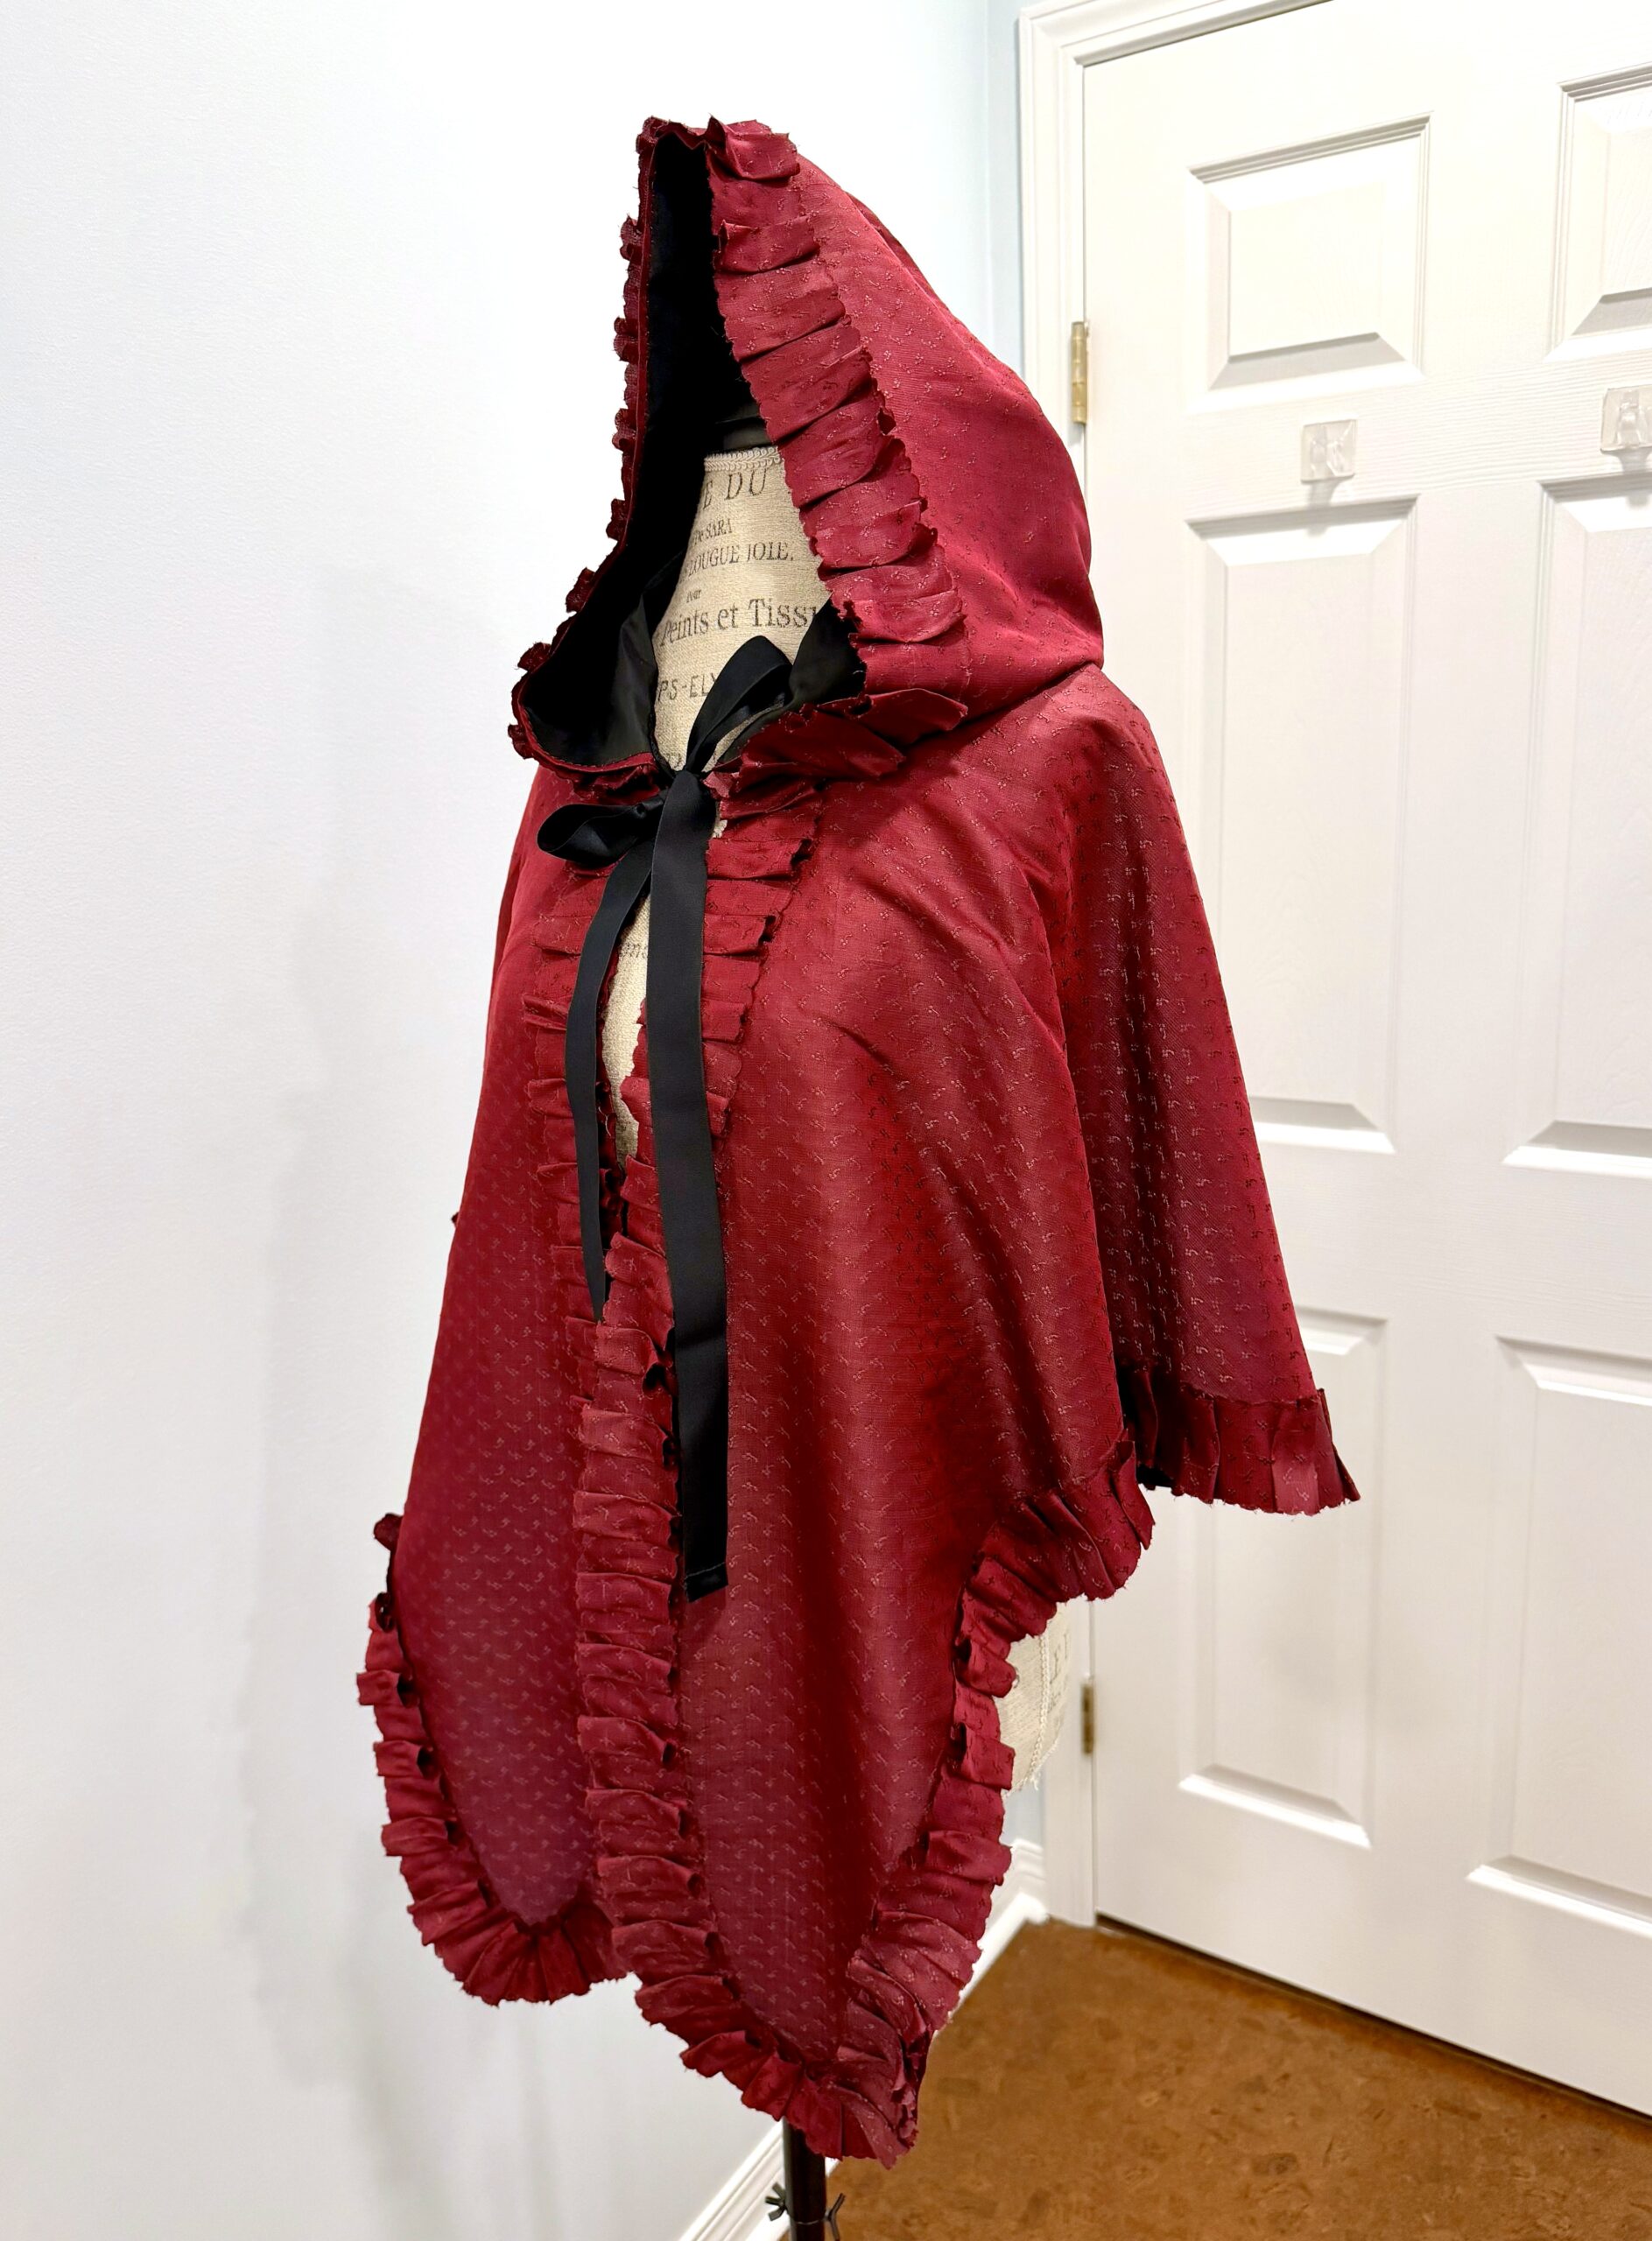
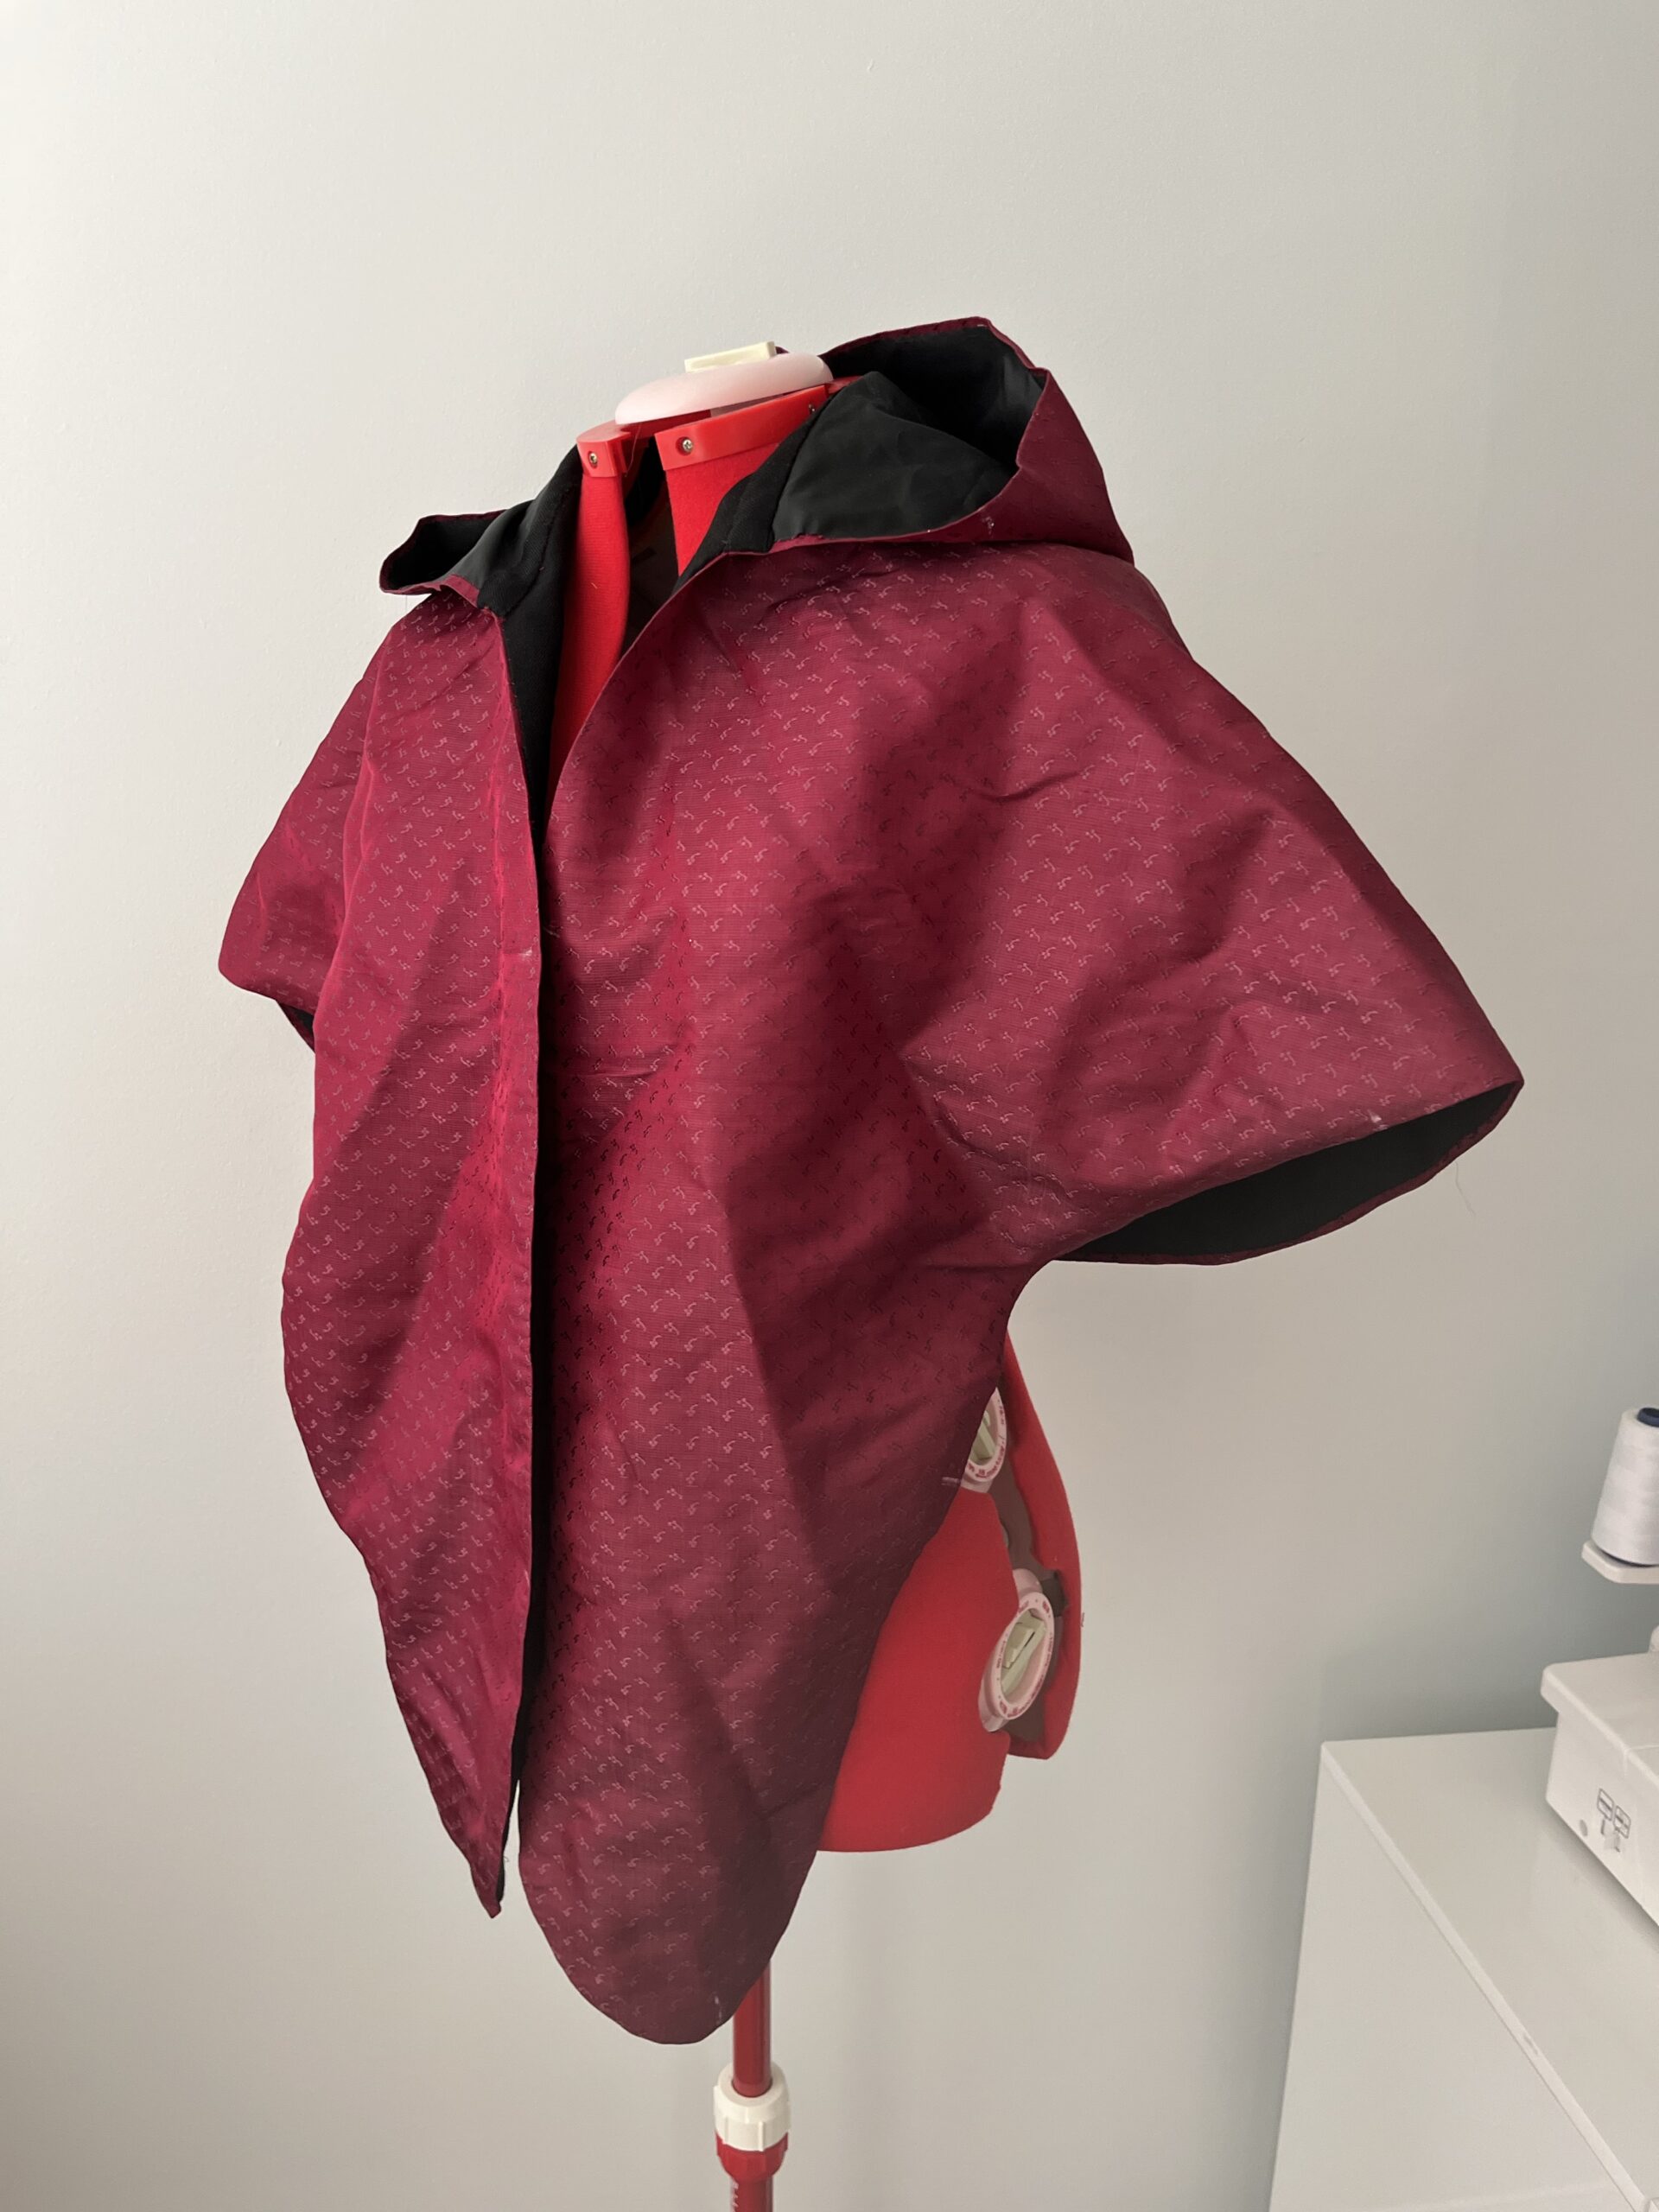
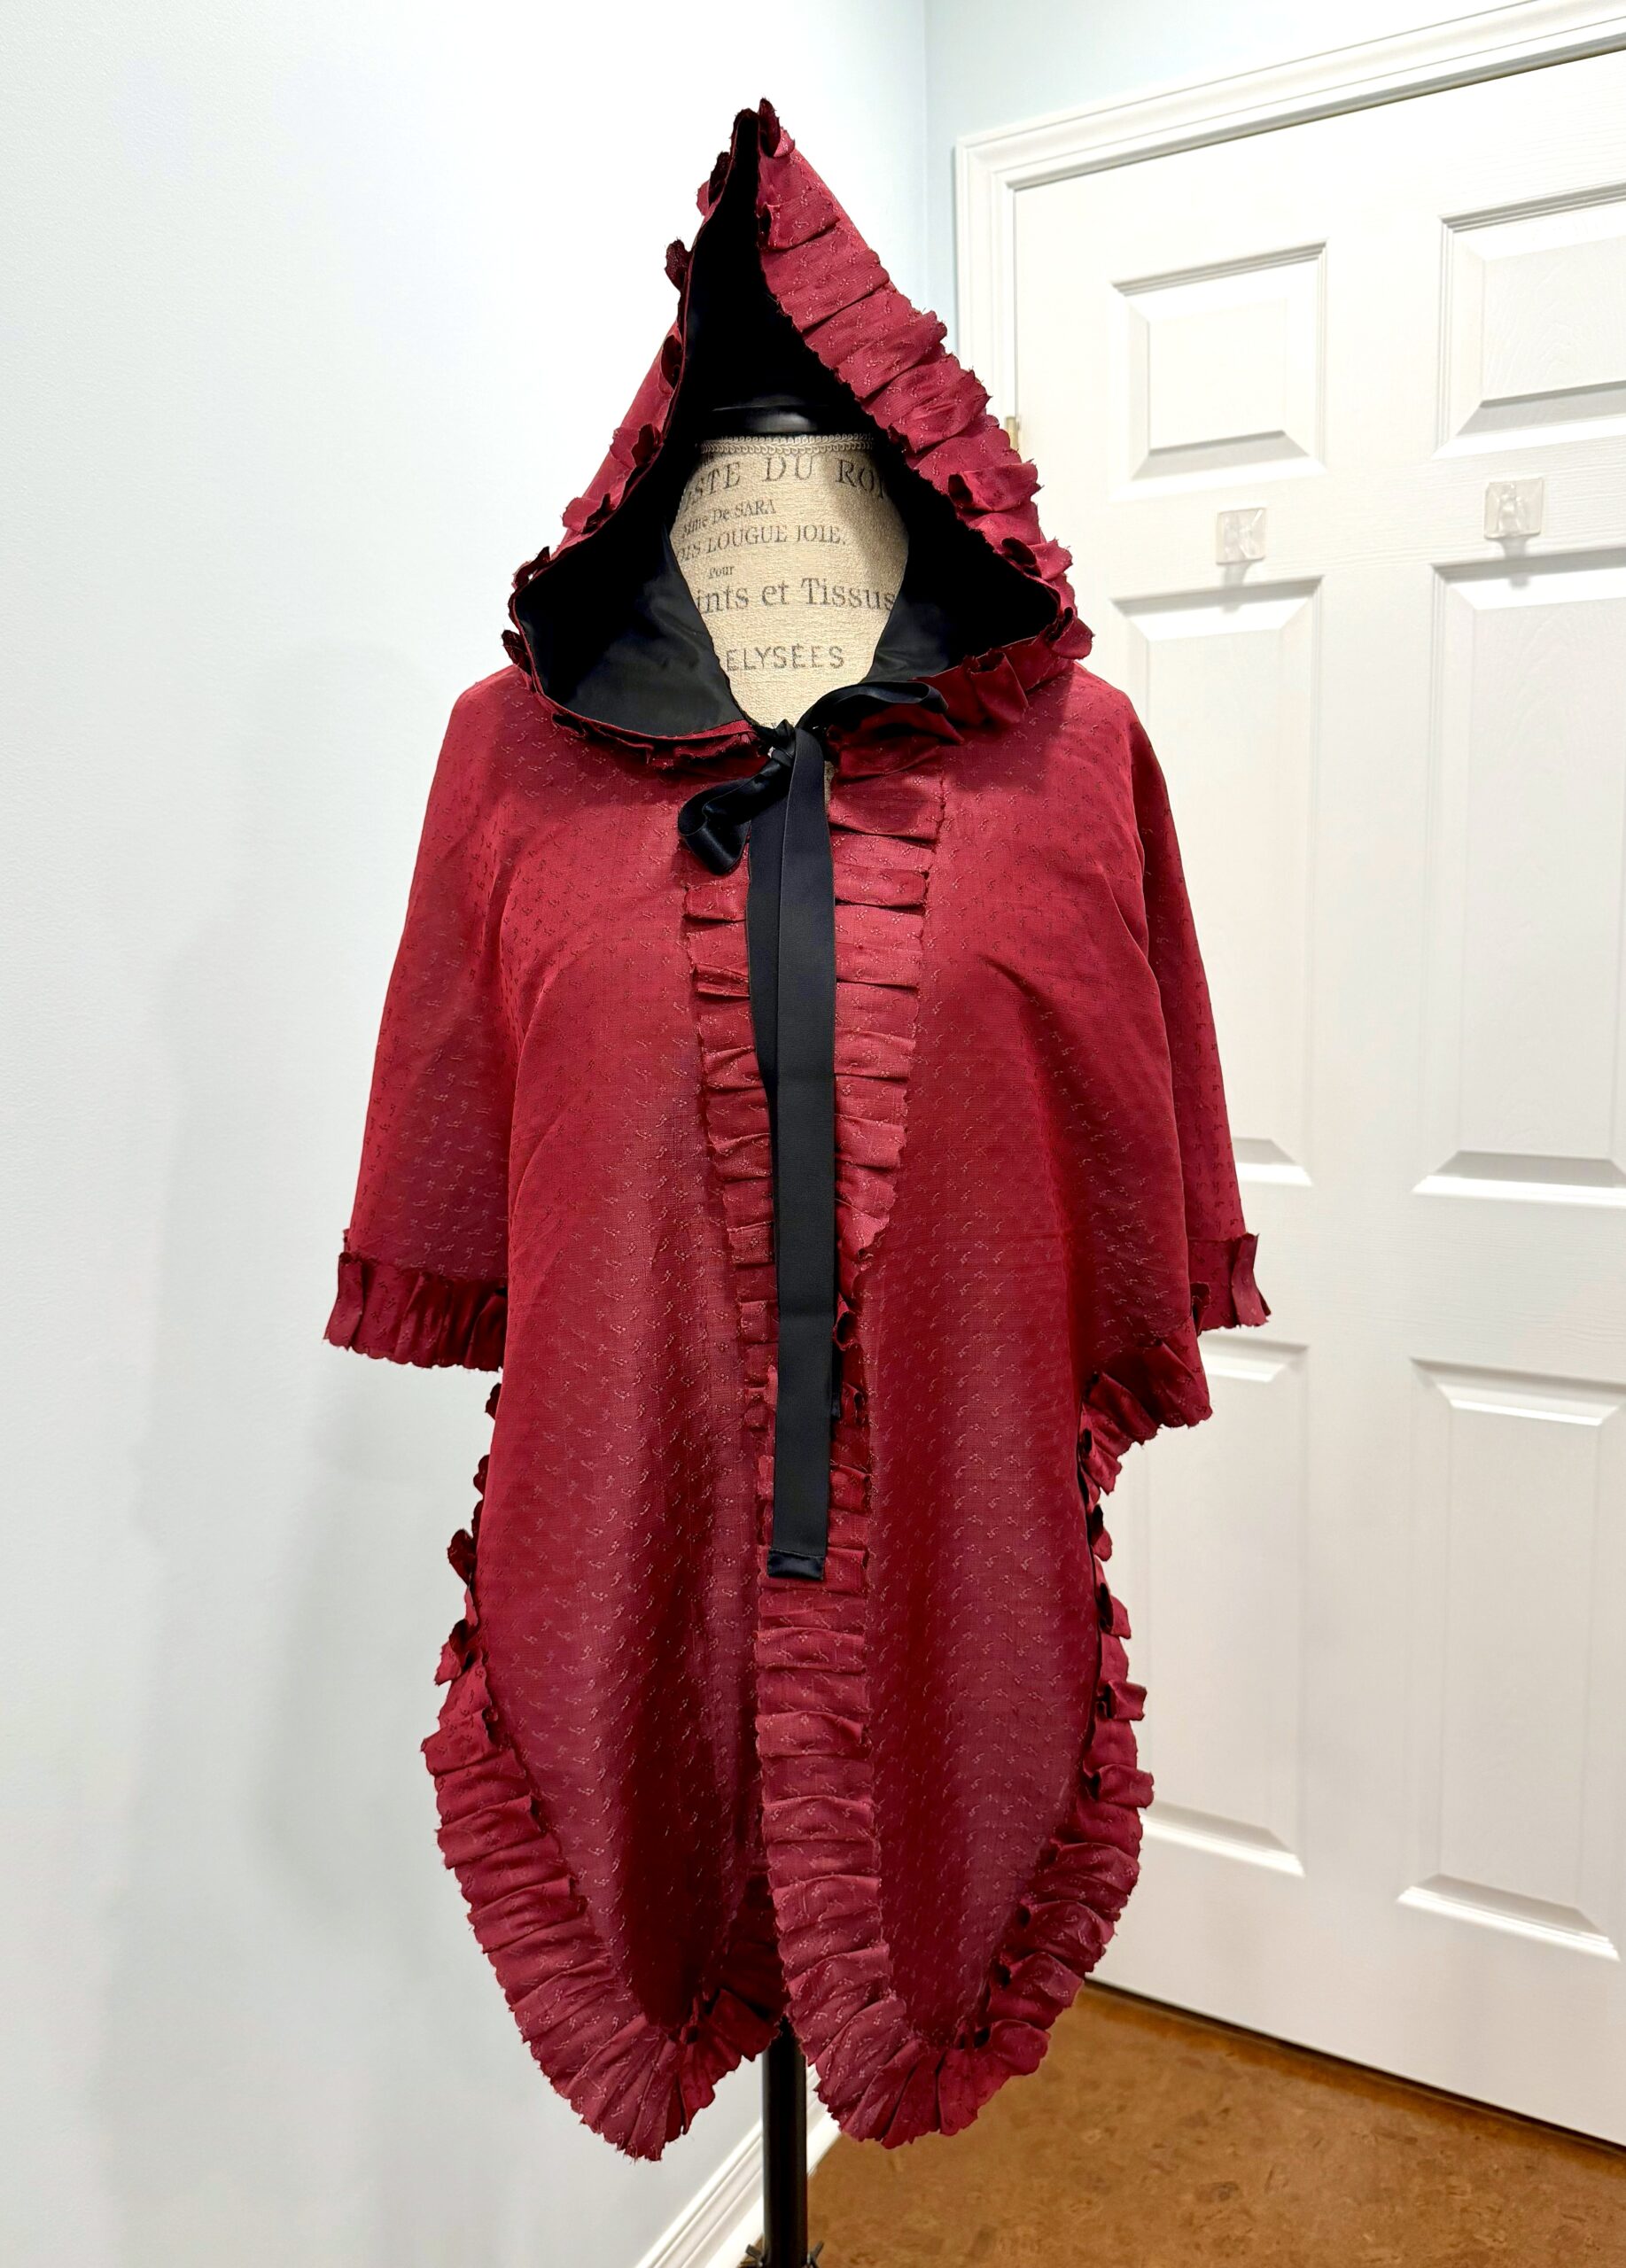
I am on a mission to make all of the Scroop Mantle patterns. Right now I’m making a silk Scroop Charlotte mantle in a red figured silk taffeta.
This project began with a bit of an argument. The extant silk mantles of which I’m aware are lined in silk. While silk does have insulating properties, I have come to temperate Vancouver from a tropical climate. I wanted to be very very warm, and I intended to line this particular mantle with wool. Unfortunately, a friend who knows what they’re talking about told me that this really wasn’t done. Silk mantles were silk lined, and the grand bulk of written documentary evidence points to the same.
I said (stubbornly) that there was no way people would have gone about in cool weather wearing a mantle that was nothing but two layers of silk. When the temperature dropped they would have wanted their outer shells to be as warm as possible. I’d take, I said, that opinion to the barricade, except that I wouldn’t have to, on account of how all the 18th century silk-lined silk-mantle wearers on the other side of the barricade would have frozen stiff before I got there.
The friend expressed their opinions about my opinions (Which was fair. Documentary evidence really does beat someone simply banging the “Oh yeah? Sez YOU” drum.) but then they very kindly went on the hunt and found an extent child’s cape whose hood was lined with silk, but whose body (drum roll please) was lined in glazed worsted wool!
My wool-lined cloak was historically plausible. We called a truce. A wool lining it would be.
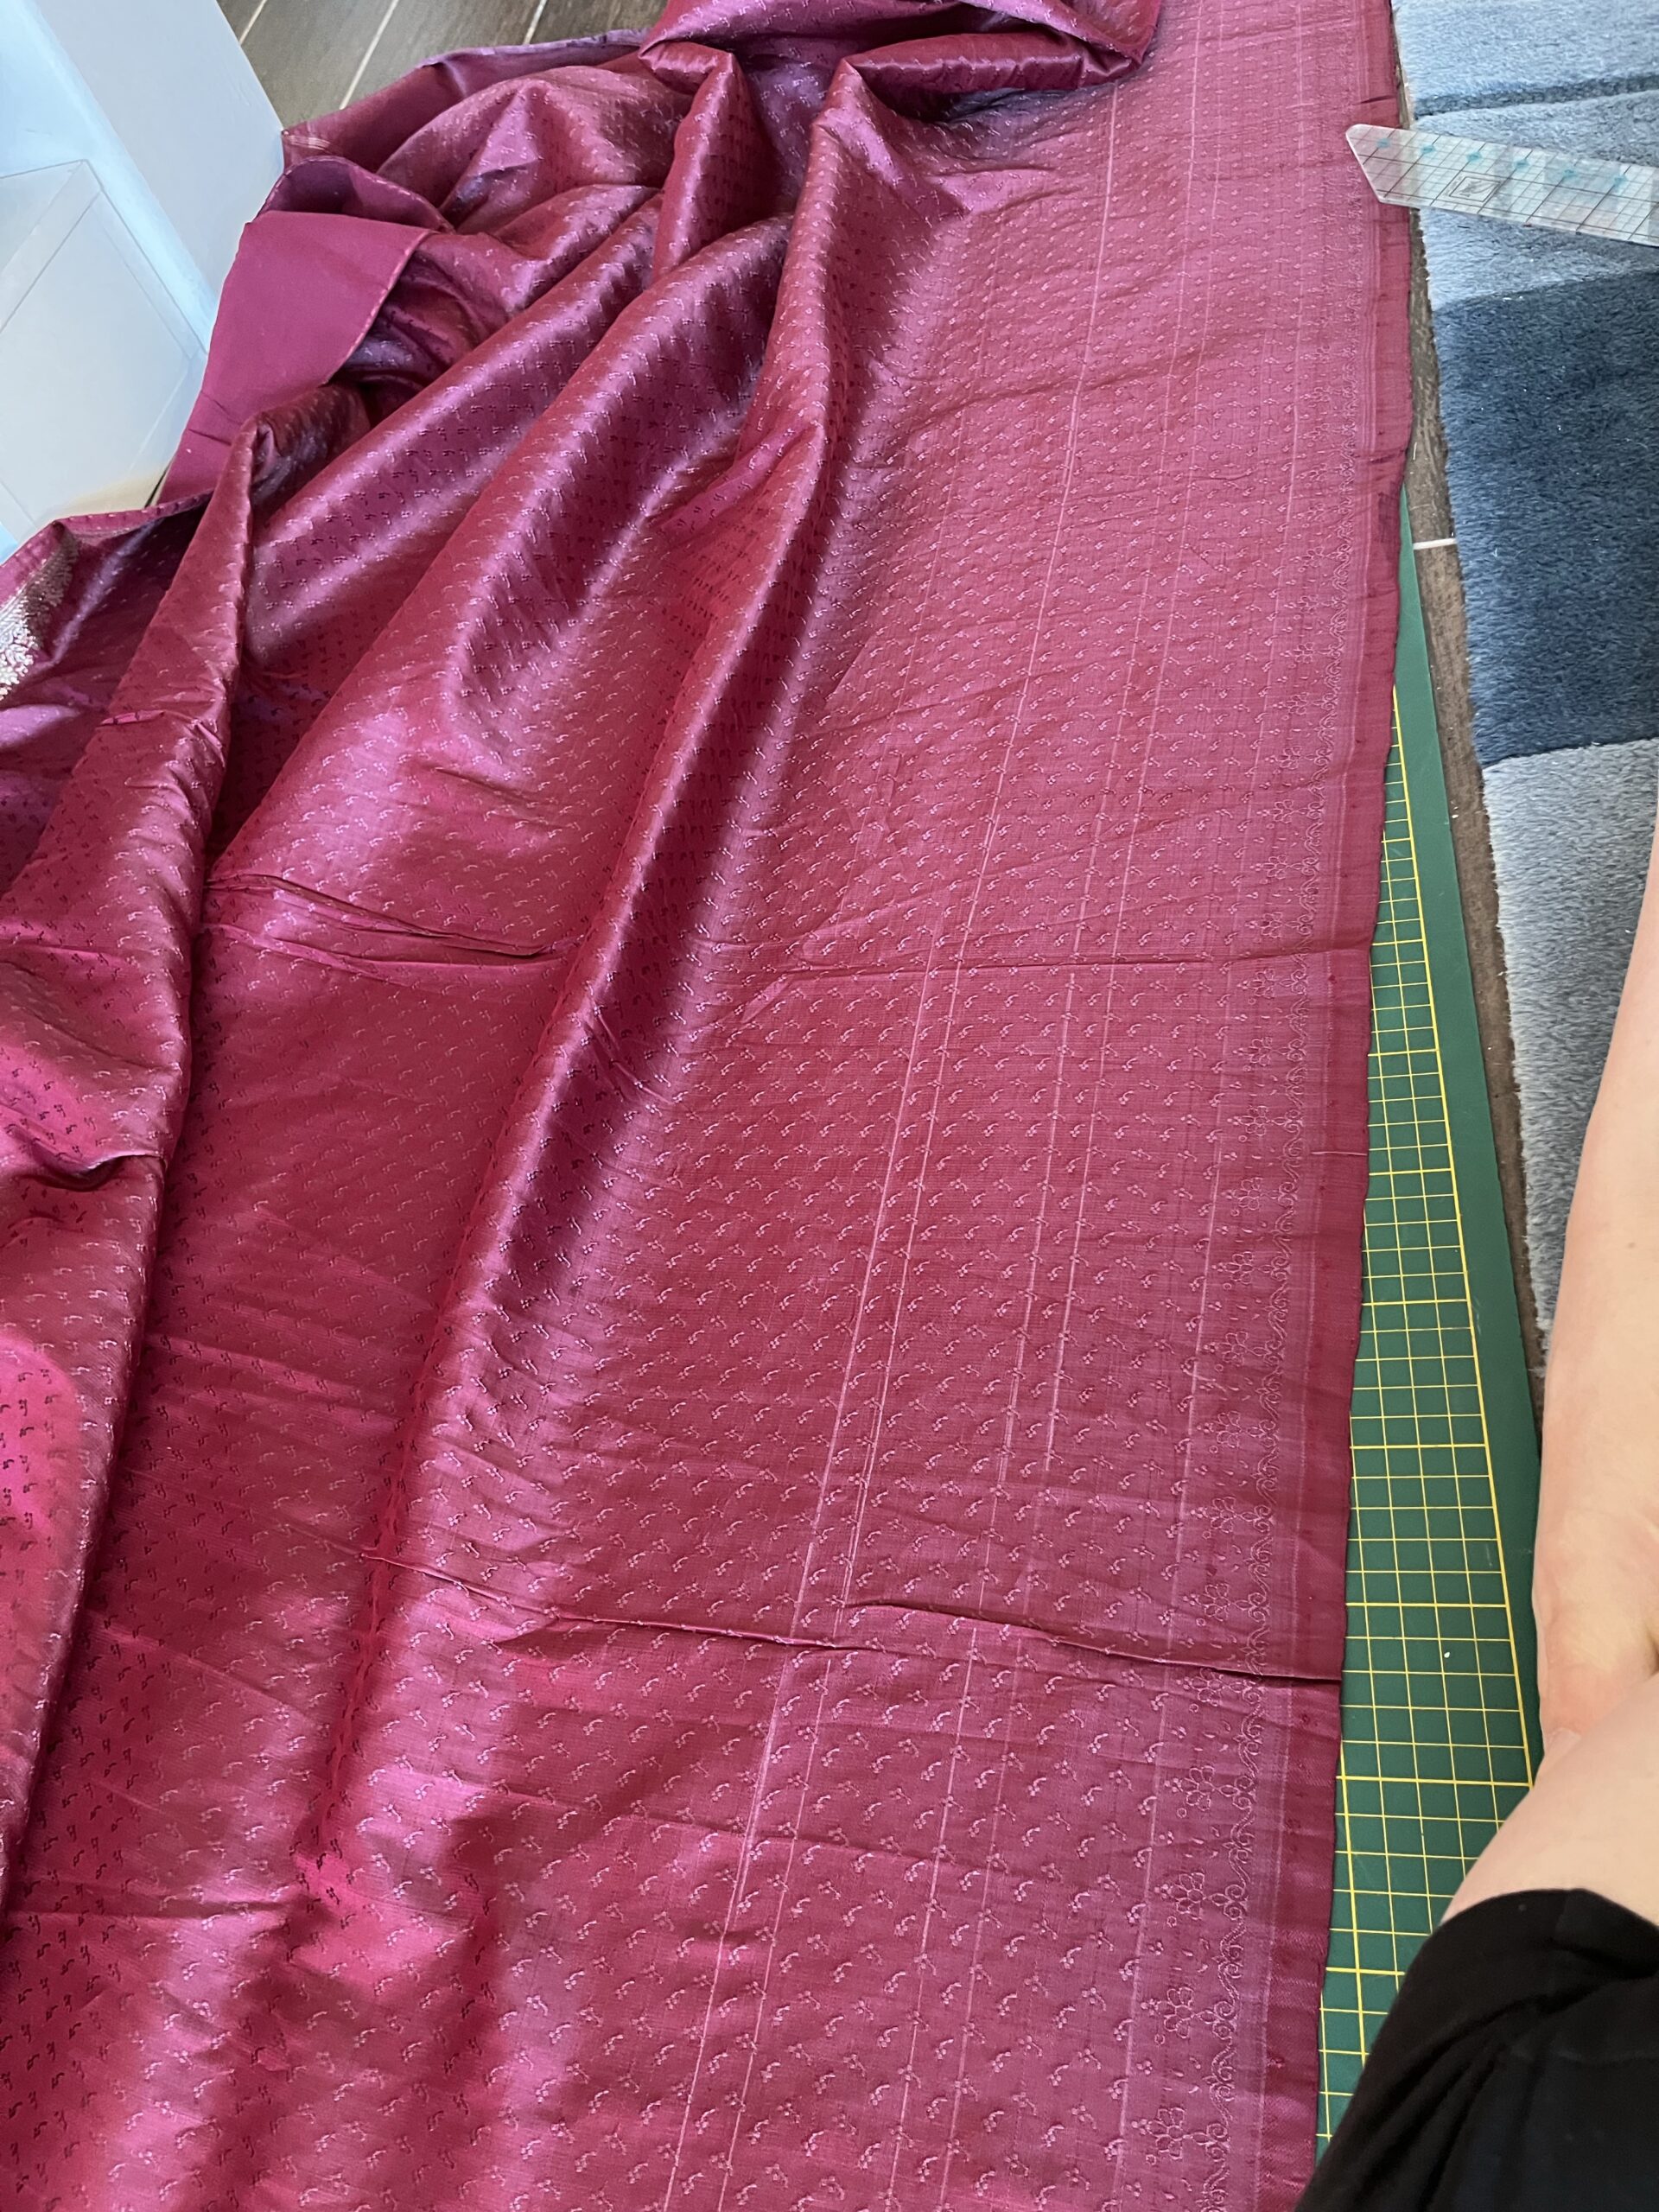
For the silk outer layer of this Scroop Charlotte mantle, I found on ebay a wonderful second hand saree in burgundy figured silk satin. The fabric feels like rich butter and drapes like a waterfall. For the warm and cozy lining, I am using a soft black wool dupatta from the same source.
Constructing the mantle:
Due to the dimensions of the dupatta and the direction of the woven figures on the silk fabric, both the outer fashion fabric and the lining had to be pieced: cut as two halves with a joined seam at the center back.
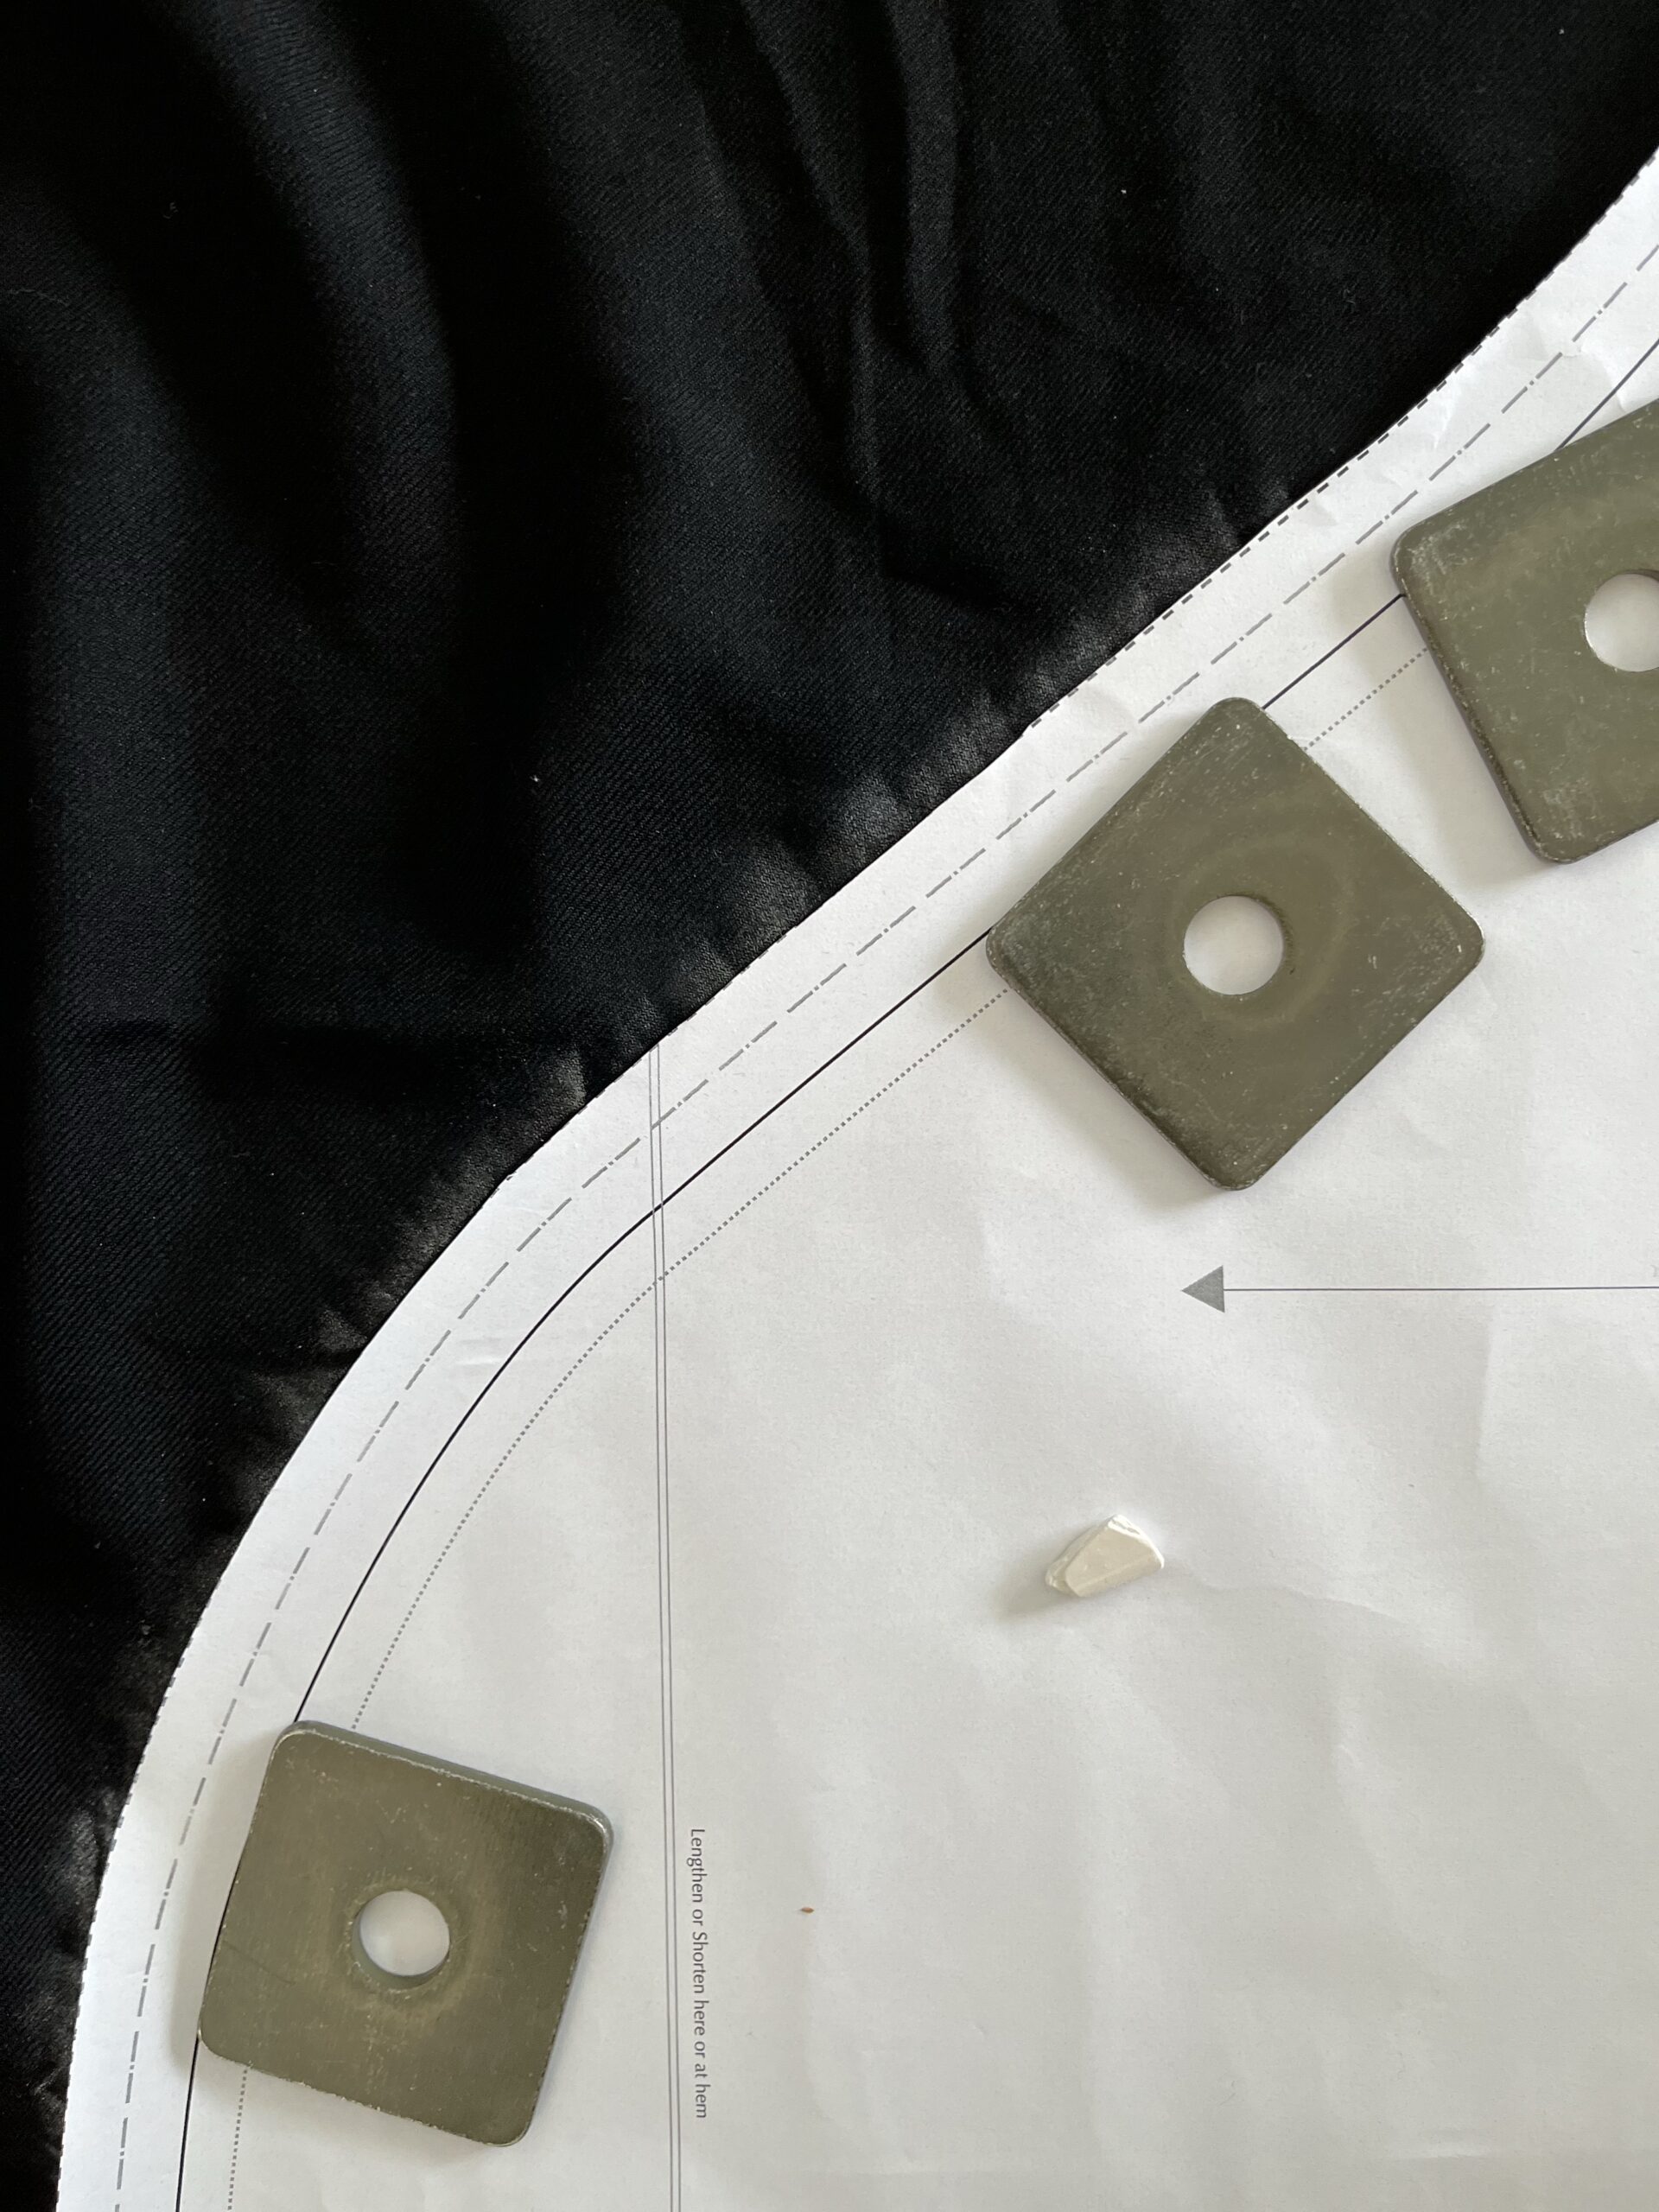
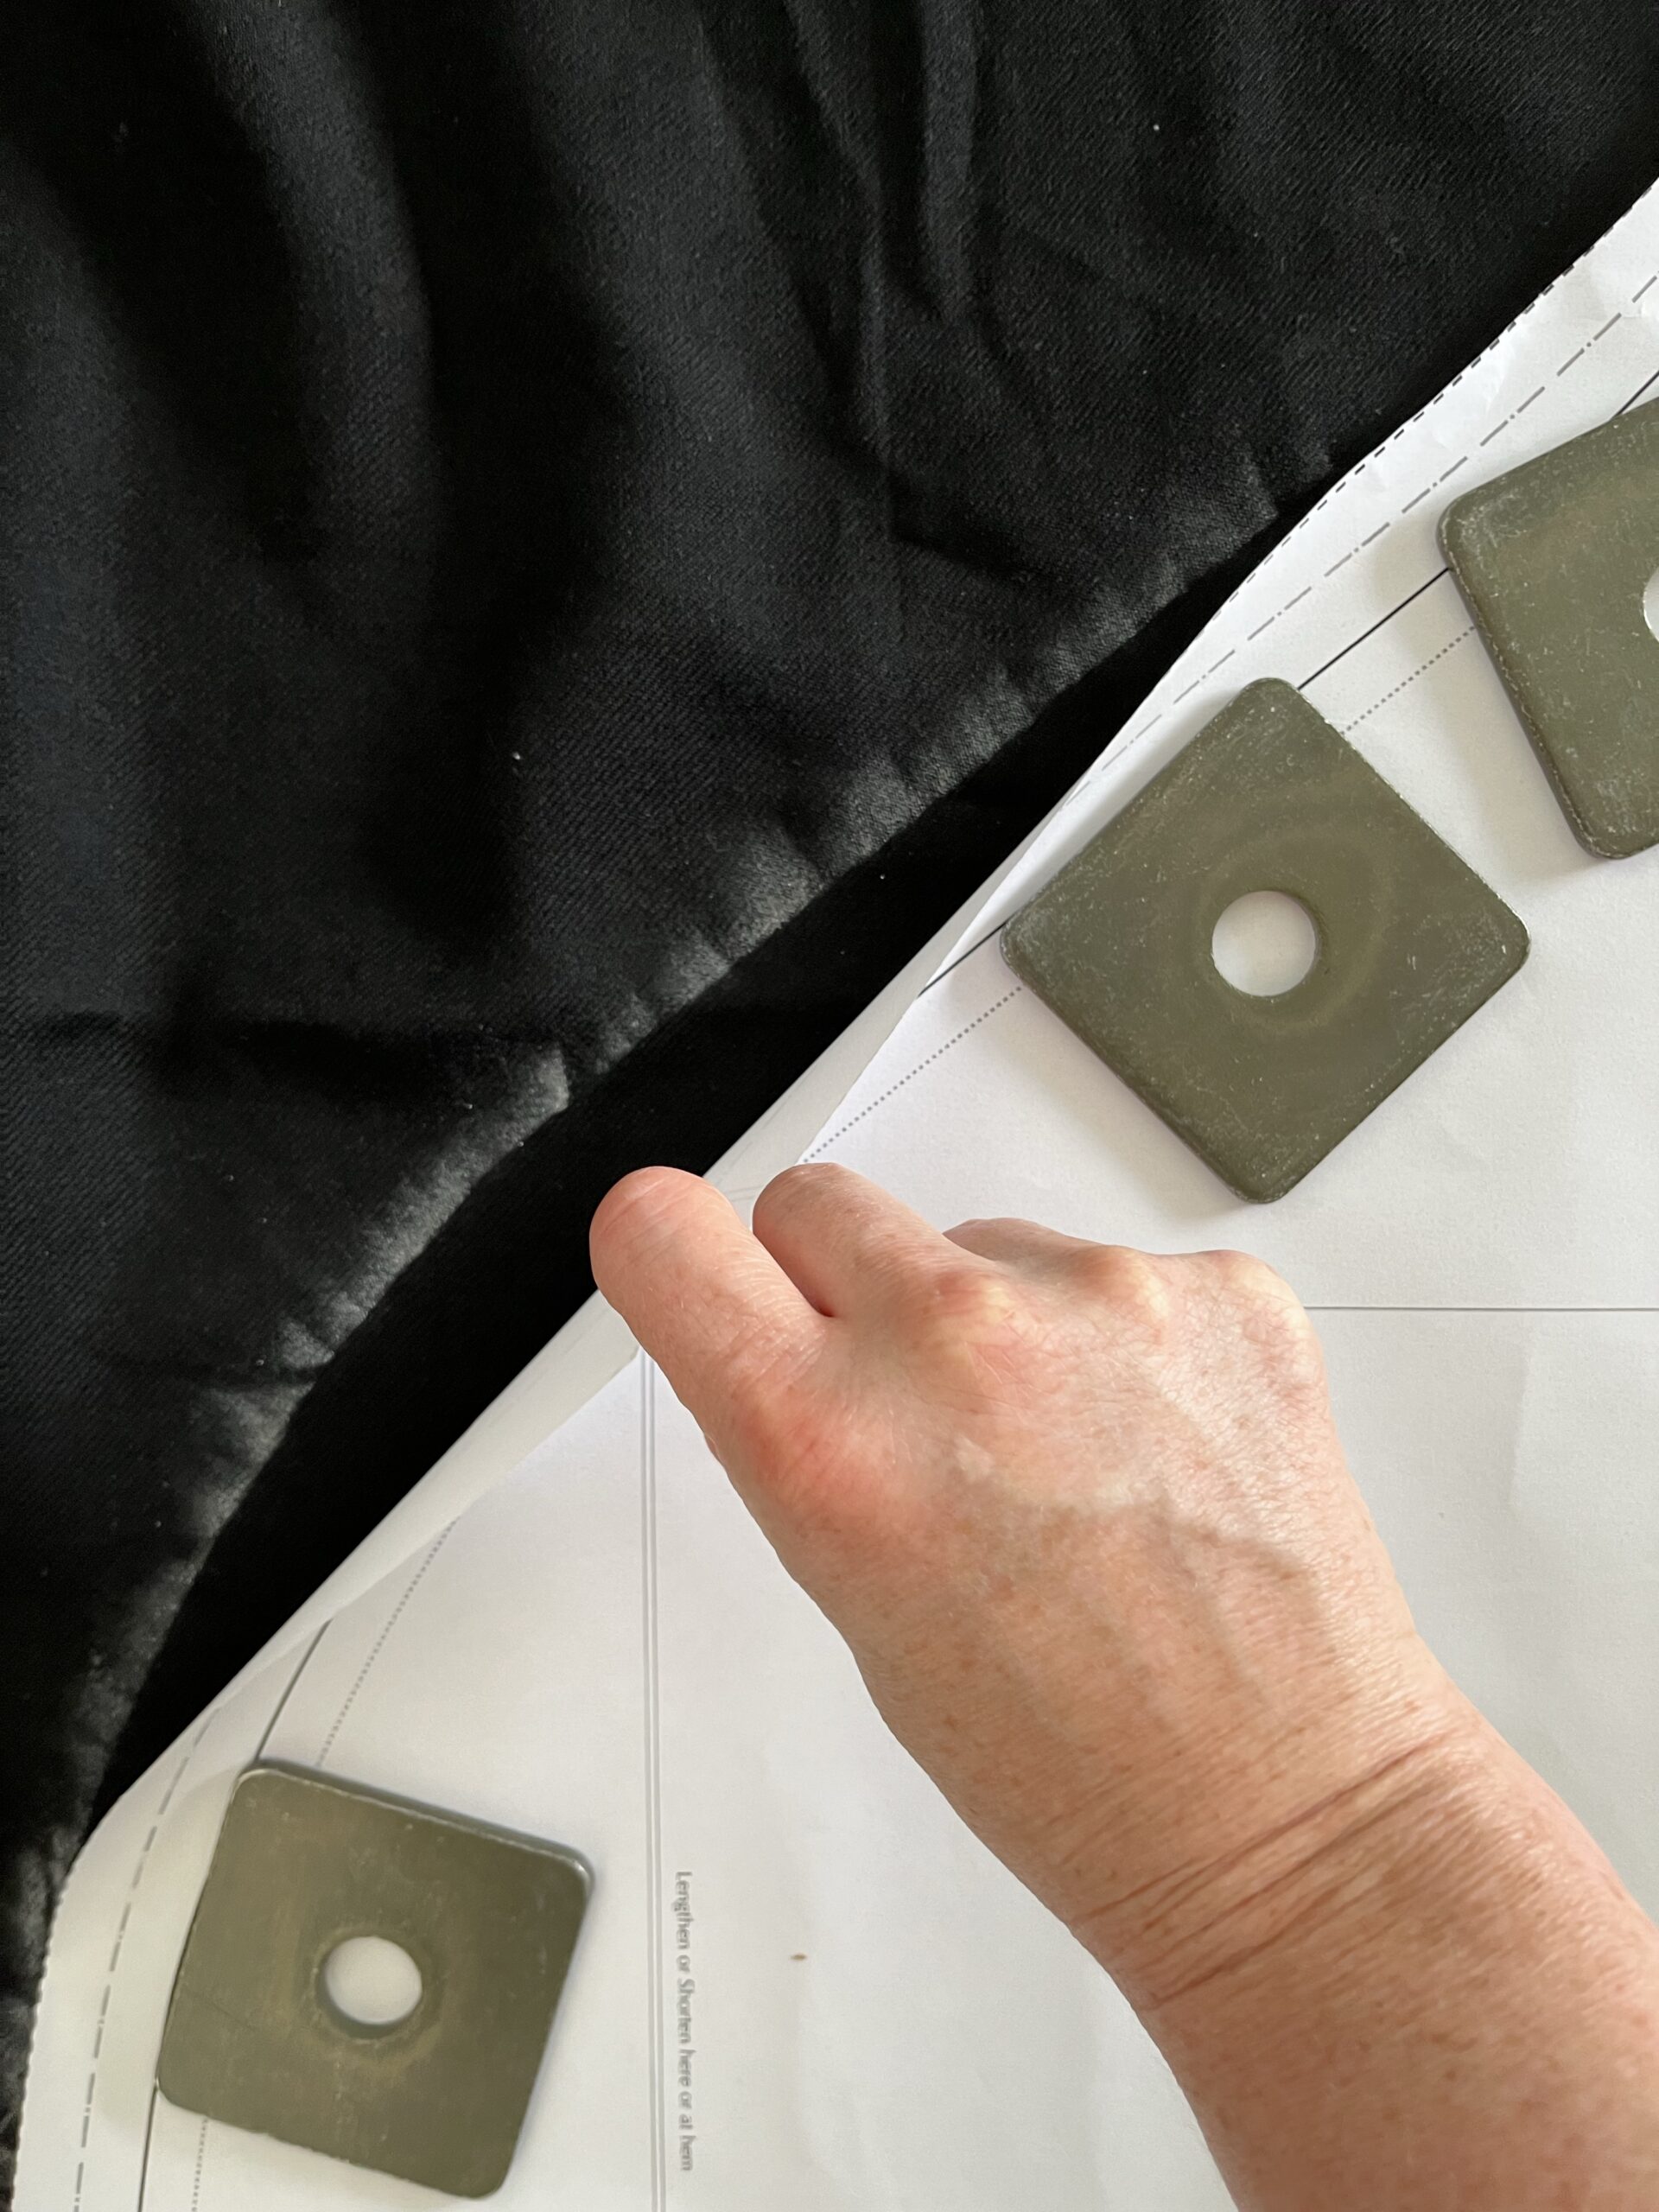
When cutting slithery fabrics like this dupatta, I often find that pinning a paper pattern to the fabric can result in slippage and shape distortion. If the fabric is dark enough to show a chalk line, I lay the pattern piece on the fabric, weight it down, and then trace the pattern piece by lightly dragging fabric chalk outward across the paper onto the fabric layer. This drag makes a soft chalk halo around the pattern piece with a hard edge on the inside that is a perfectly accurate cutting line.
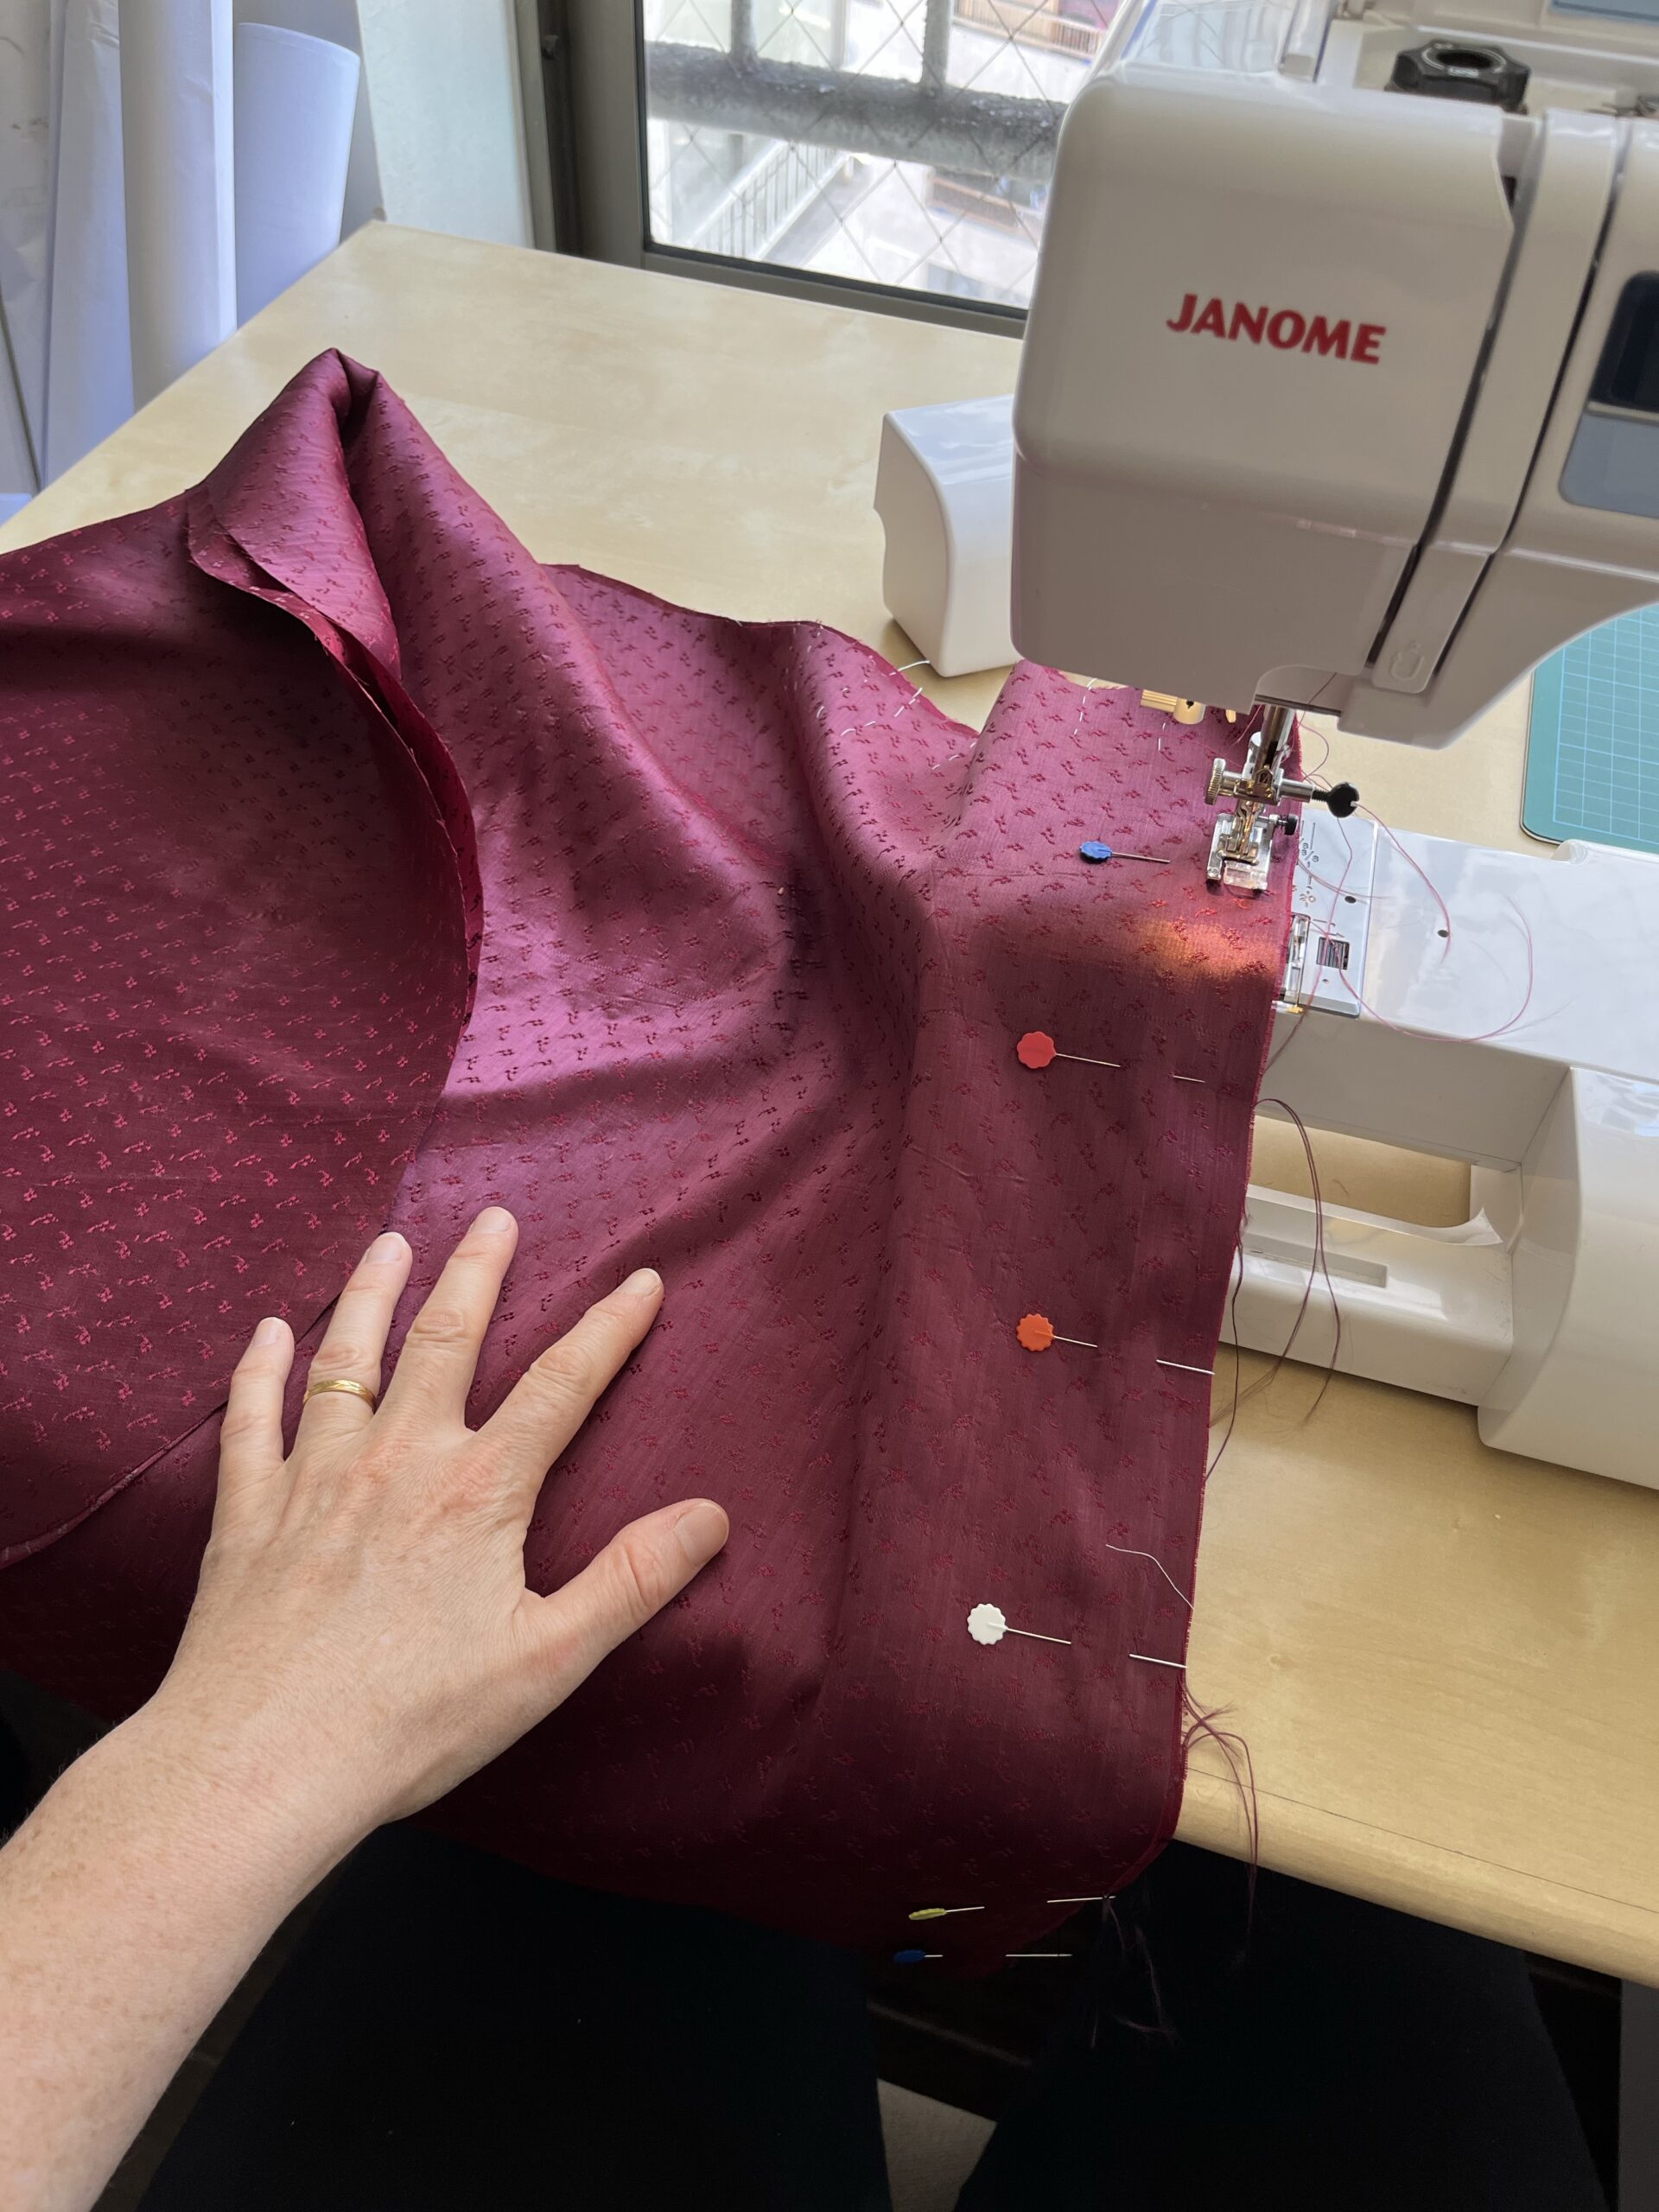
Once I had my lining and fashion fabric pieces cut, I sewed the halves together and pressed the seam flat.
Then I marked the seam allowances. Chalk wipes easily off both of these fabrics, so I used the sewing machine to trace a seam line around the edge of both pieces with a long basting stitch.
I pressed the seam allowances of both the silk and the wool to the wrong side and basted them down.
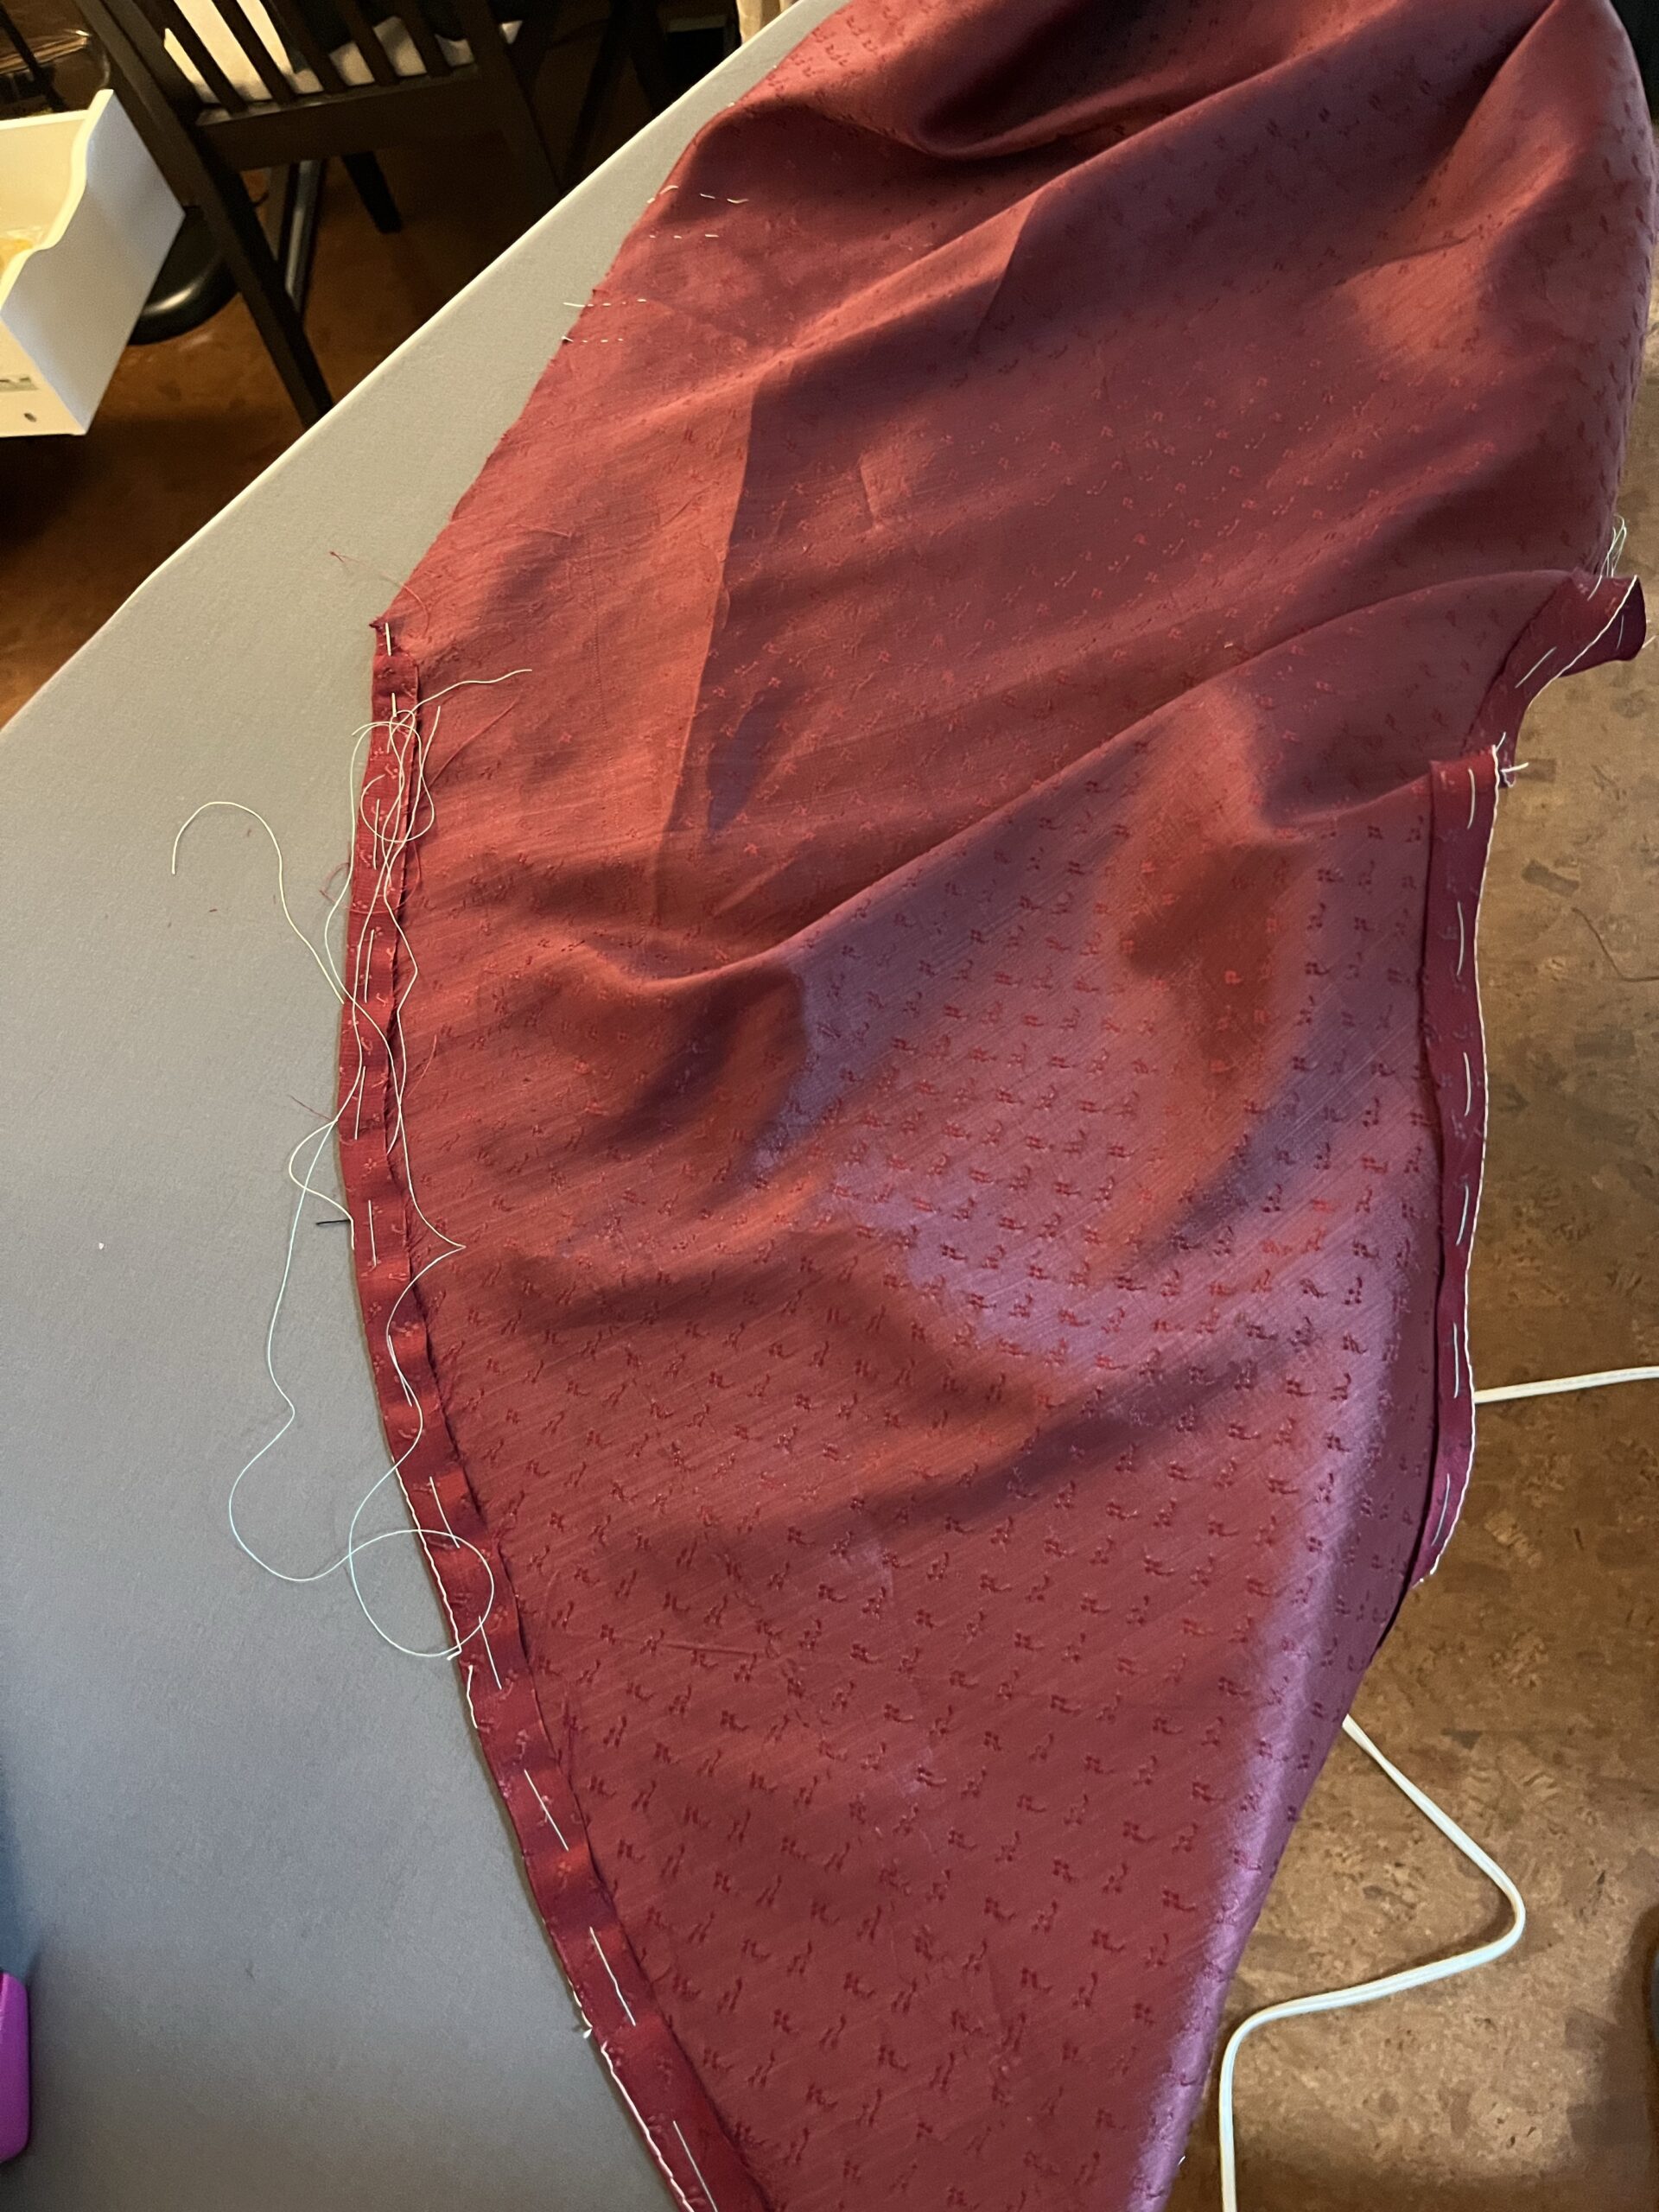
I lay down the silk fashion fabric and wool lining with wrong sides together. This was the fiddly part; both the silk and wool were very slippery, so I started by basting down the center seam, stitching in the ditch, and then I pinned the two layers together around the perimeter.
I treated the hood pieces the same way – pressing the seams inward, laying the pieces together and basting the edge. As a concession to my Expert, and also to give the hood some body, I used my wool dupatta for interior flat-lining, and laid a layer of black silk taffeta lining over the top of the wool interlining. There. Now everybody could be happy.
Preliminaries complete, I curled up in front of the TV and whip-stitched the linings to the outer layers.

Next, I assembled the mantle as per the Scroop Instructions.
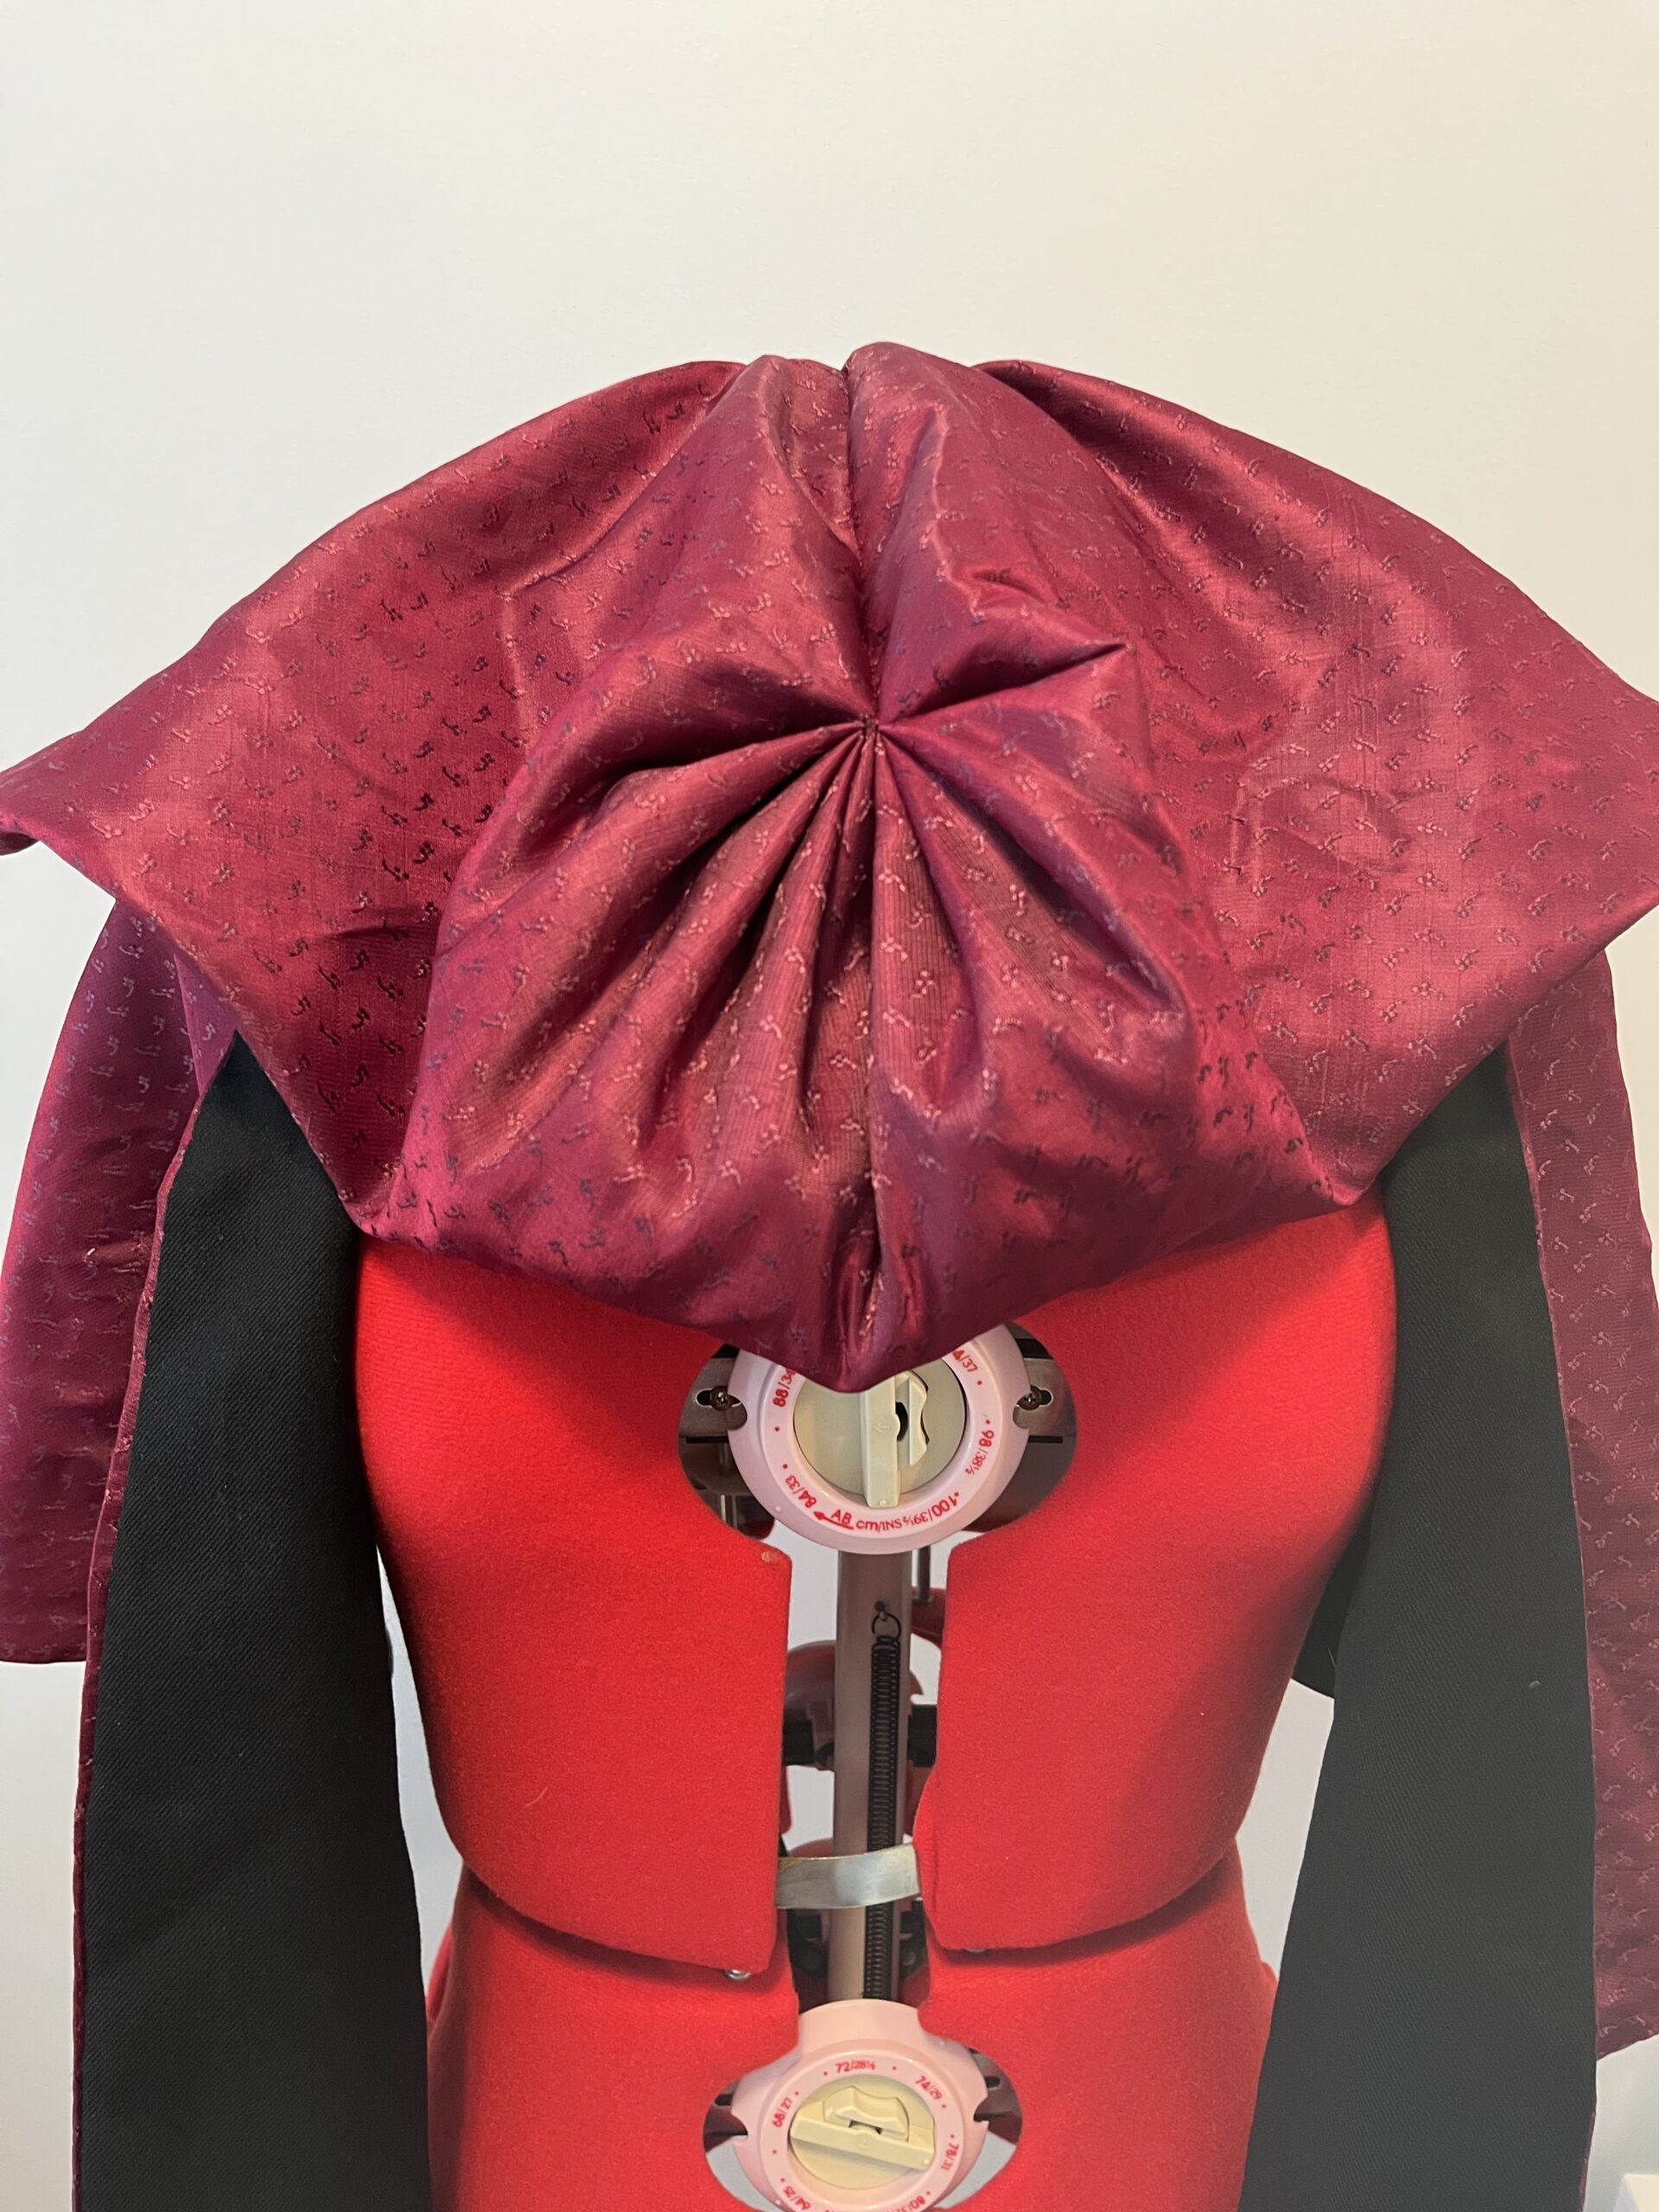
On both my Burnley & Trowbridge blonde lace mantelet and my black net Scroop Marie Mantle, the hood pleats were constructed as stacked pleats caught at the inner edge to form a starburst, and then the starburst reinforced about an inch out from the edge. On the Scroop Charlotte mantelet, the pleats were done differently, as a double stack of staggered pleats whipped along the whole of the stack edge.
It’s always fun trying a new technique, and I really enjoyed the finished effect of this one!
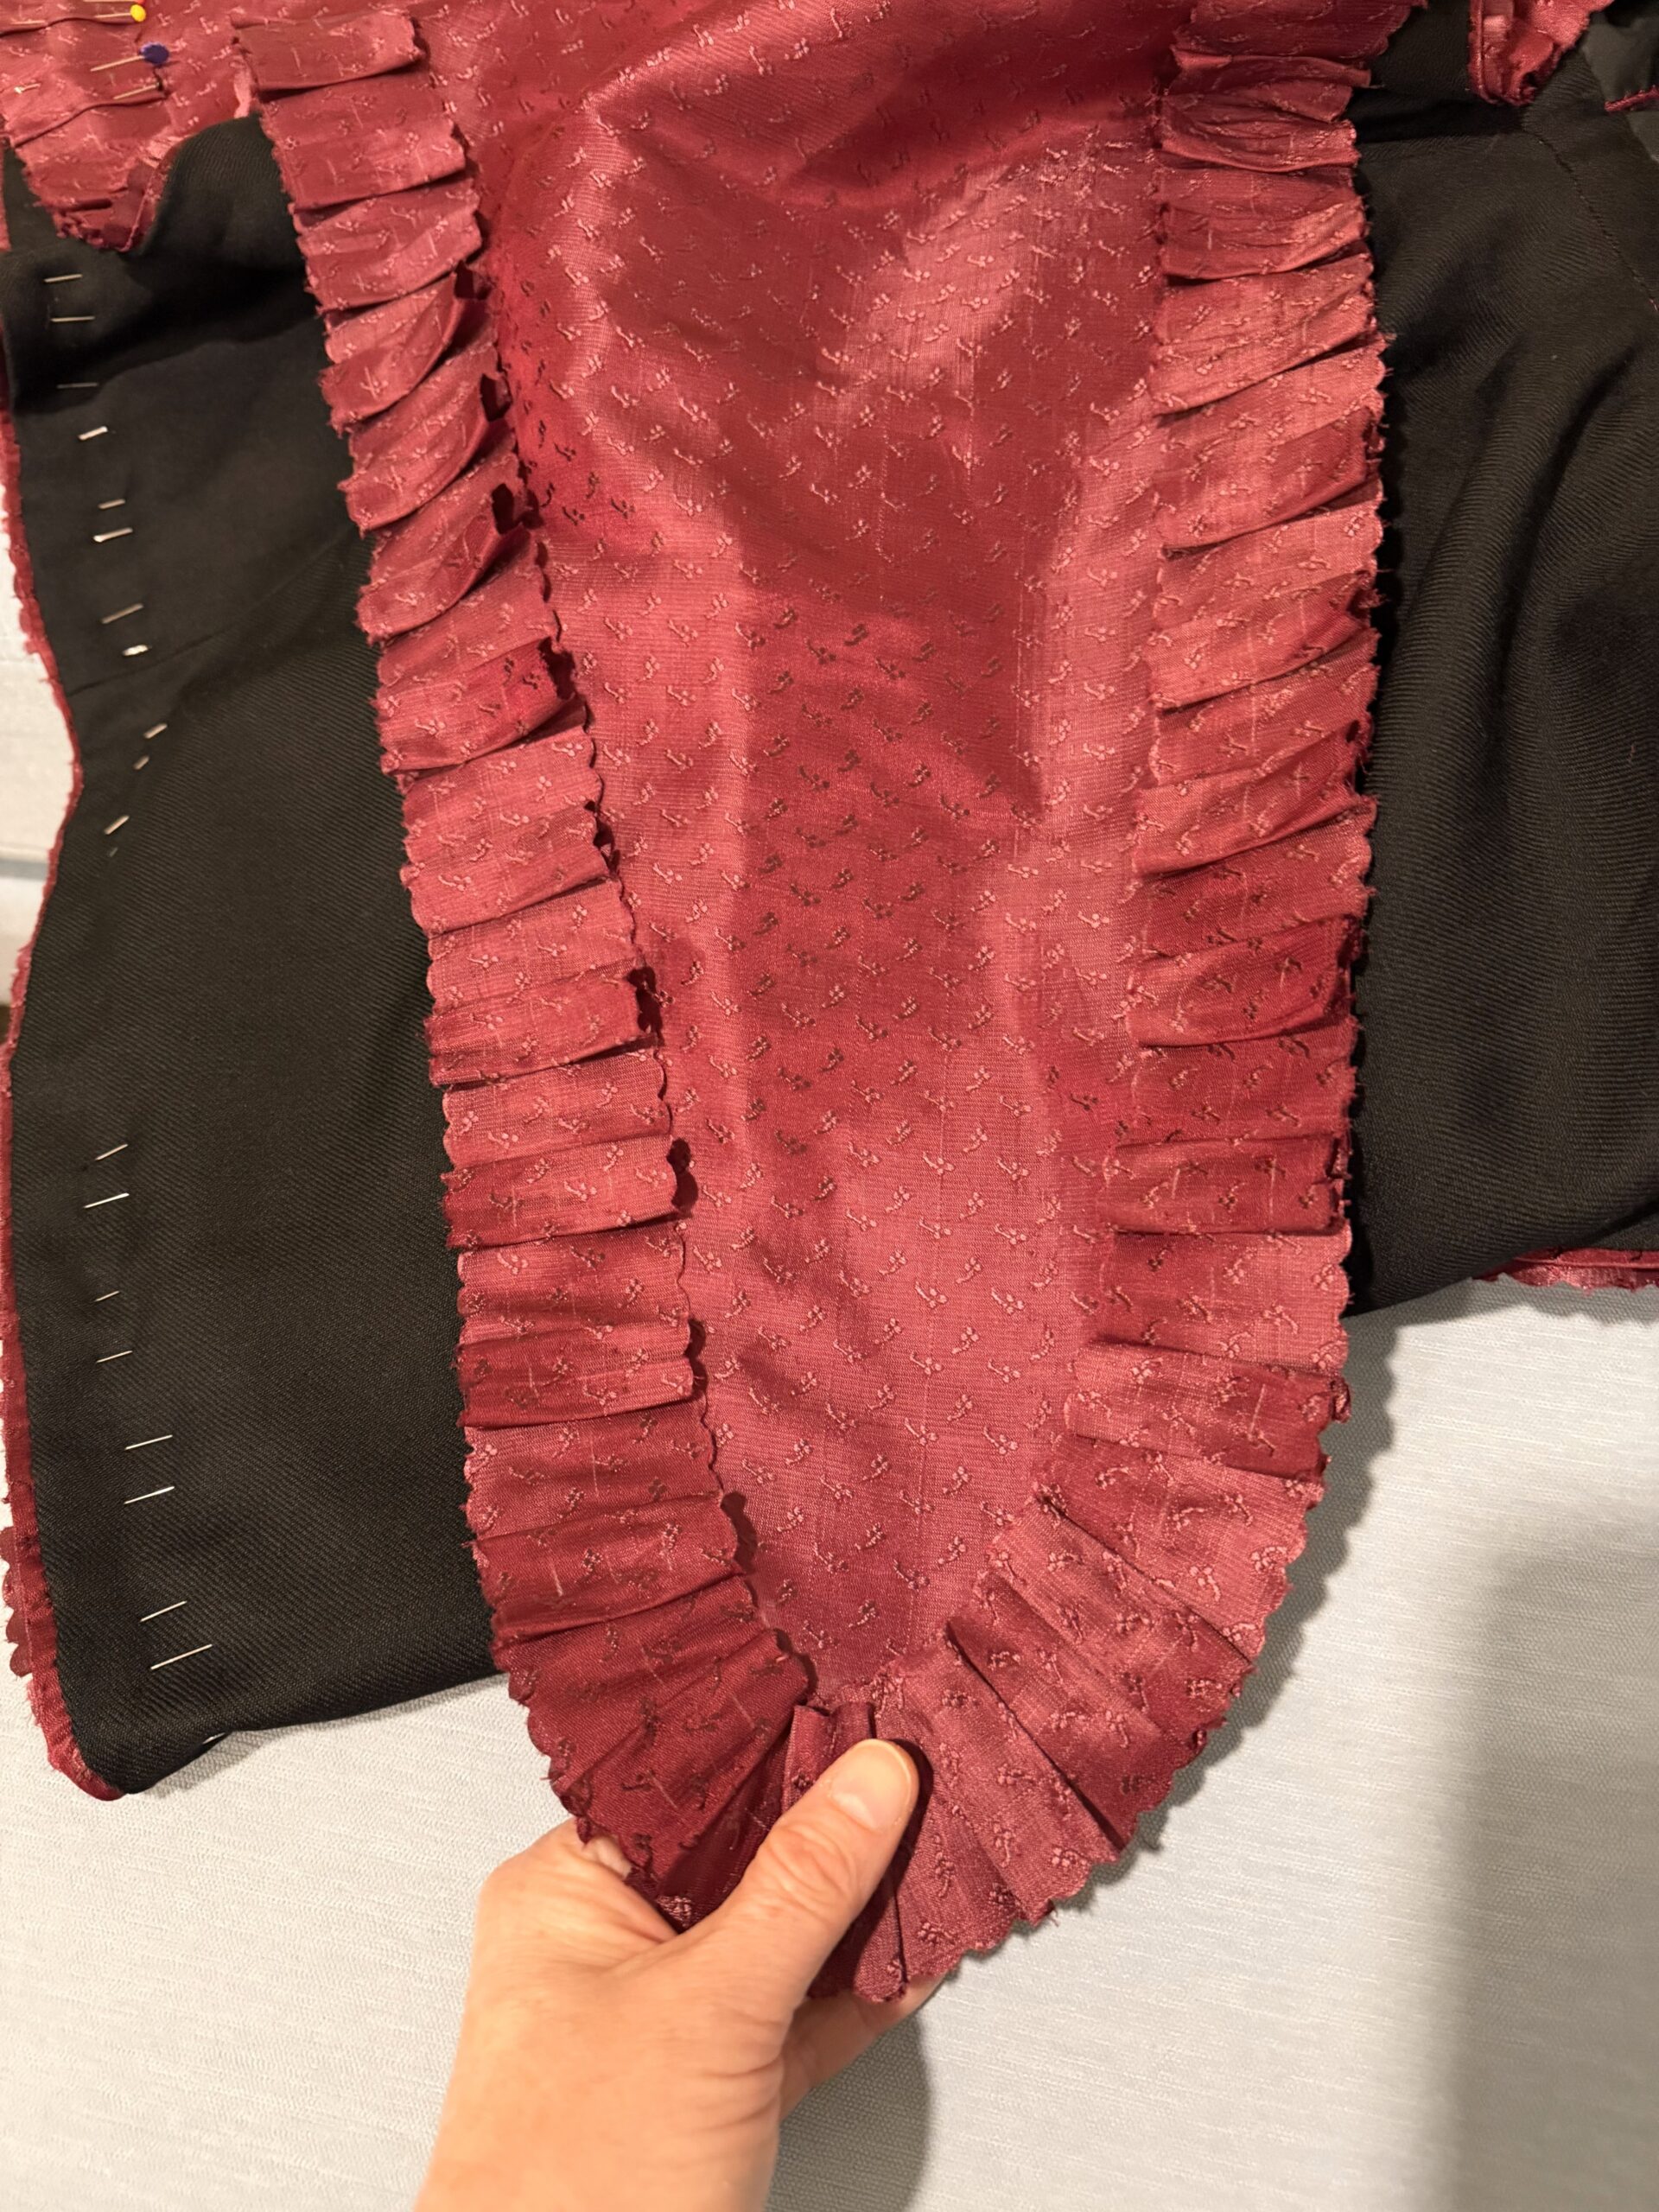
My silk Scroop Charlotte Mantle was finished. Now it was time for the fun, fluffy bits: the trim!
Trimming the mantle:
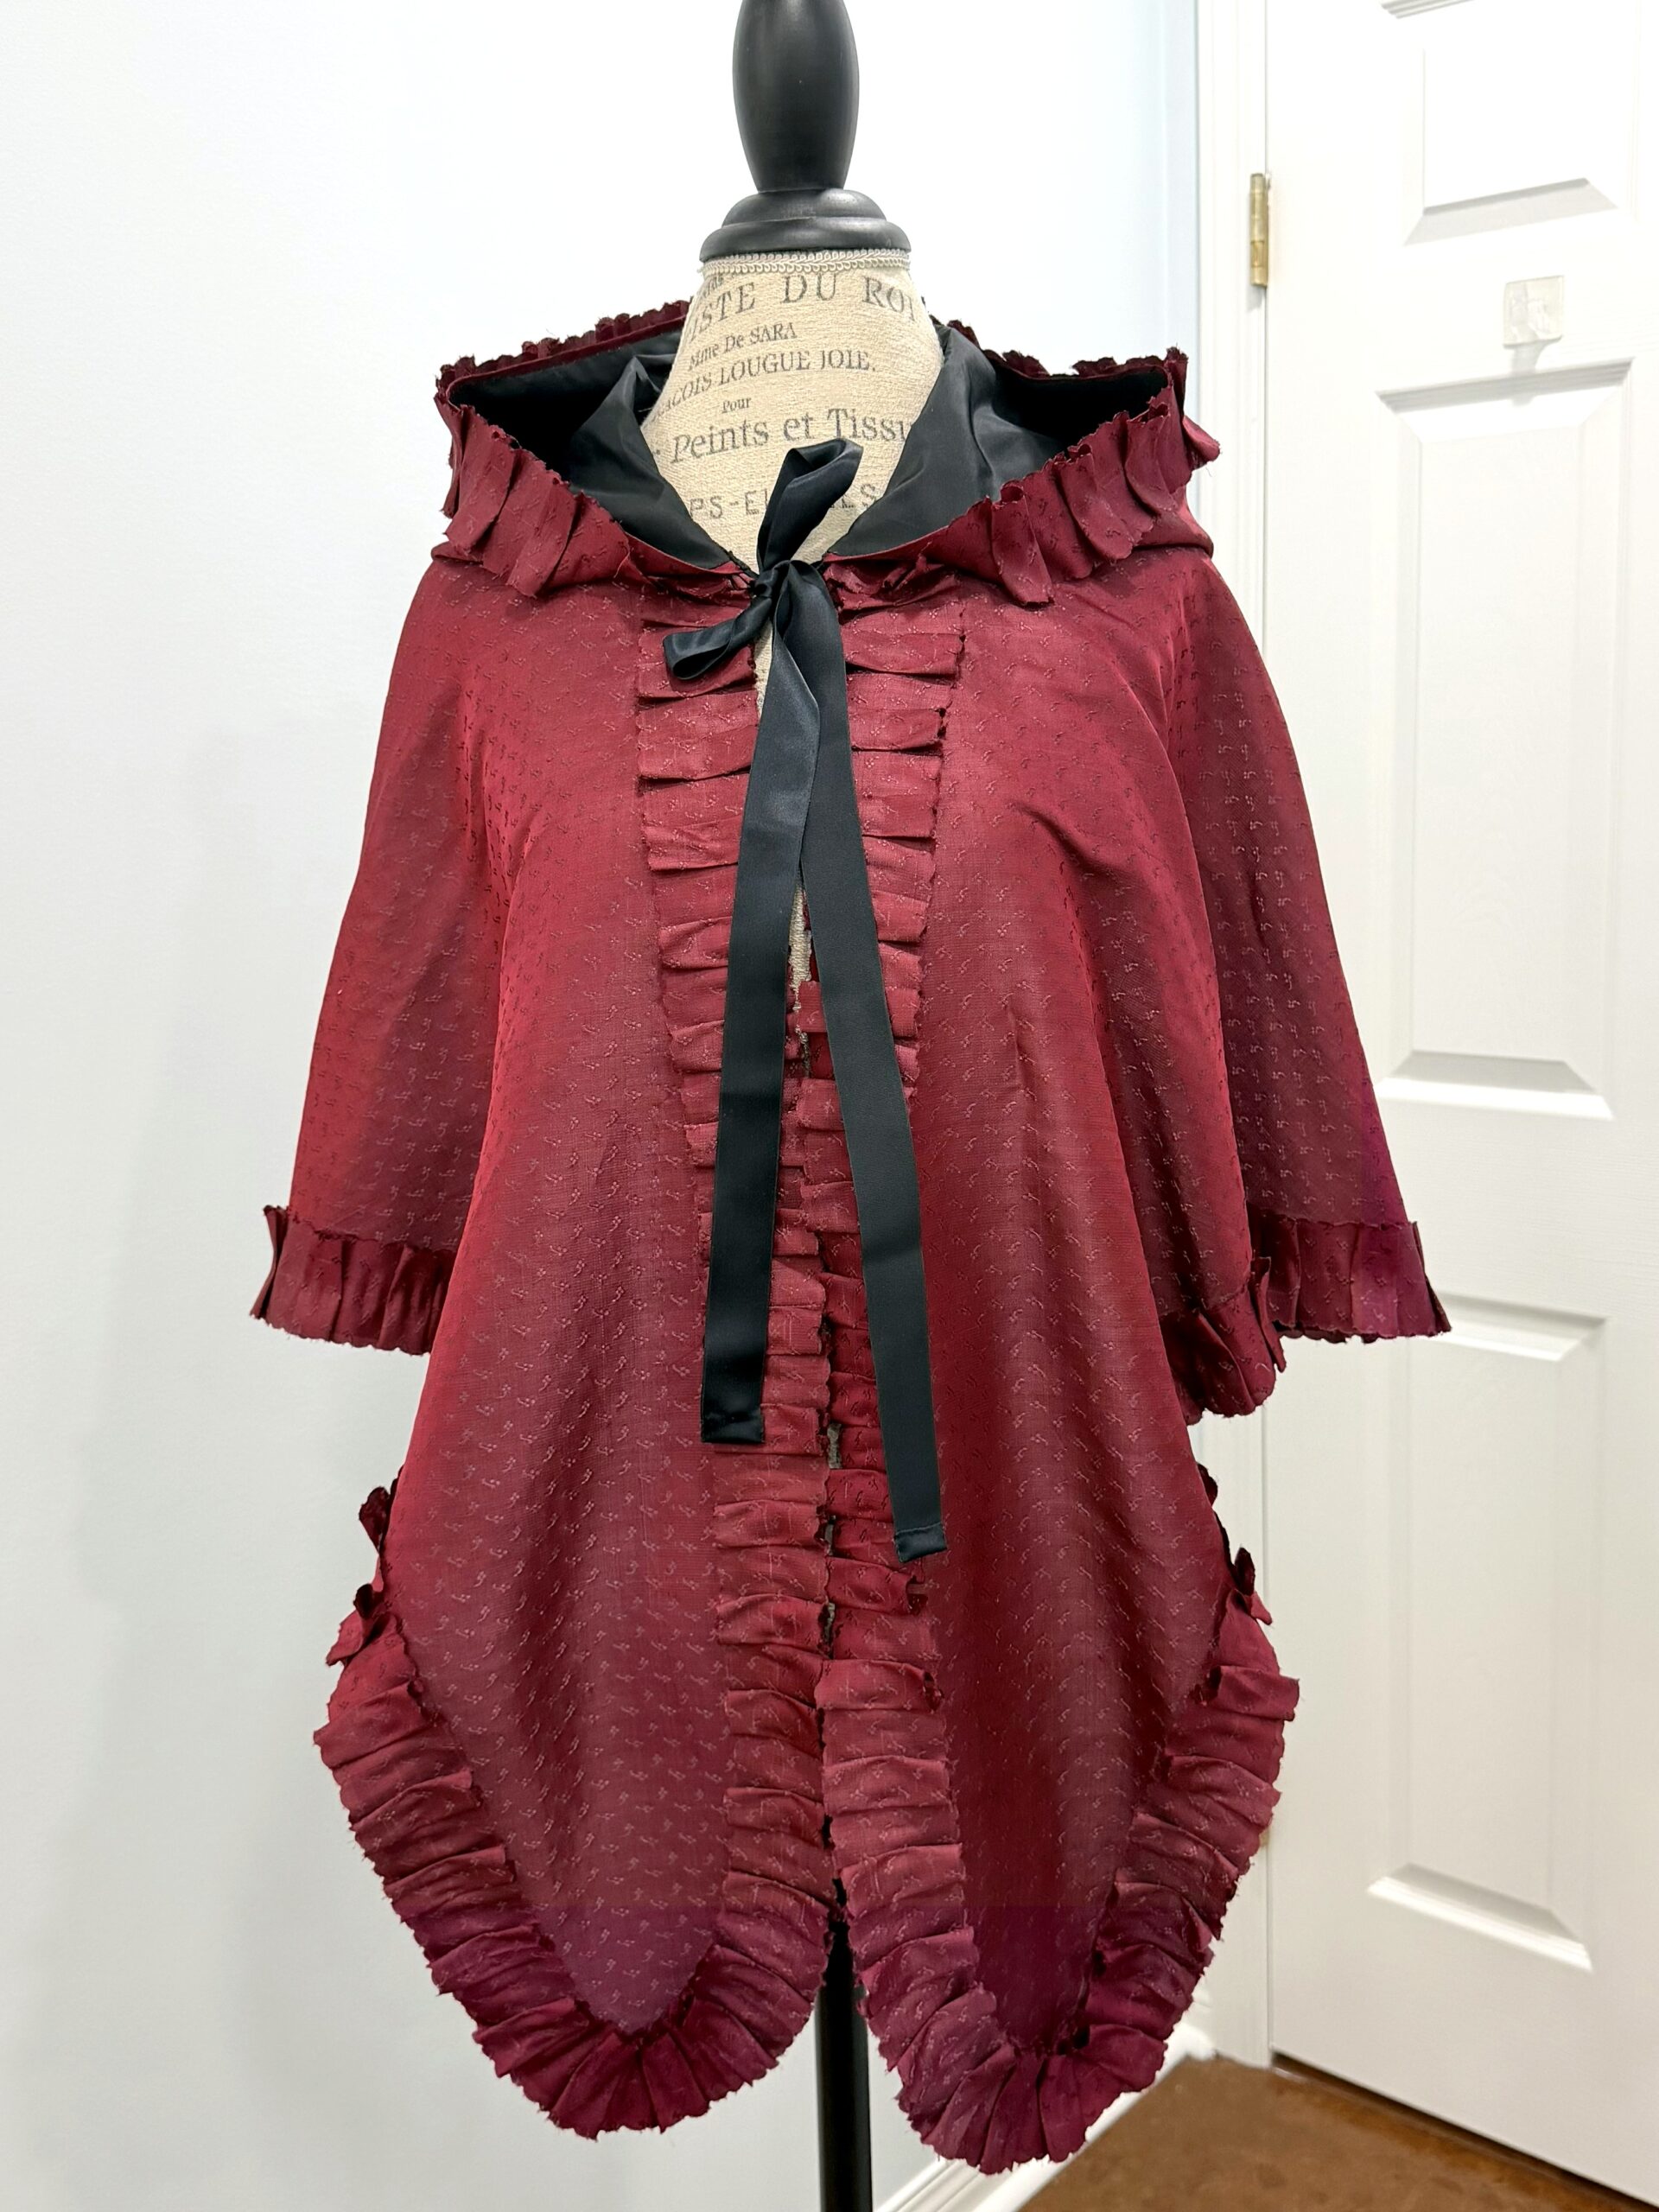
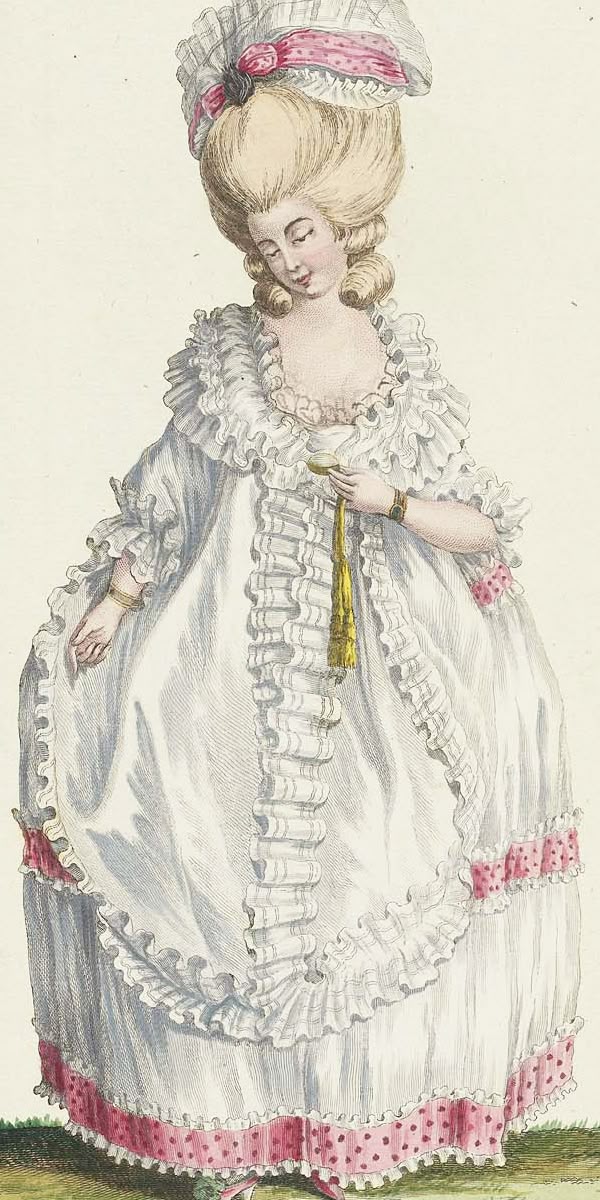
I still had quite a lot of saree left, and I decided to trim this Charlotte Mantle with a row of pinked box pleats. Pinked box pleats were a common mantle trim through the 1770s and 1780s –
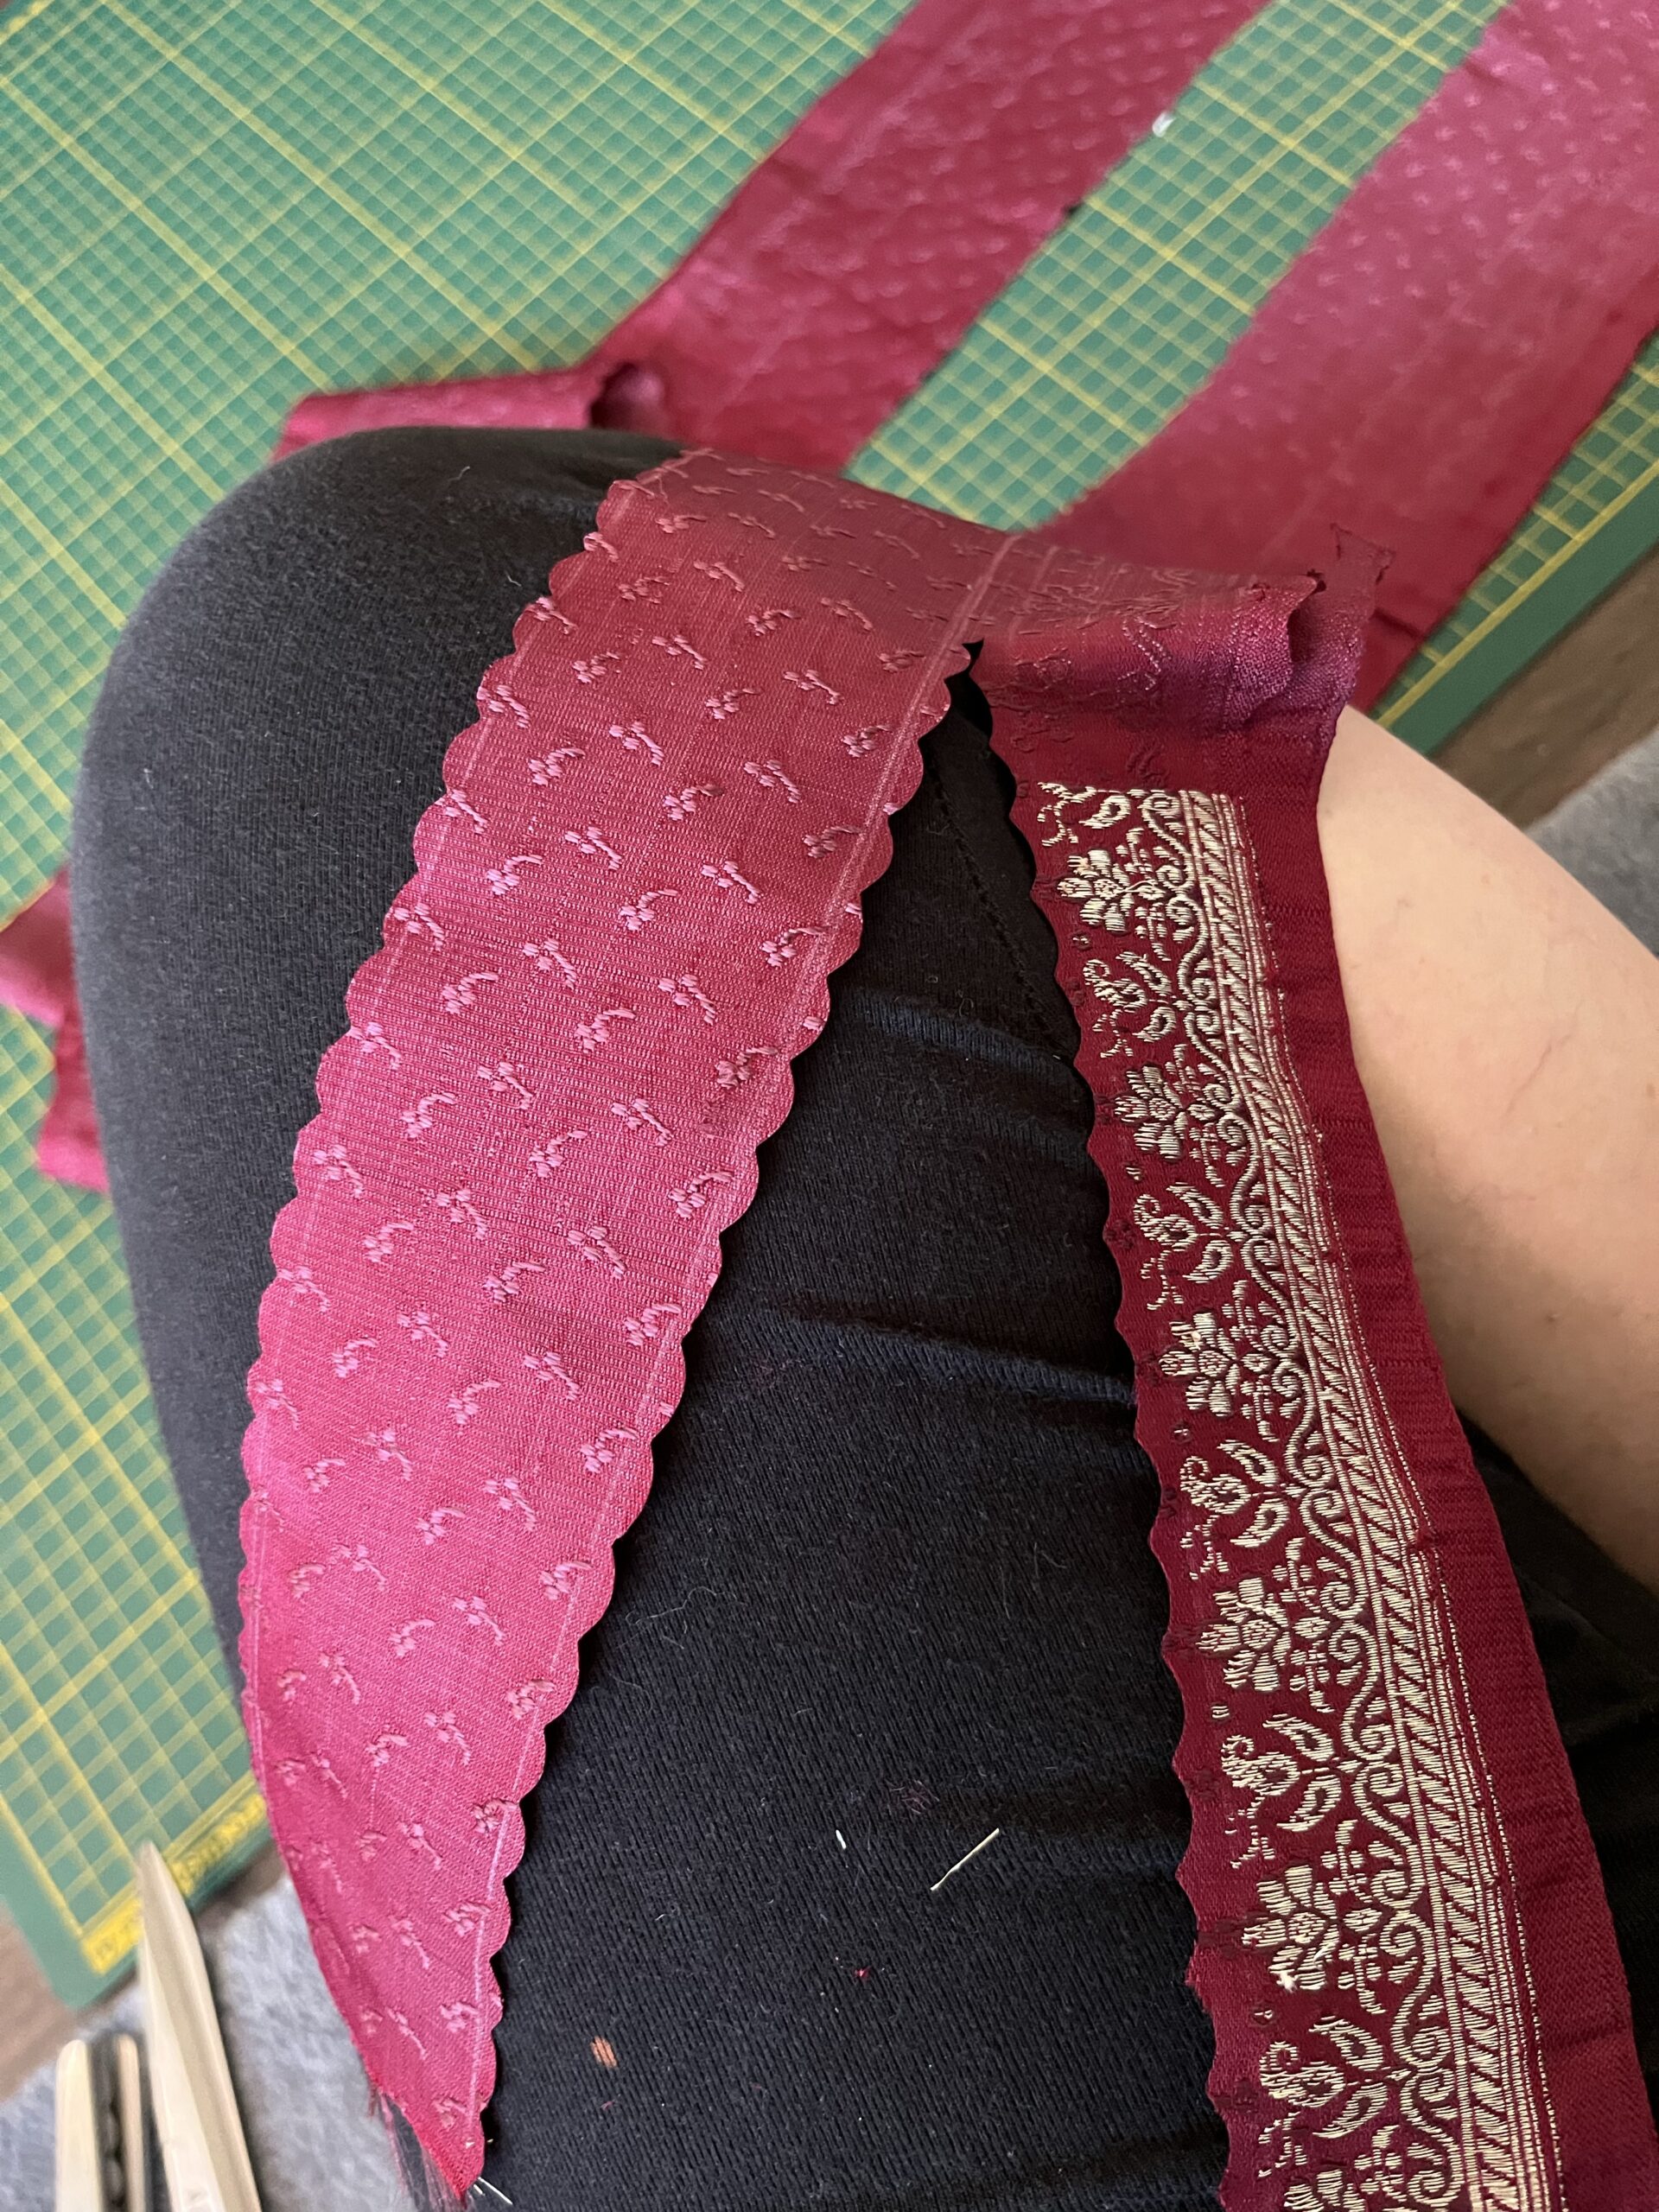
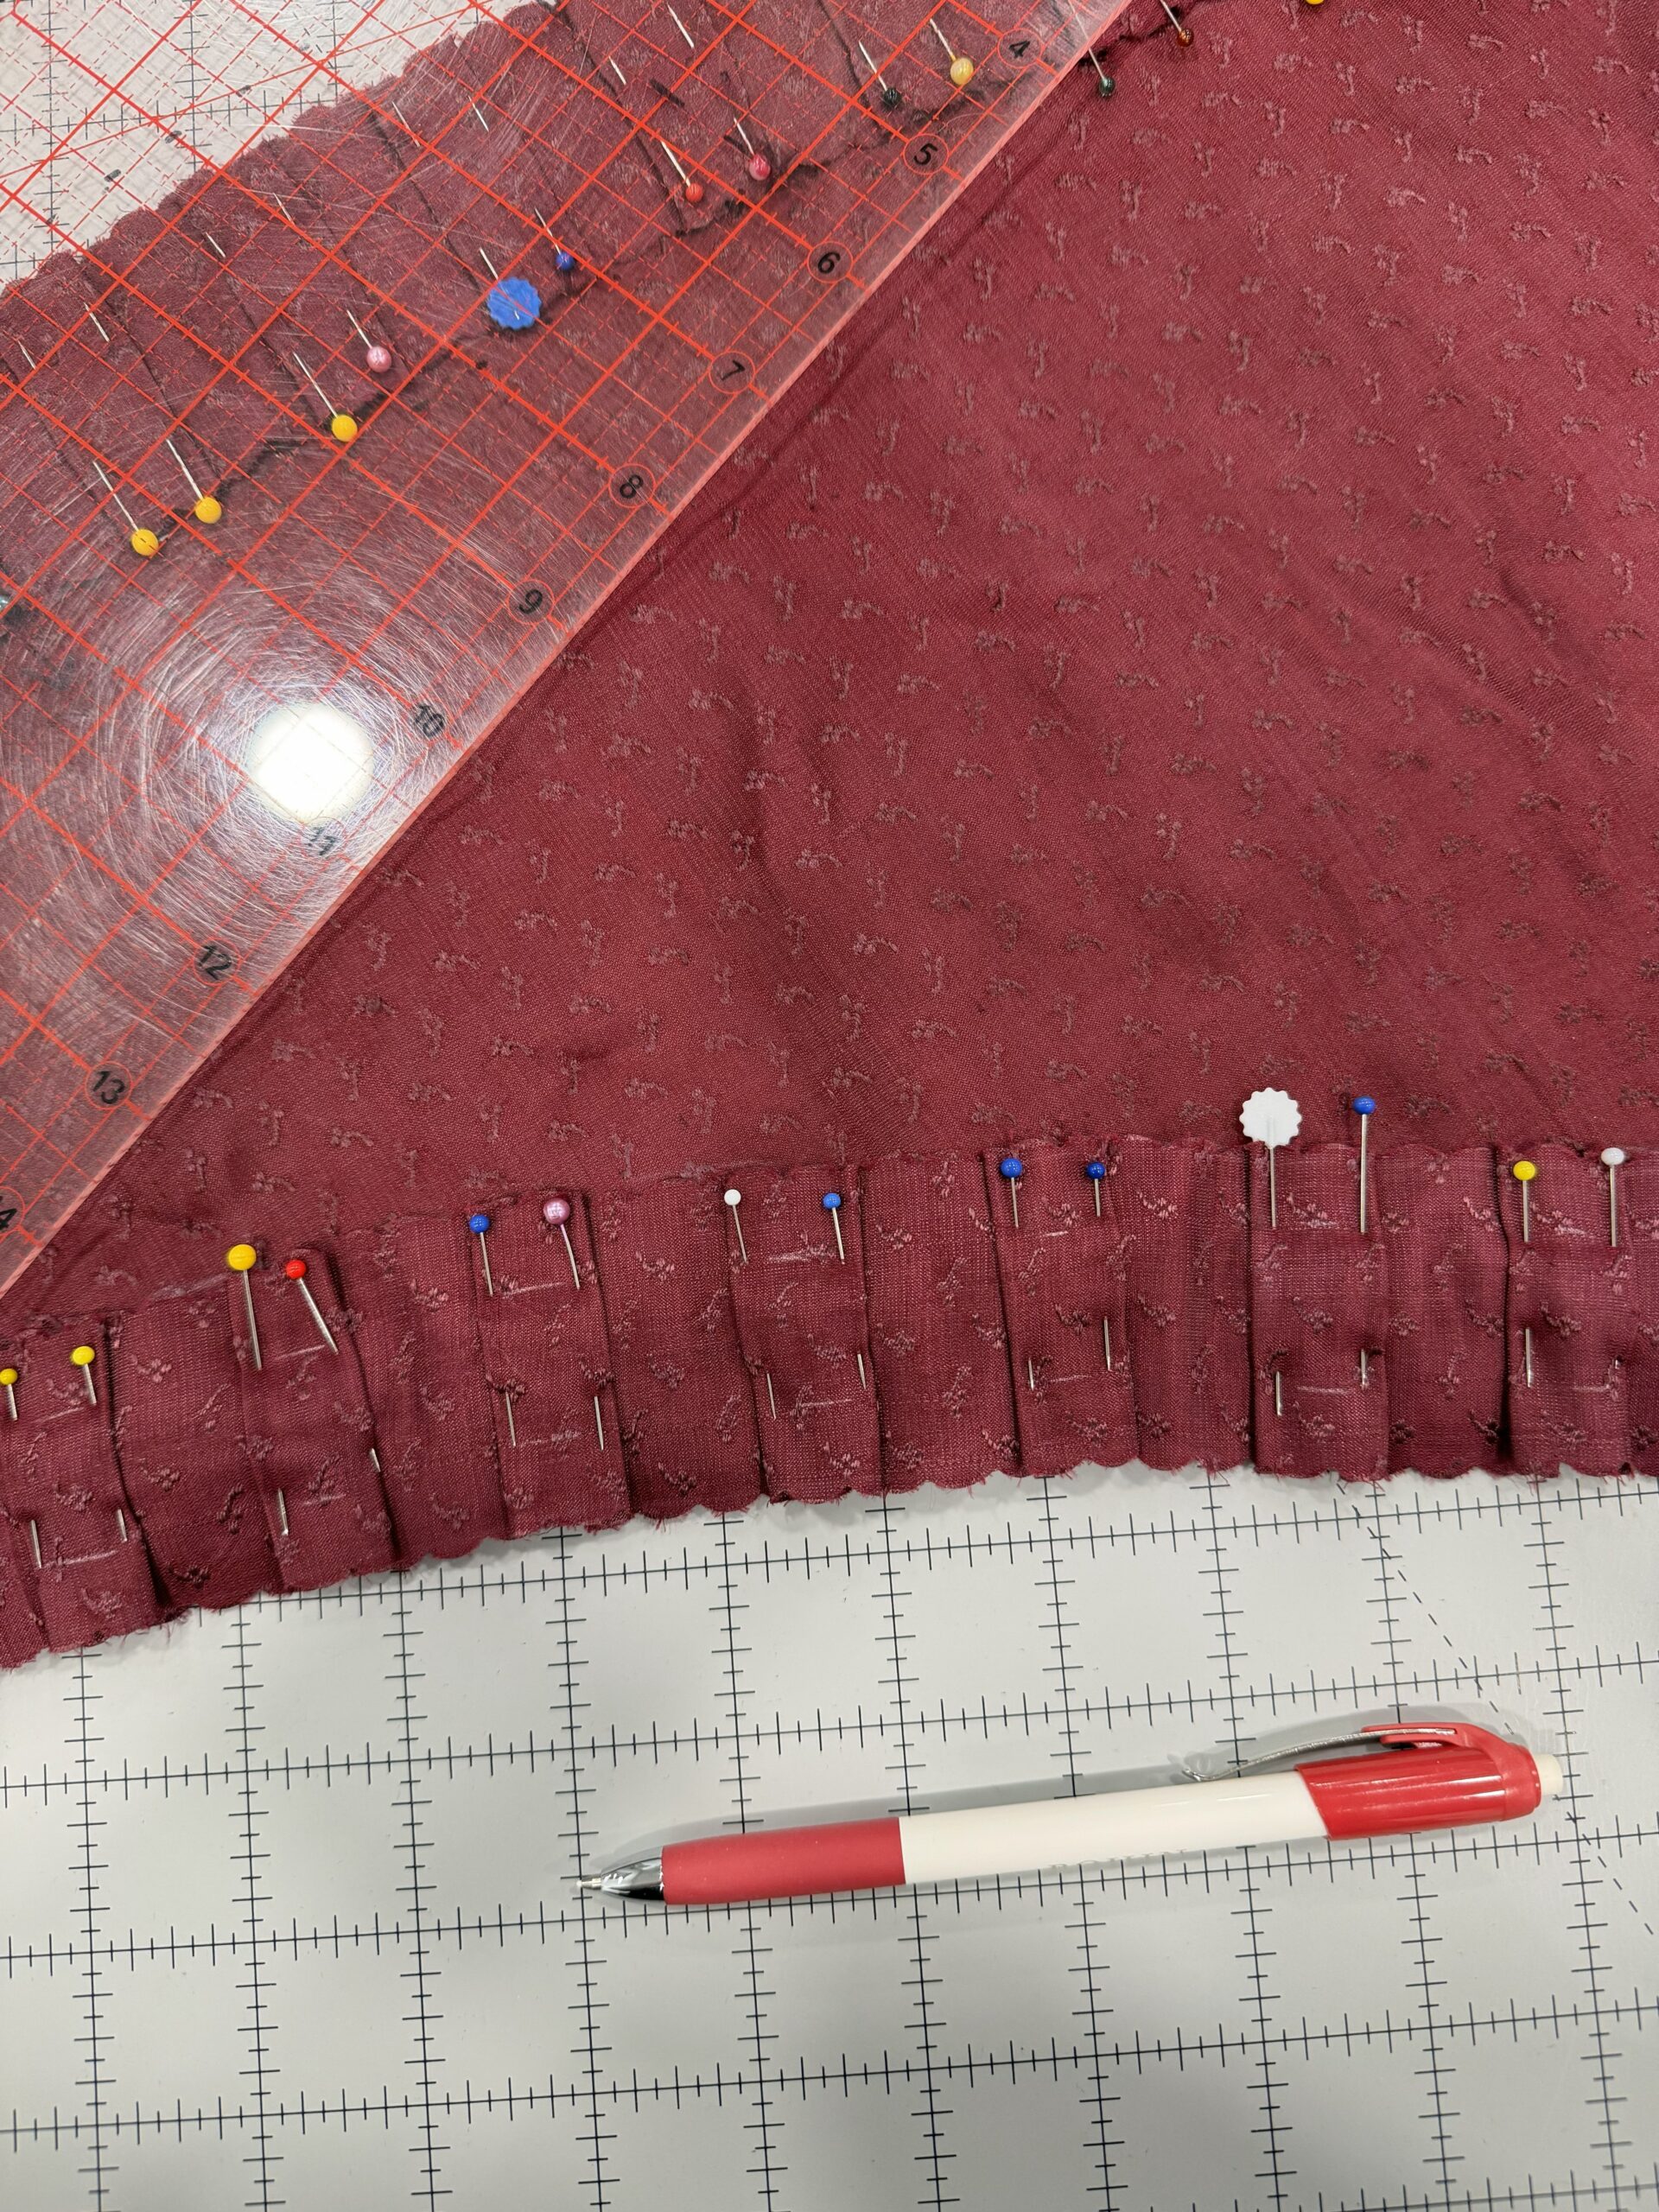
Using scalloped pinking shears, I cut the remainder of my saree into lots (and lots) of strips 2 inches wide.
To create the scallops, the fabric had to be cut with the scallops on the outside of the cutting lines. Accordingly, two strips, could not share the same cutting line, so I drew double lines 1/2″ apart, and-double checked which side of which line I was cutting before i cut.
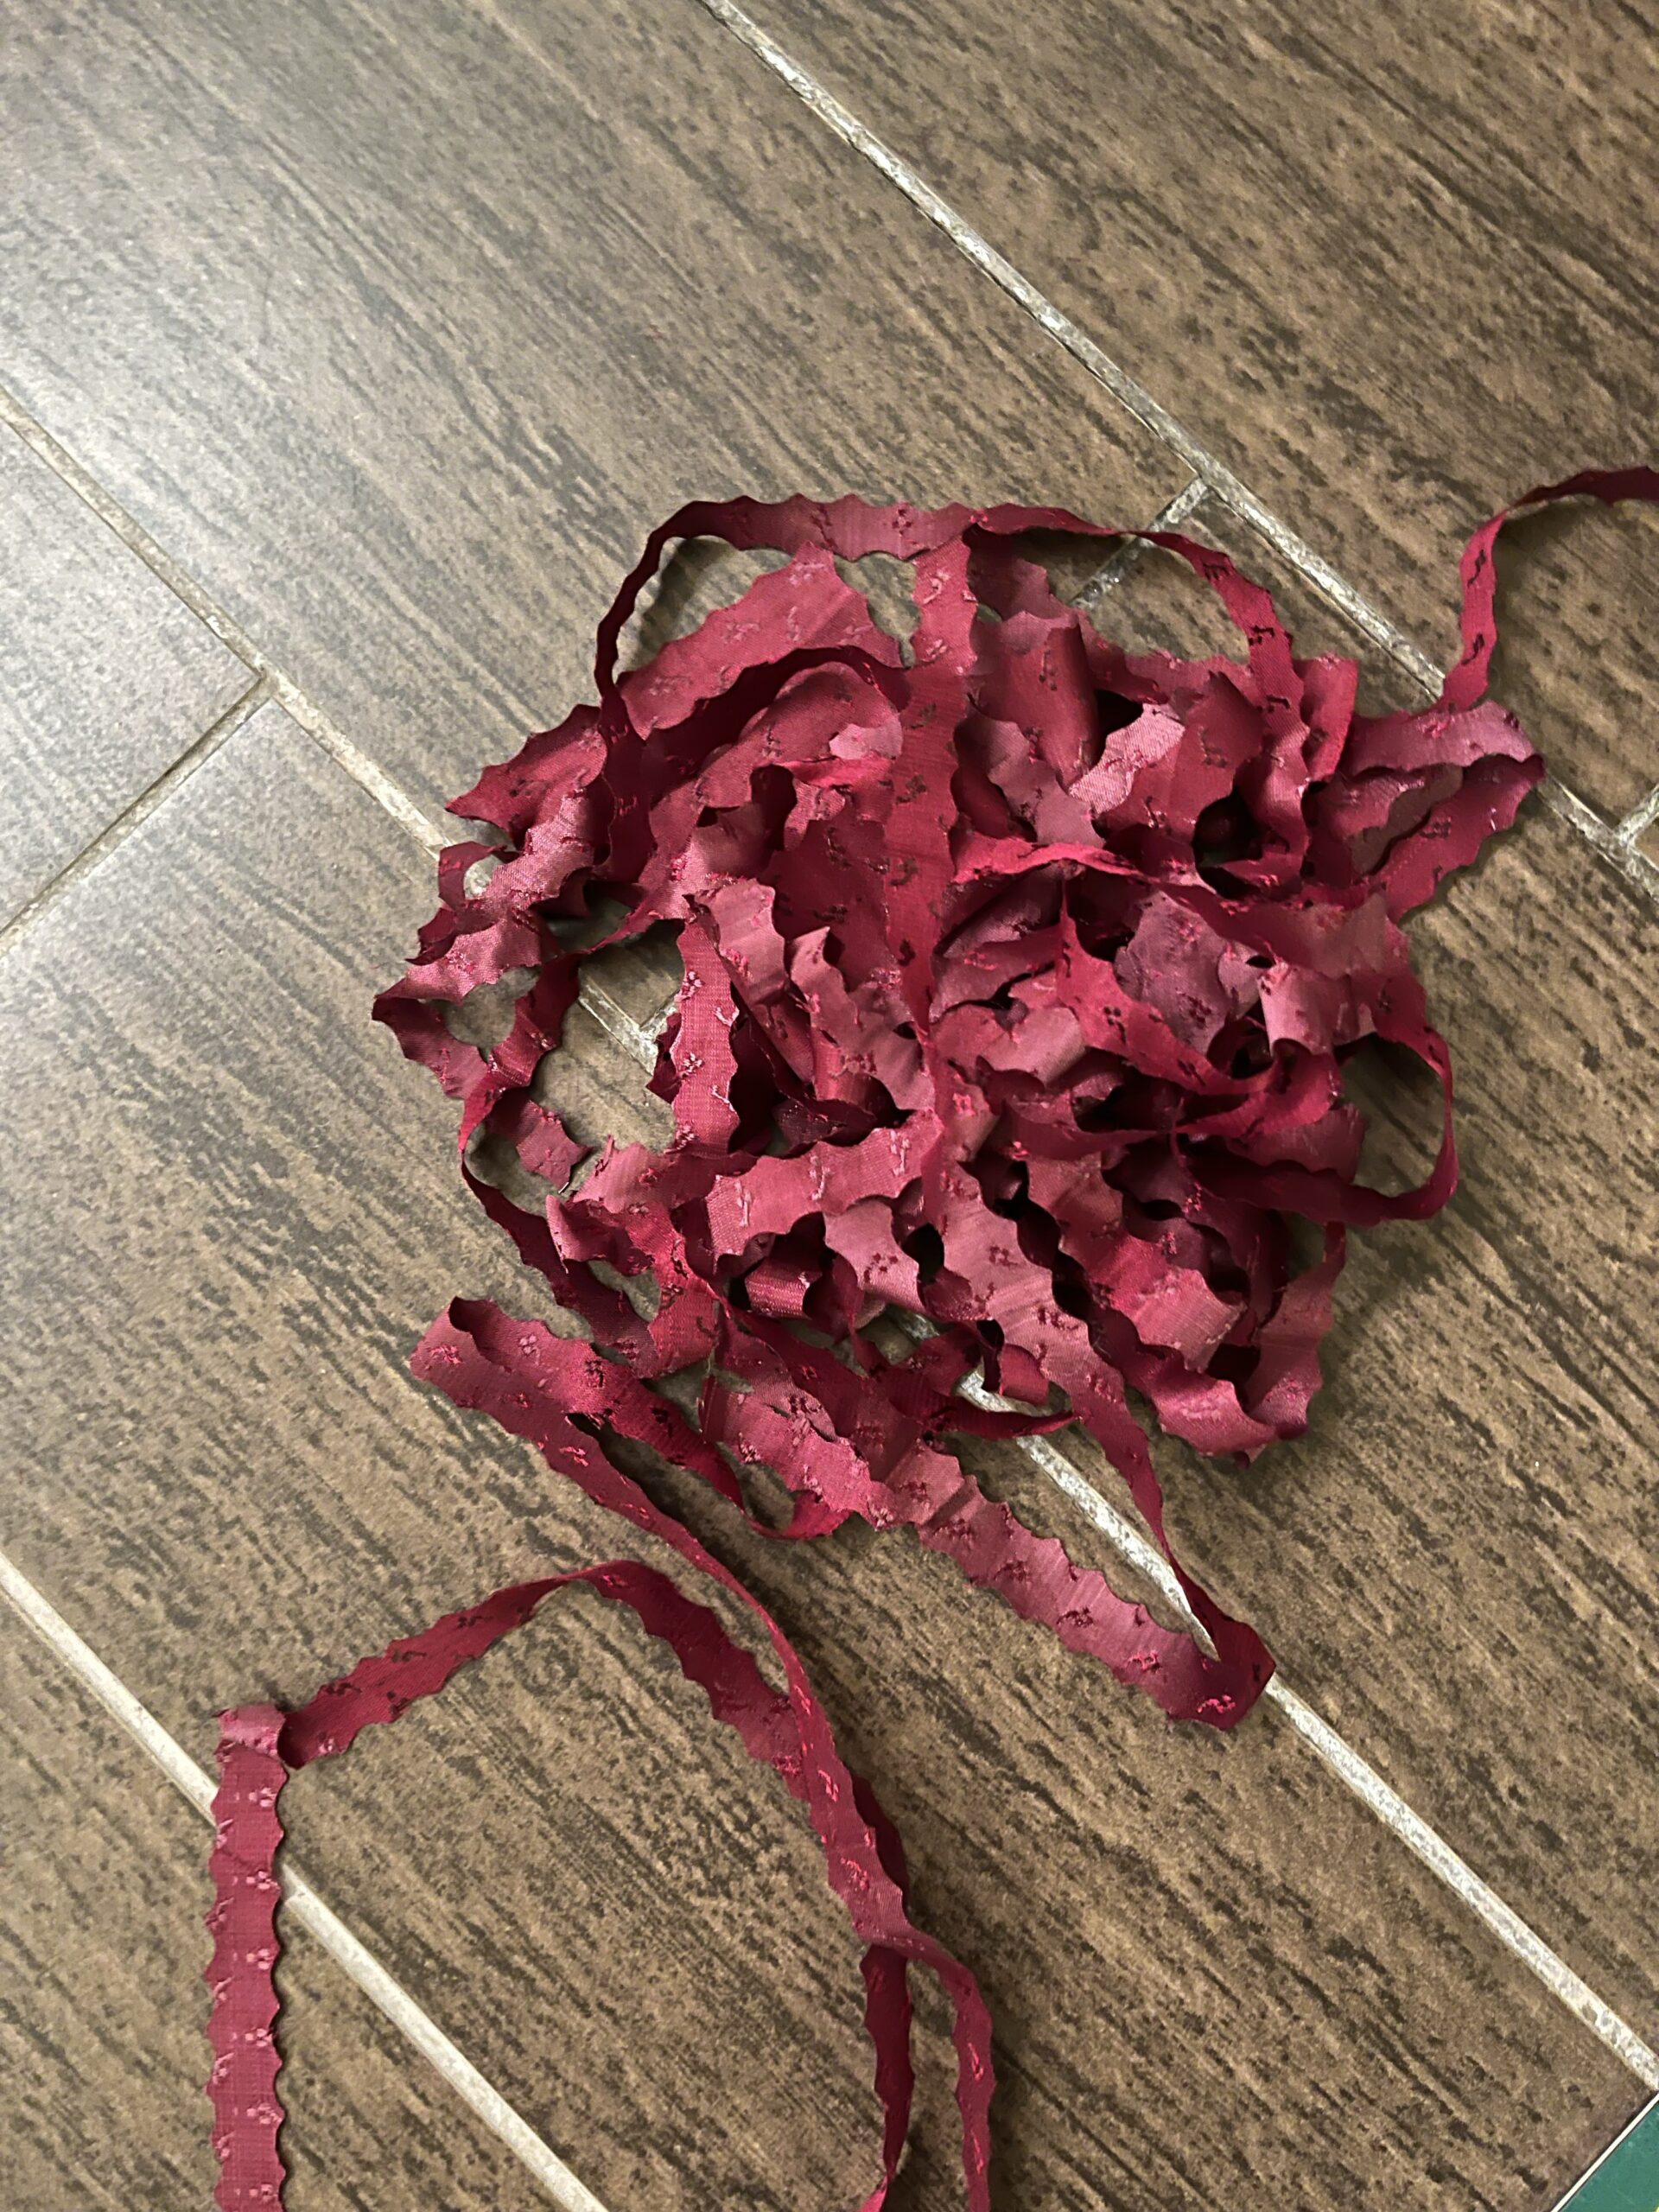
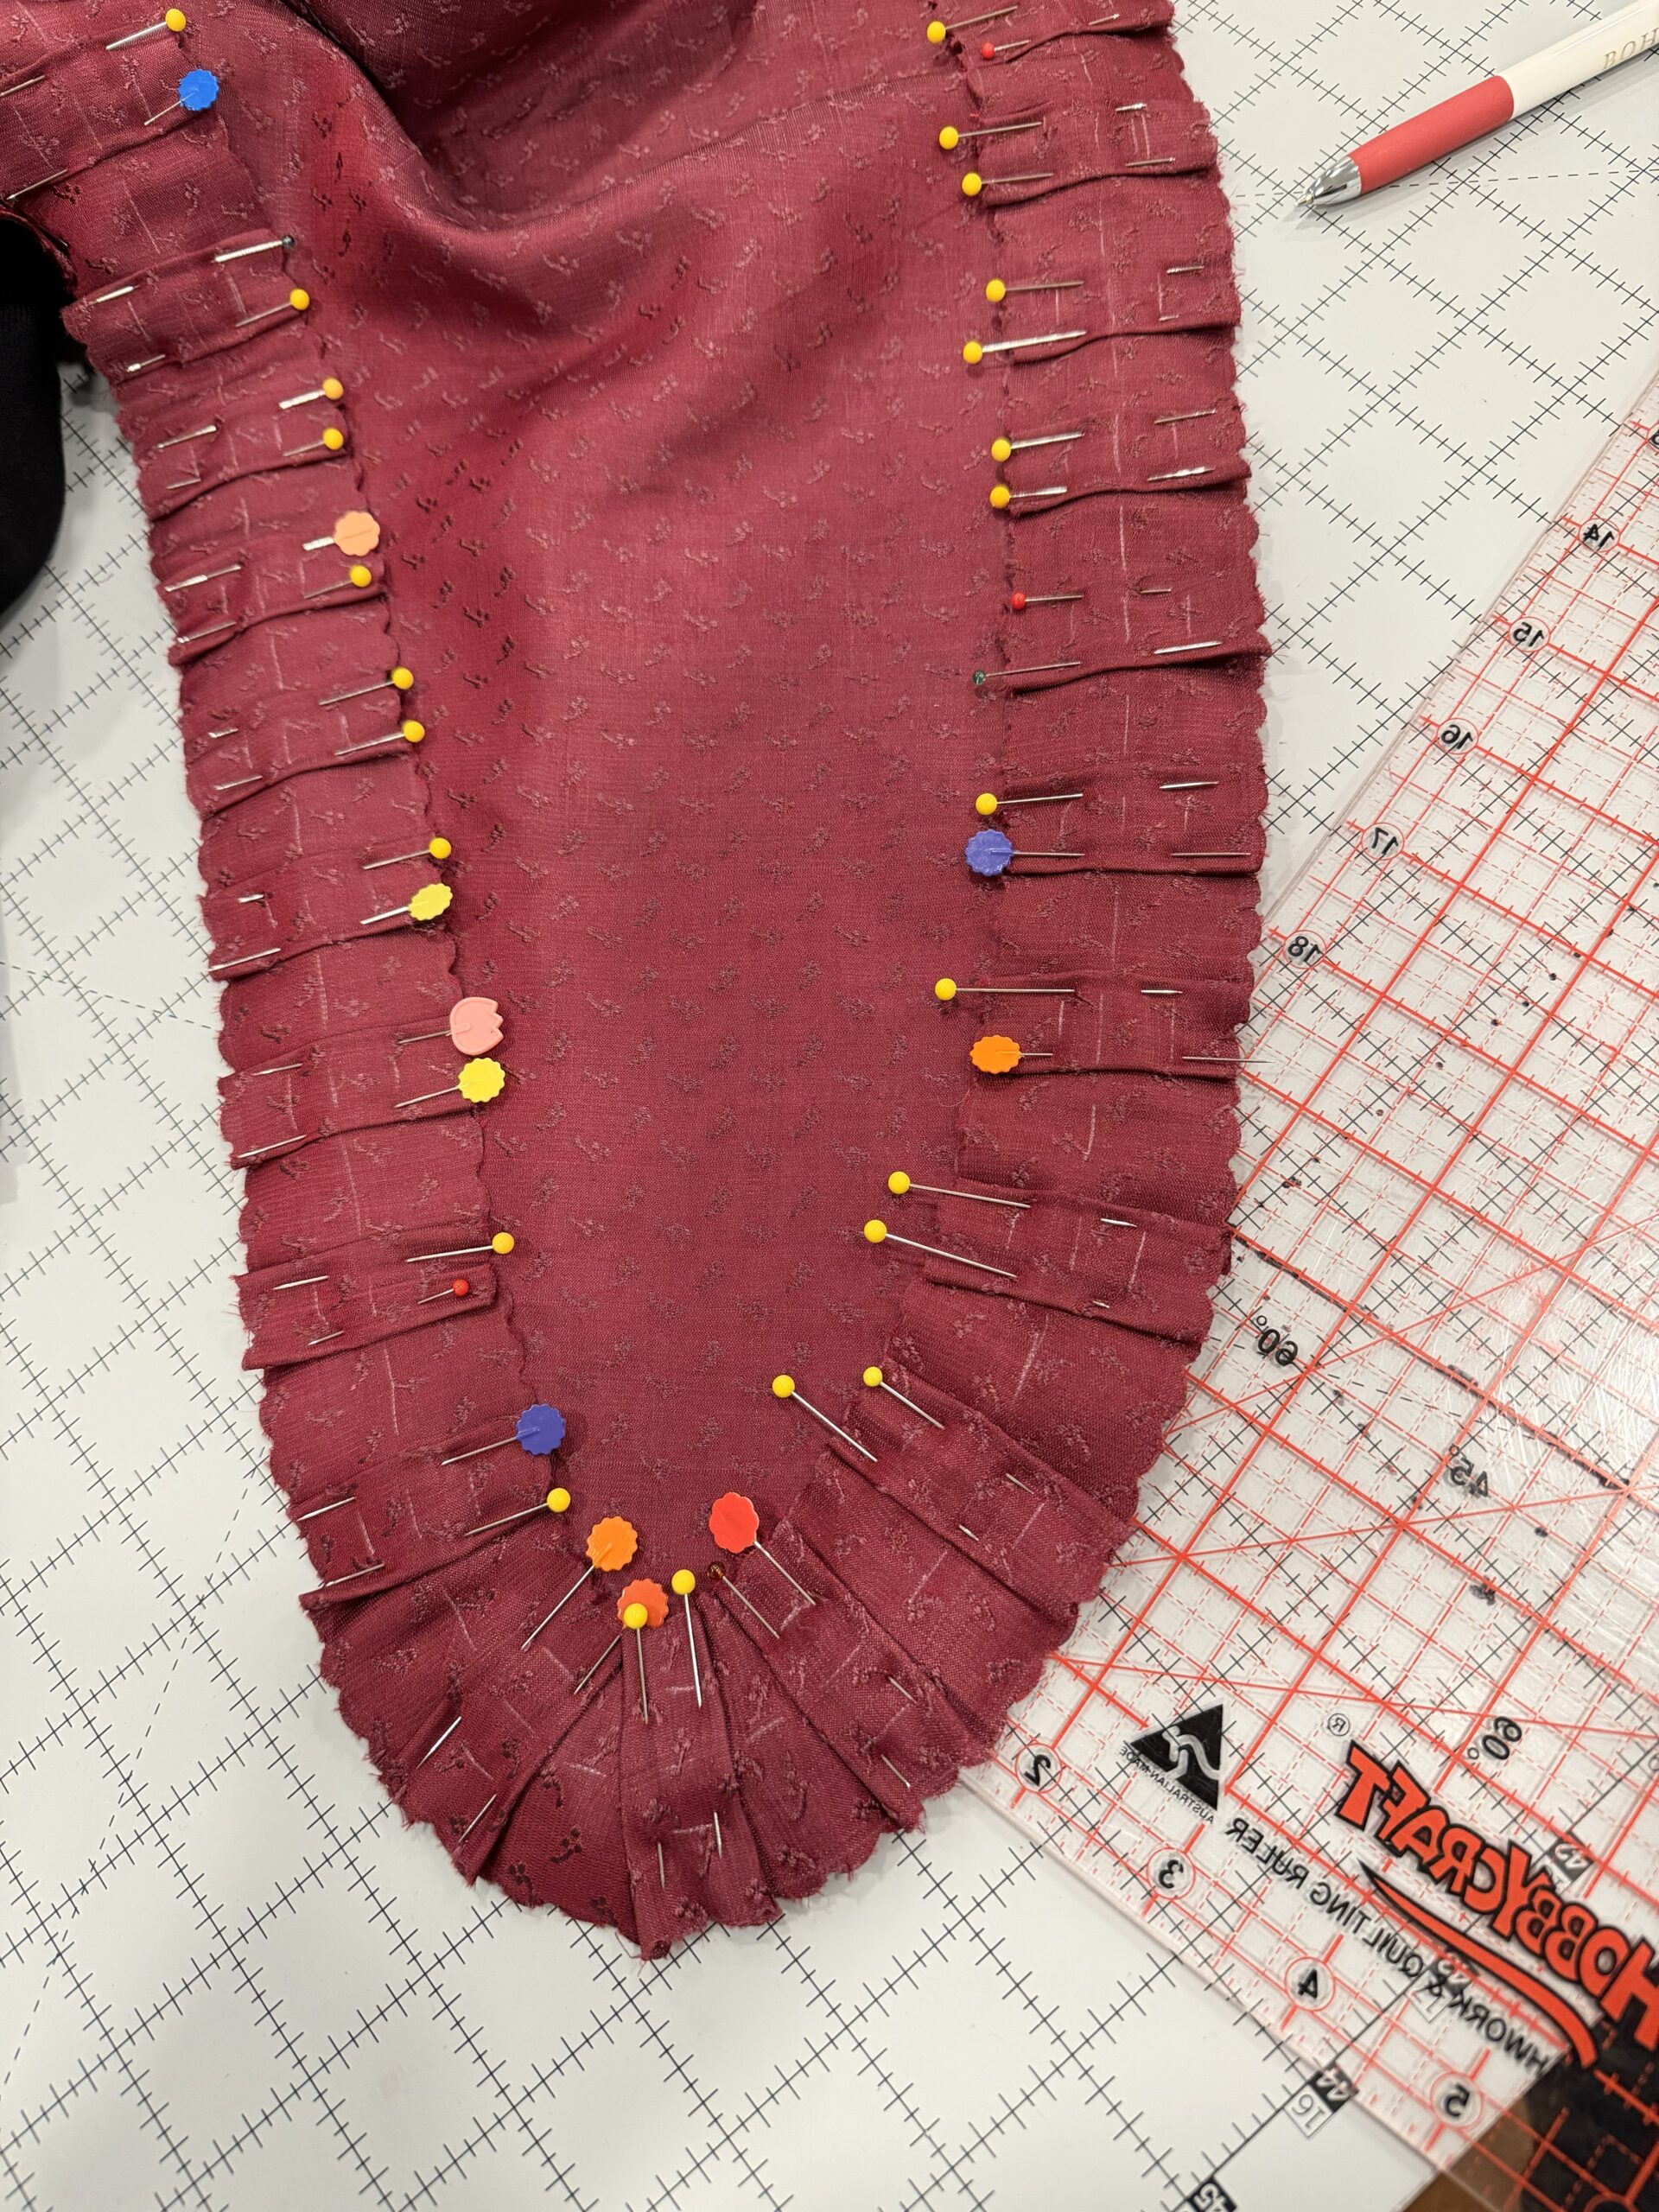
I sewed all of my strips together, not bothering to encase the raw edges as they’d be hidden on the back of the trim. Then I played with pleat proportions until I had a size and spacing that I liked, and I set to pinning pleats!
I sewed my pleats down with little stitches –
I added a set of ribbons to tie at the neck –
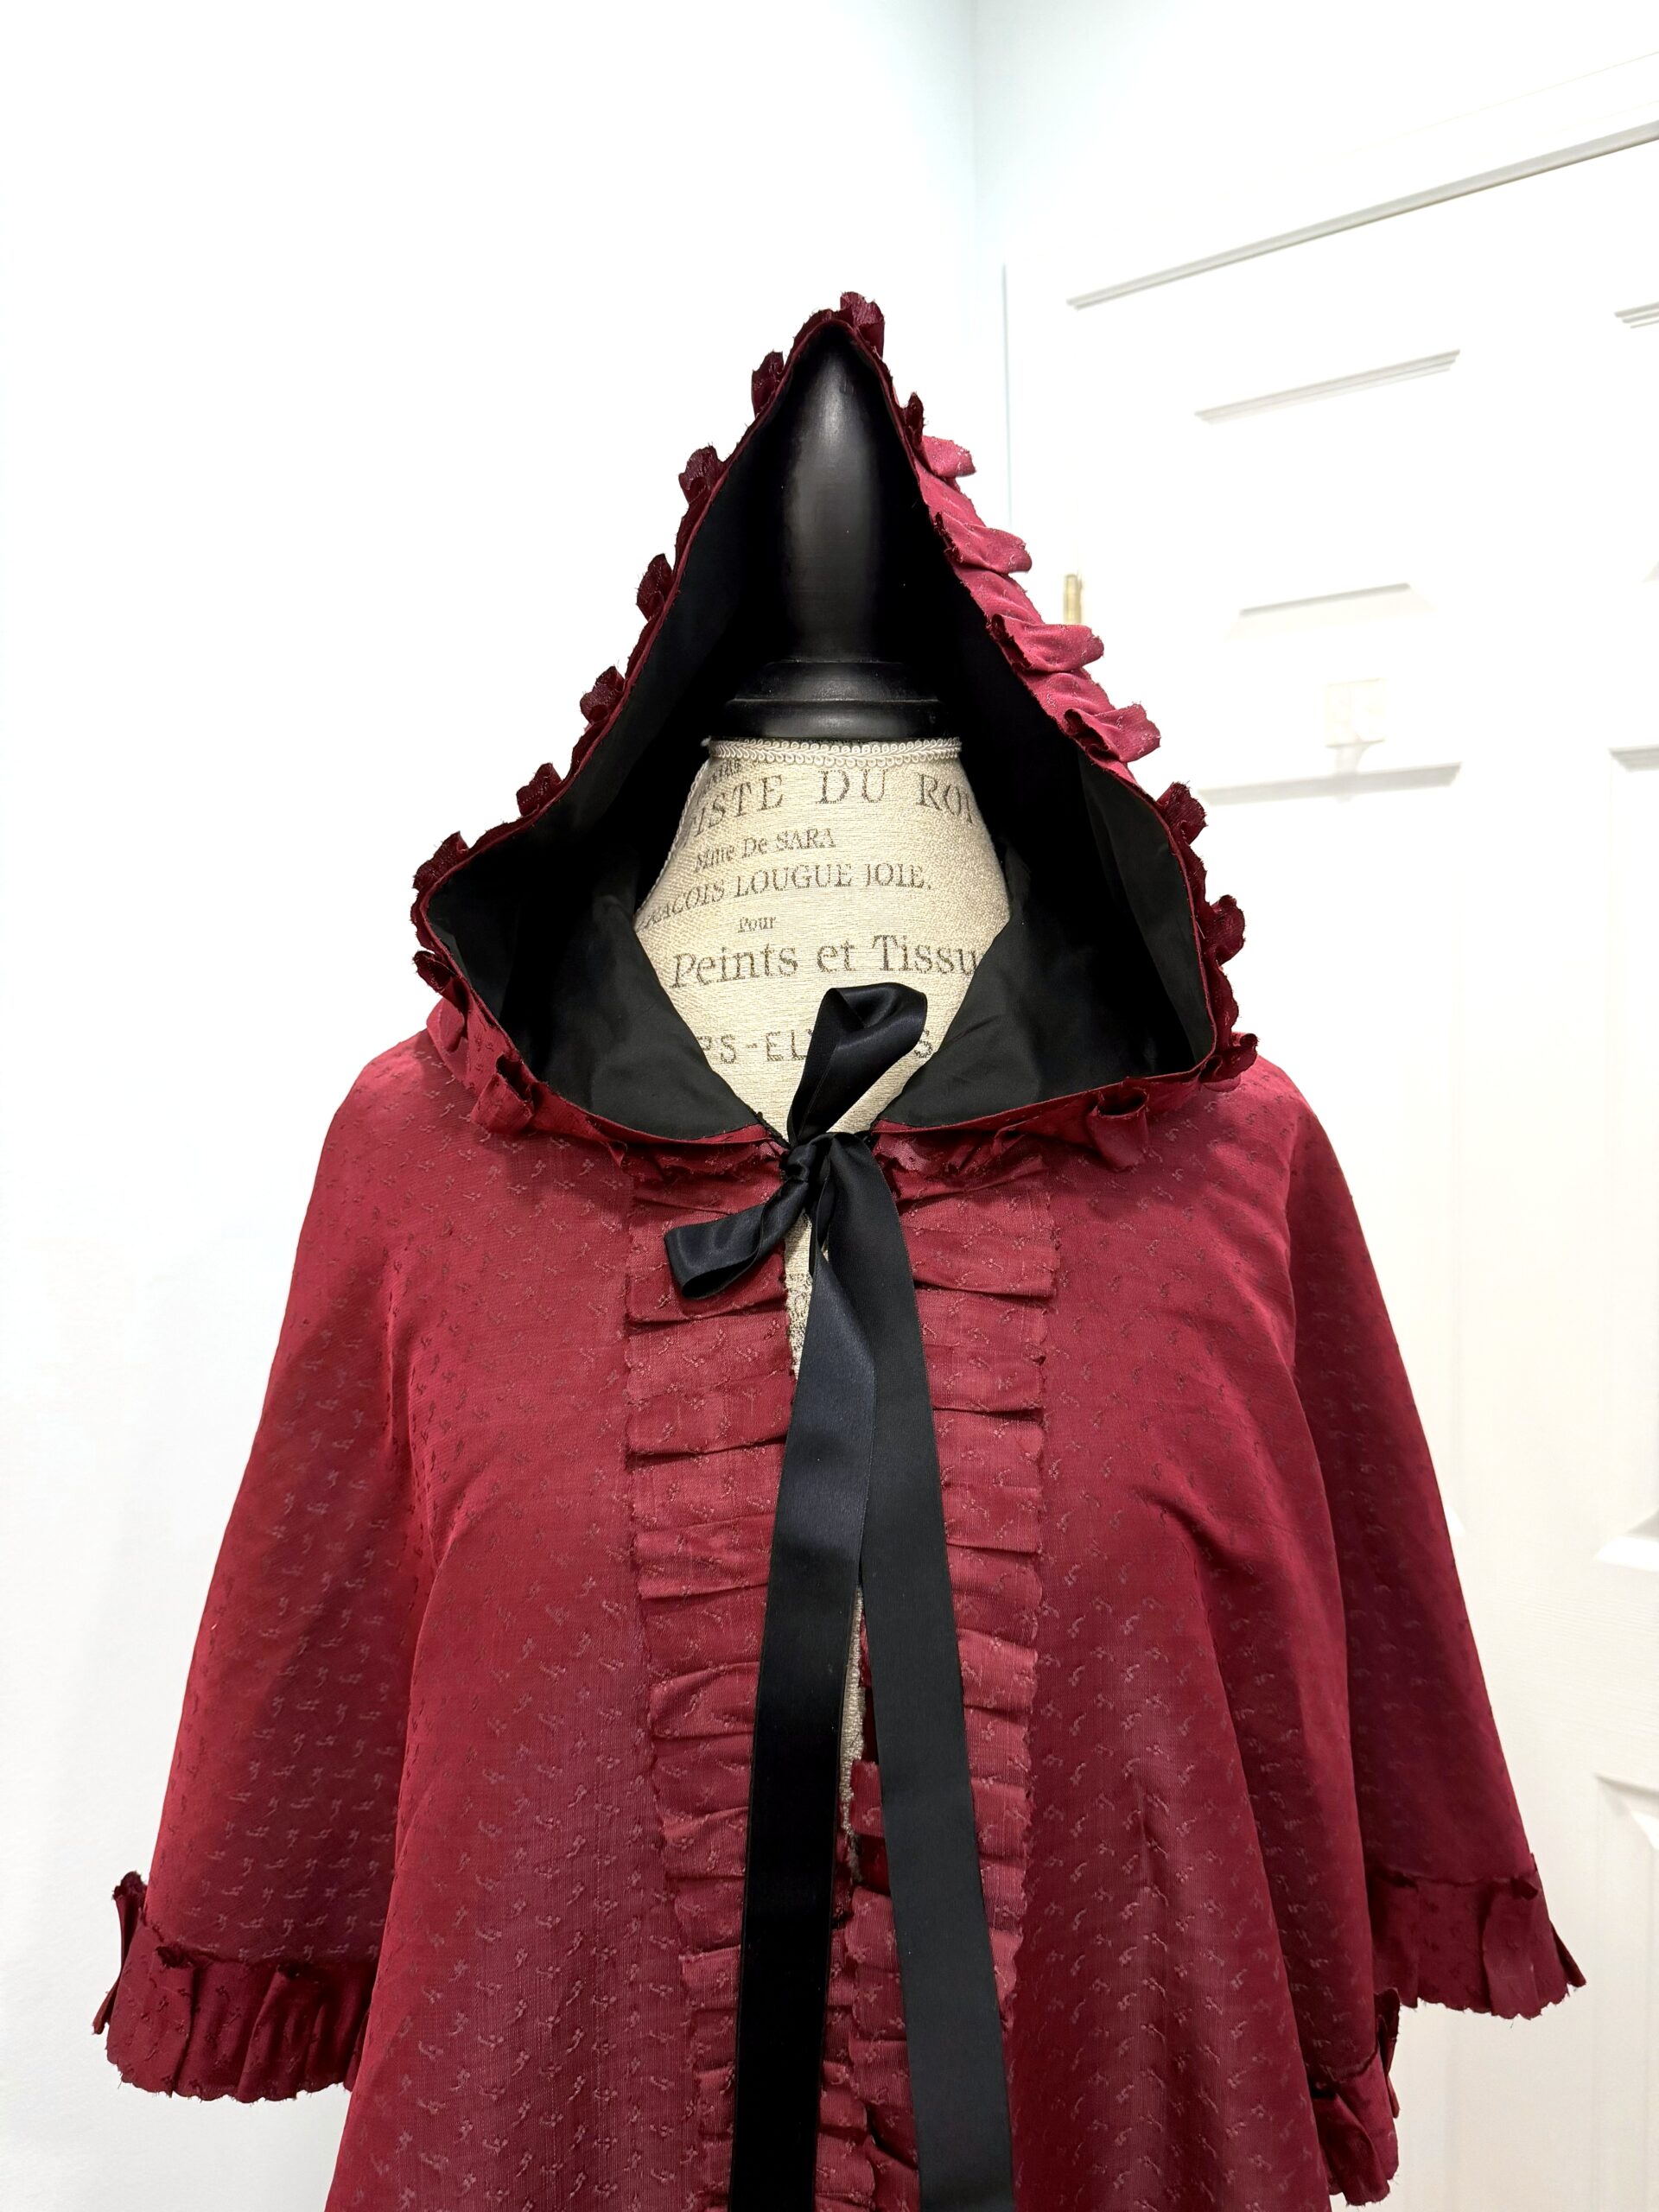
And voila! A burgundy silk Scroop Charlotte Mantle, ready to keep me not just elegant, but warm on cold costuming days!
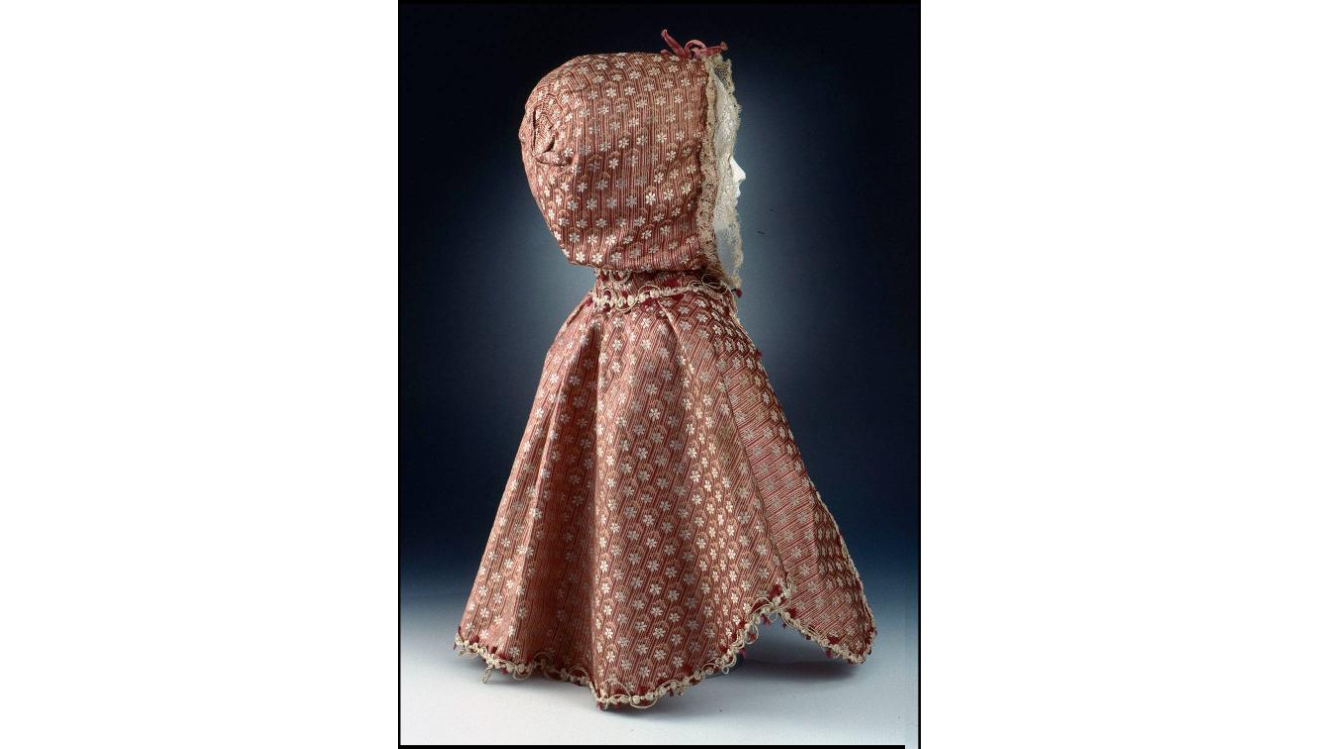
If you’re interested in some further reading, you’ll find a good database of extant 18th Century mantles here at Larsdatter.com
If you’d like to see a few other examples of the Scroop Charlotte Mantle, Lady Annabelle of Didmarton has made it in blue silk taffeta here
And Thimble Raven has made it here in a gorgeous red wool!