
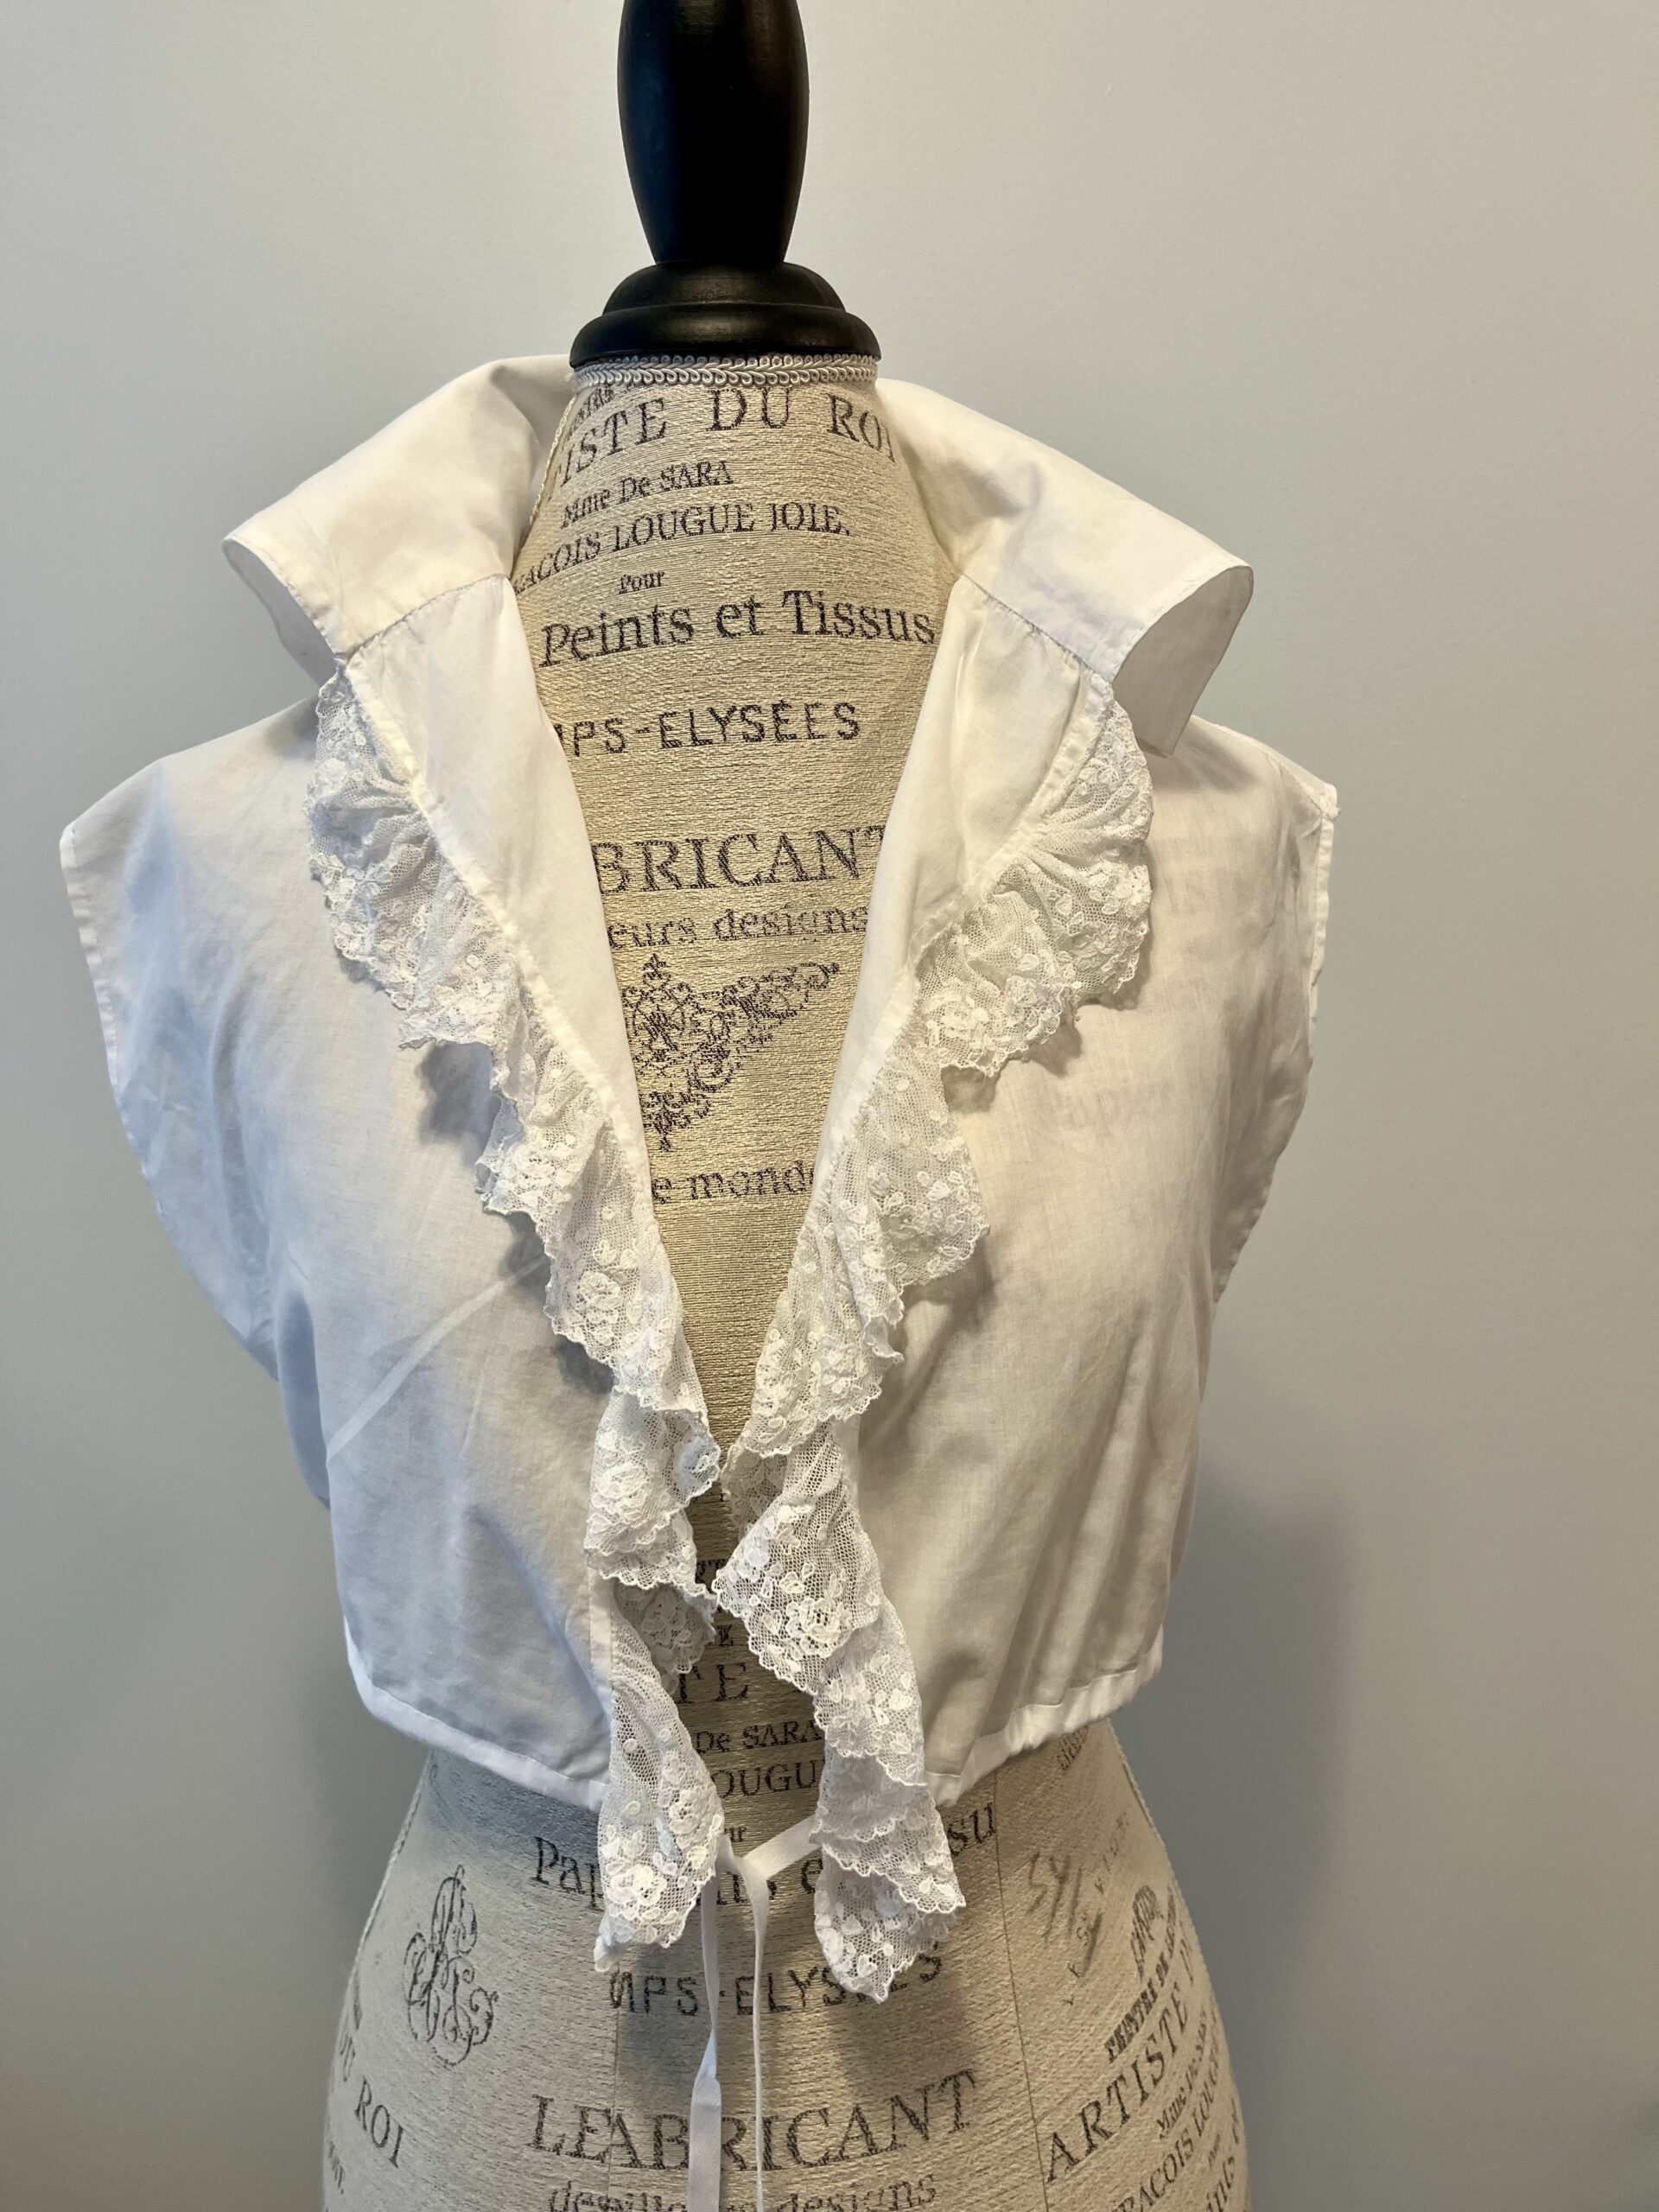
One long piece of white lace trim with a moth-nibbled middle makes… two short pieces of white lace trim! Obviously, my only recourse was to make a 1790s chemisette with lace ruffles down the front. But what if I wasn’t in a mood for wearing lace? Obviously I would have to make a second chemisette and leave that one plain! Twice the chemisette means twice the amount of stroked gathers, so here is a tutorial for a pair of 1790s chemisettes, ready for any late regency sartorial vibe!
Sometimes the thing you mean to sew isn’t what you get to sew. A piece of vintage lace destined for a 1750s cap turned out to have a rotted section right in the middle – it was shredded, full of holes, and totally unusable.

I could piece it, but I had another idea. Previously I’d seen on the American Duchess blog a chemisette whose fronts were trimmed with large fluffy lace ruffles. Split in half, with the rotted middle chopped out, my lace would be perfect for a chemisette. As frosting on the already frosted chemisette (it’s a bad metaphor but I’m sticking with it) the American Duchess chemisette pattern has a stroke gathered neckline, and I DO love stroked gathering. It is slow and meditative with lots of careful little steps and lots of careful little stitches, and the result is pretty and satisfying and NICE.
And because I like stroked gathering so much, by inexorable and logical processes of thought, I realized I’d have to make a second, unadorned chemisette, too.
Taking the pattern from the American Duchess Book, I added an inch and a half of length to the bodice to suit my long torso, then cut two chemisettes from fine while cotton lawn.
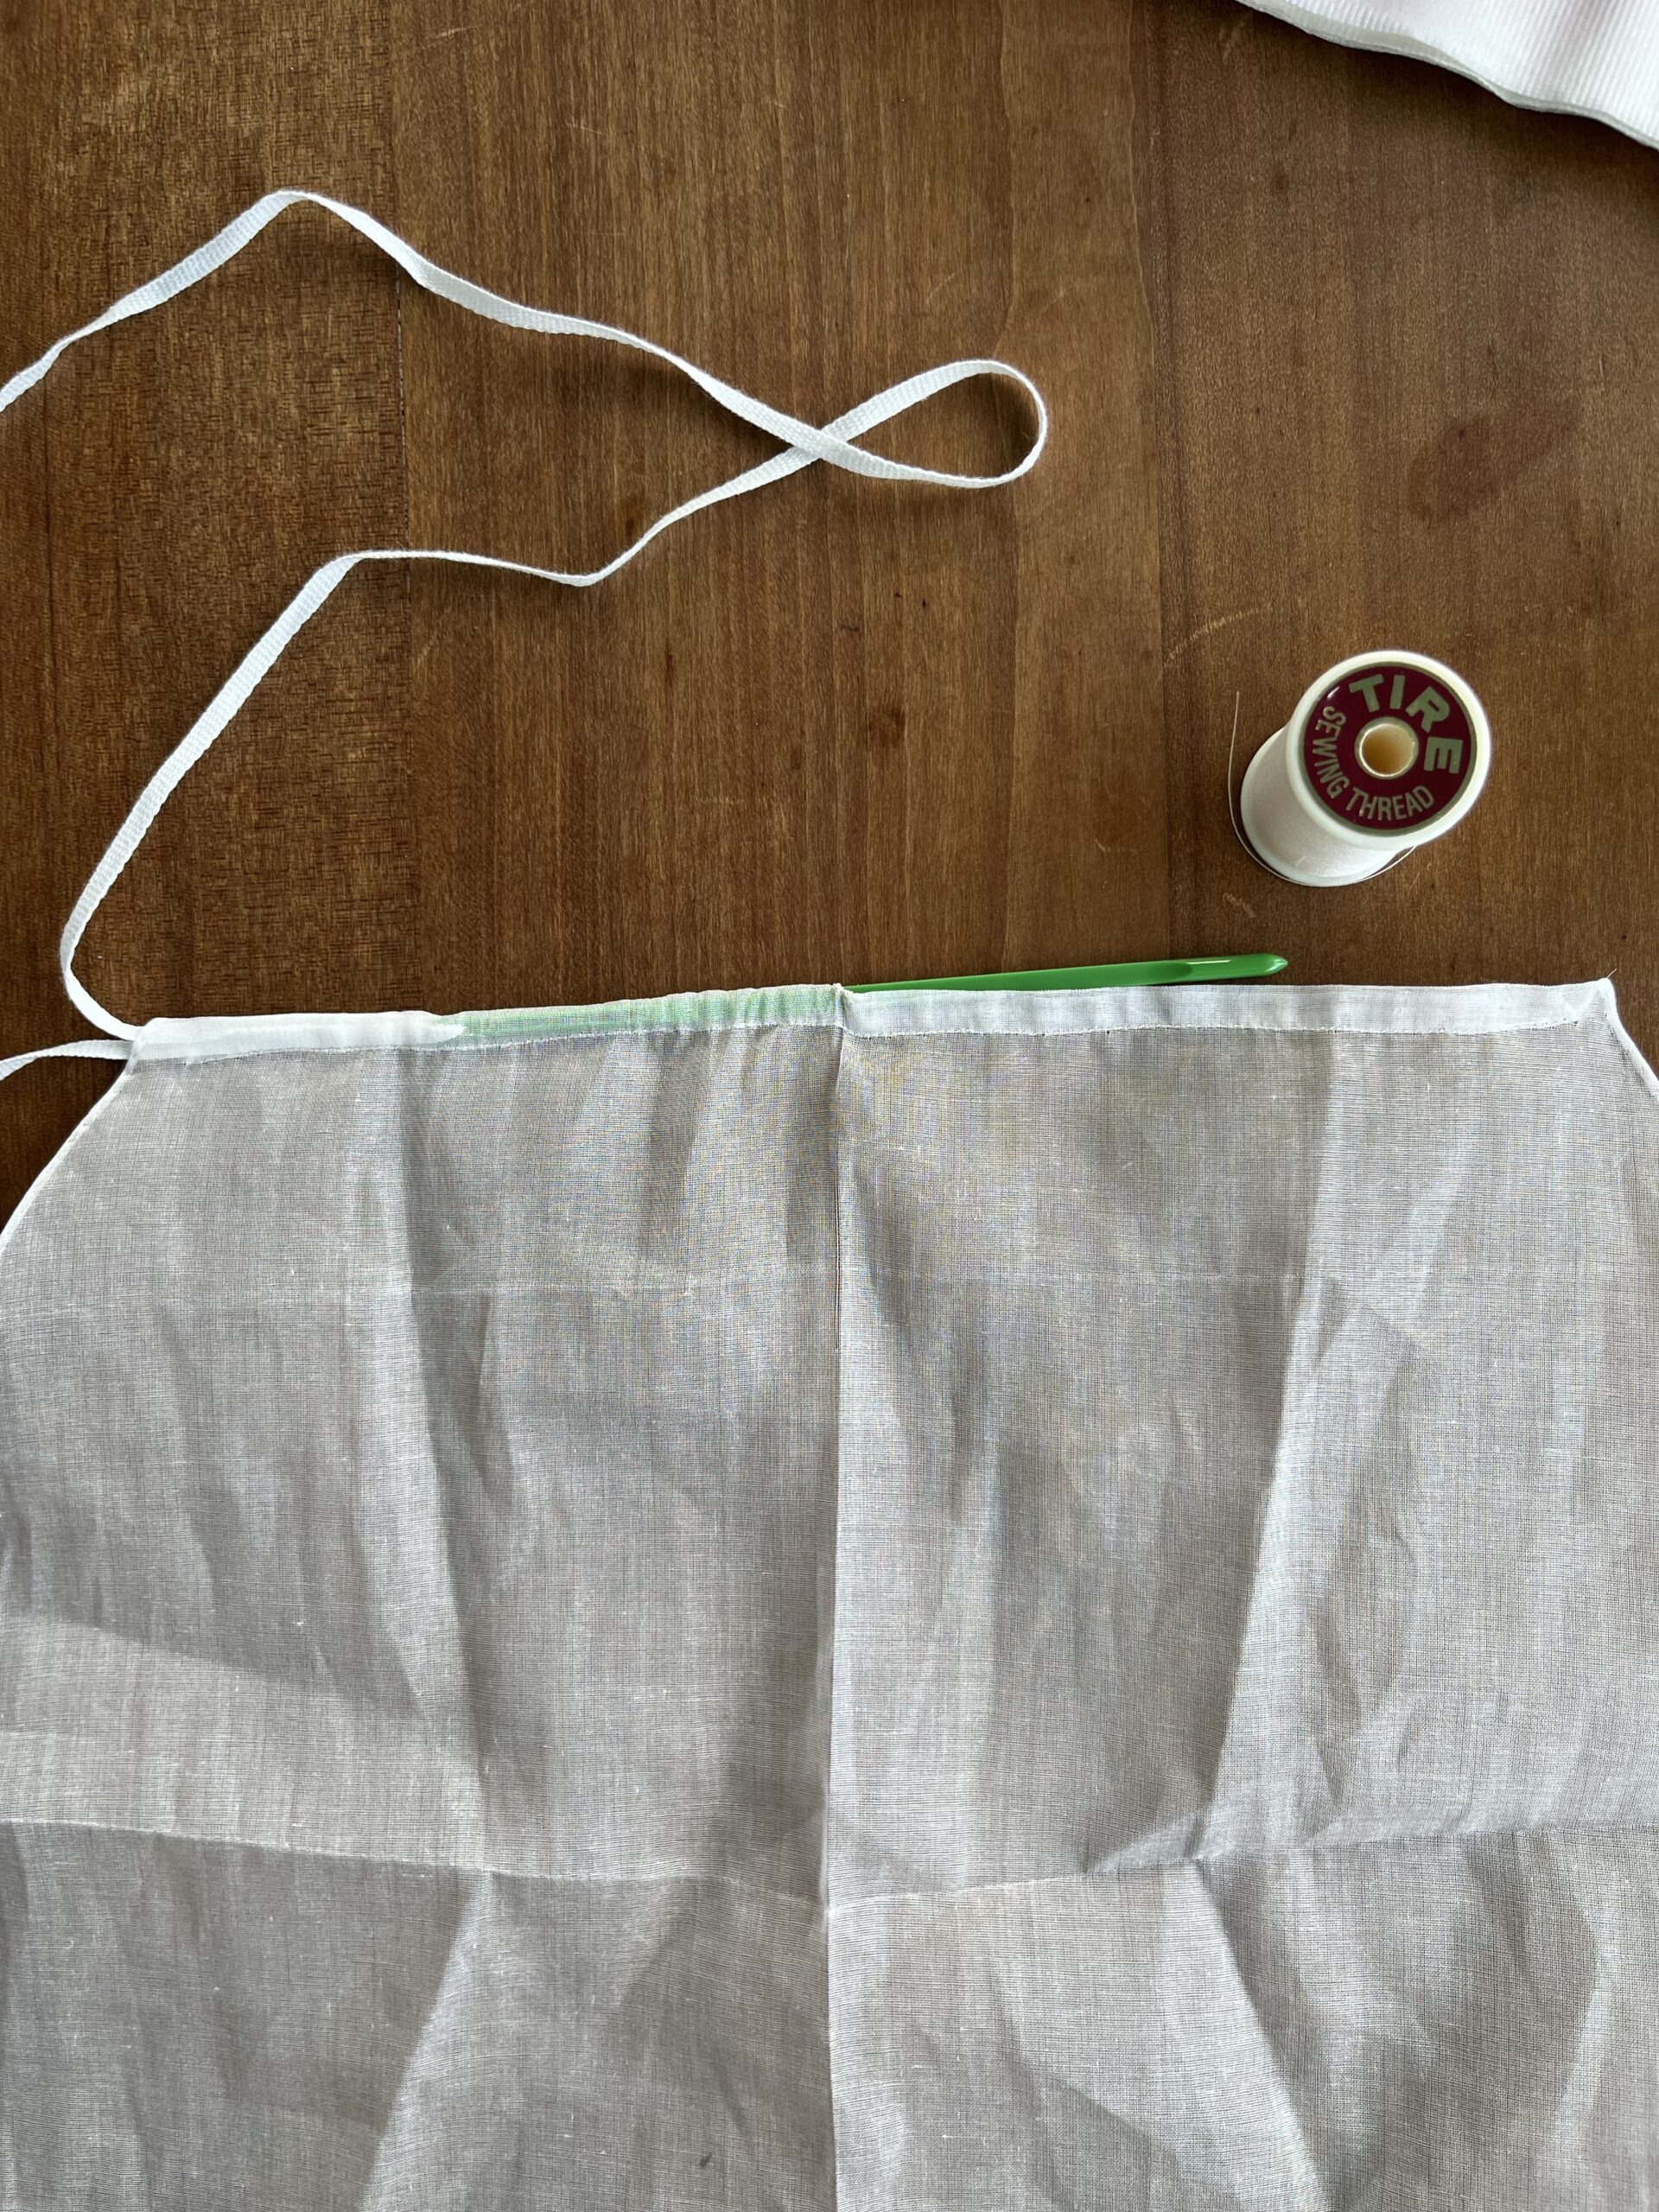
I sewed the fronts to the backs, hemmed the sides and the fronts, and sewed drawstring channels into the bottoms.
I sewed the sides of the collars together, leaving the bottom inch unsewn (so that I could slide the stroke-gathered necklines in later.) Then I pressed the seam allowances of the long collar edges up to the inside.
Preliminaries out of the way, I could start on the fun stuff. Time to stroke gather my pair of 1790s chemisettes!
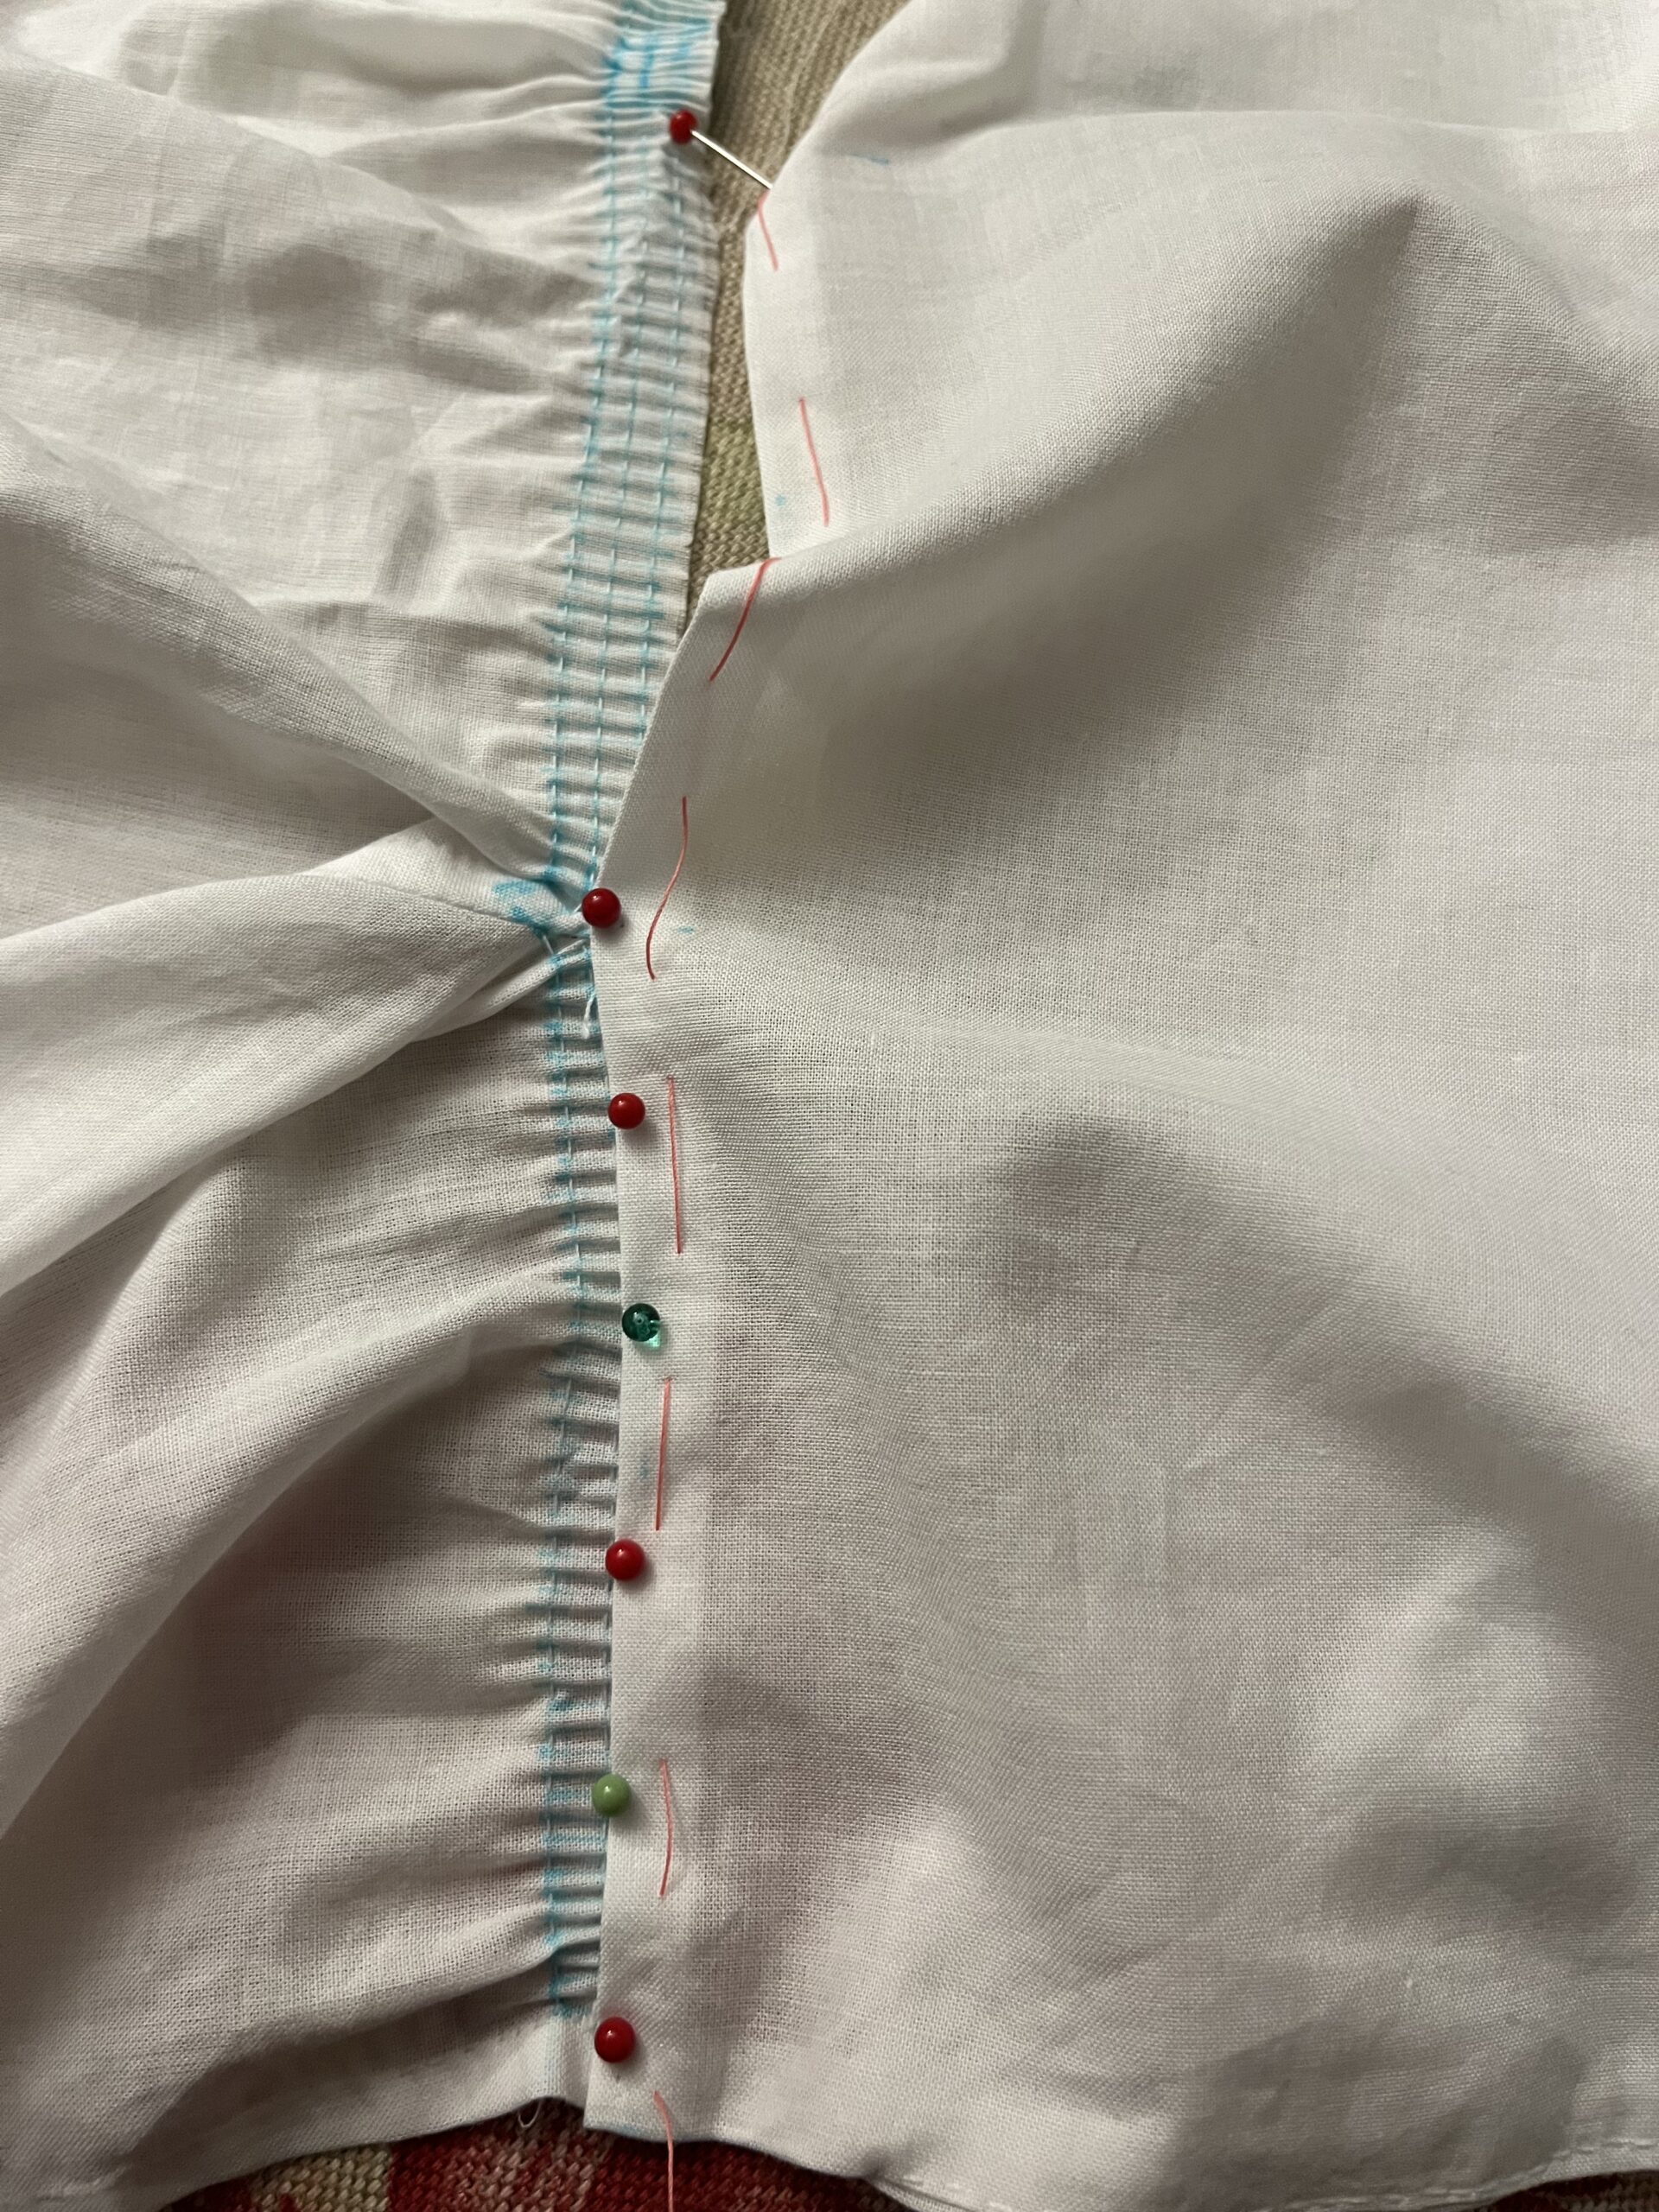
I like to mark the gathering lines for my stroked gathers. Using a water soluble pen, I drew 3 parallel lines along the length of the neckline, the first on the seam line, and the others two 1/8 inch above and below my first line. Then I drew lots and lots of short perpendicular lines, all about 1/8 of an inch apart. The corners get tricky, so you sort of have to eyeball those sections and wing it.
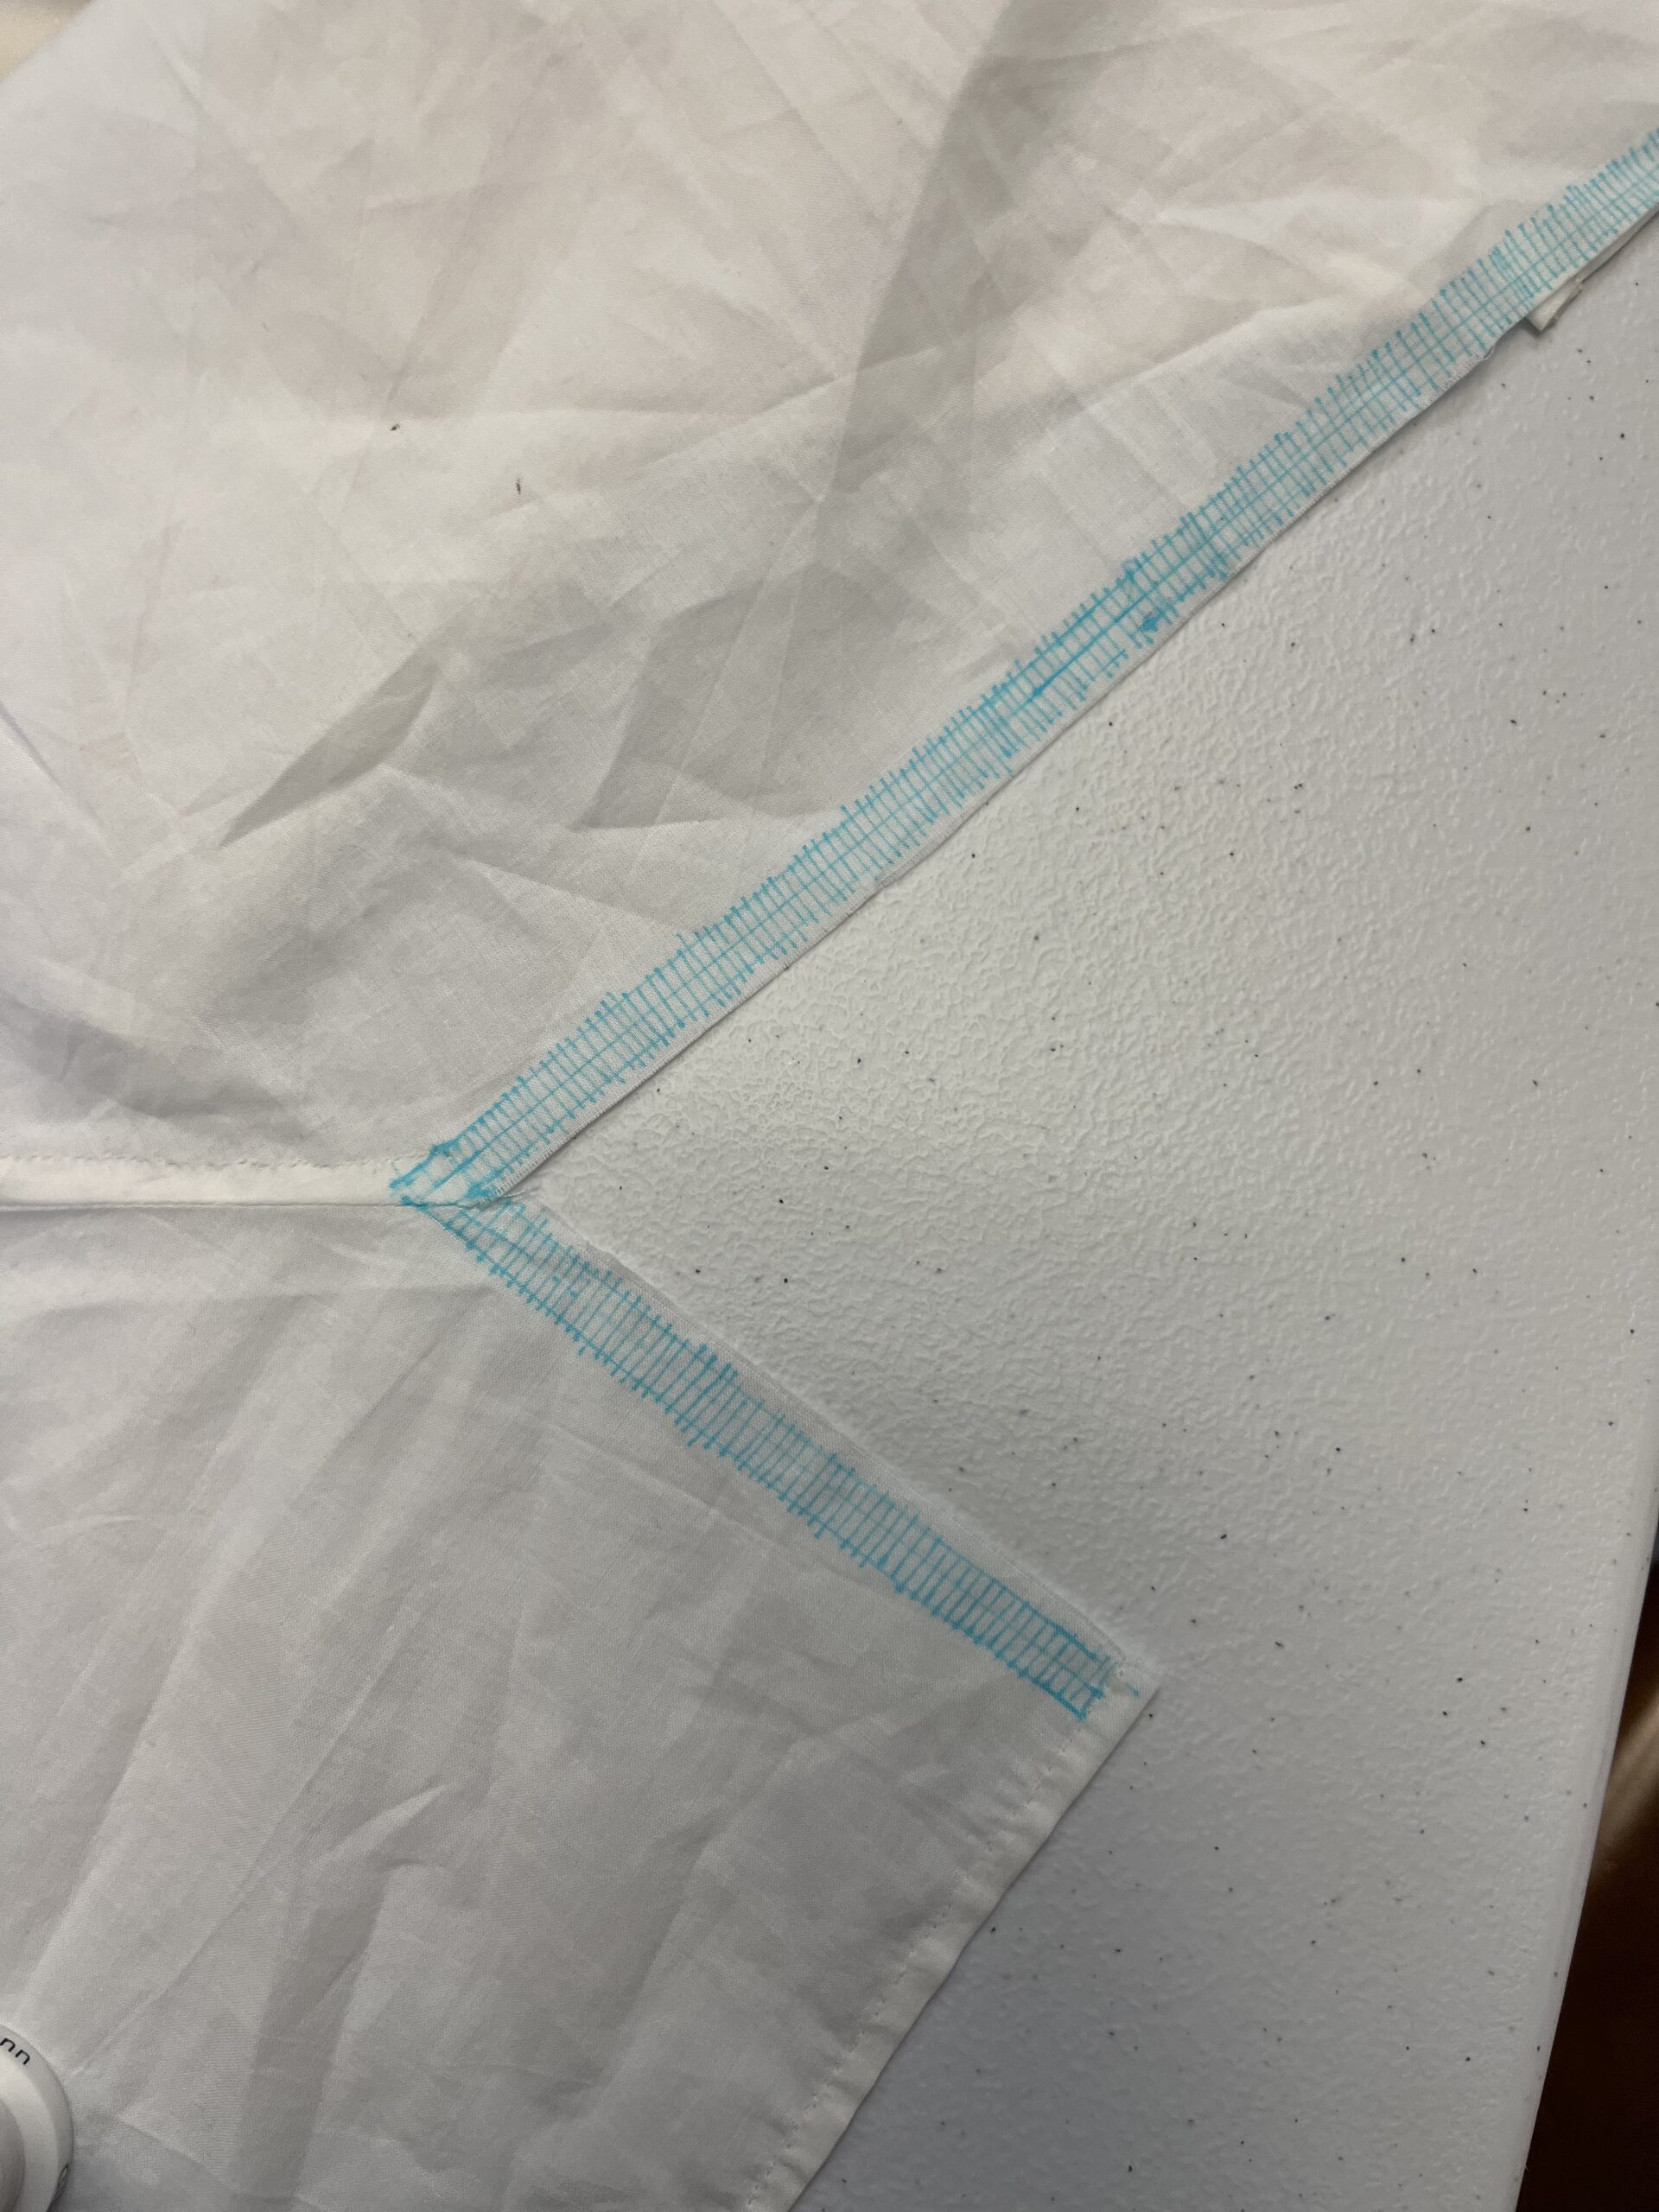
At this stage, I also make a point of marking with LONG perpendicular lines, the half and quarter divisions of the neckline. I mark the same intervals on the collar – on both sides, so that I can line them up later on when I sew the neckline and collar together.
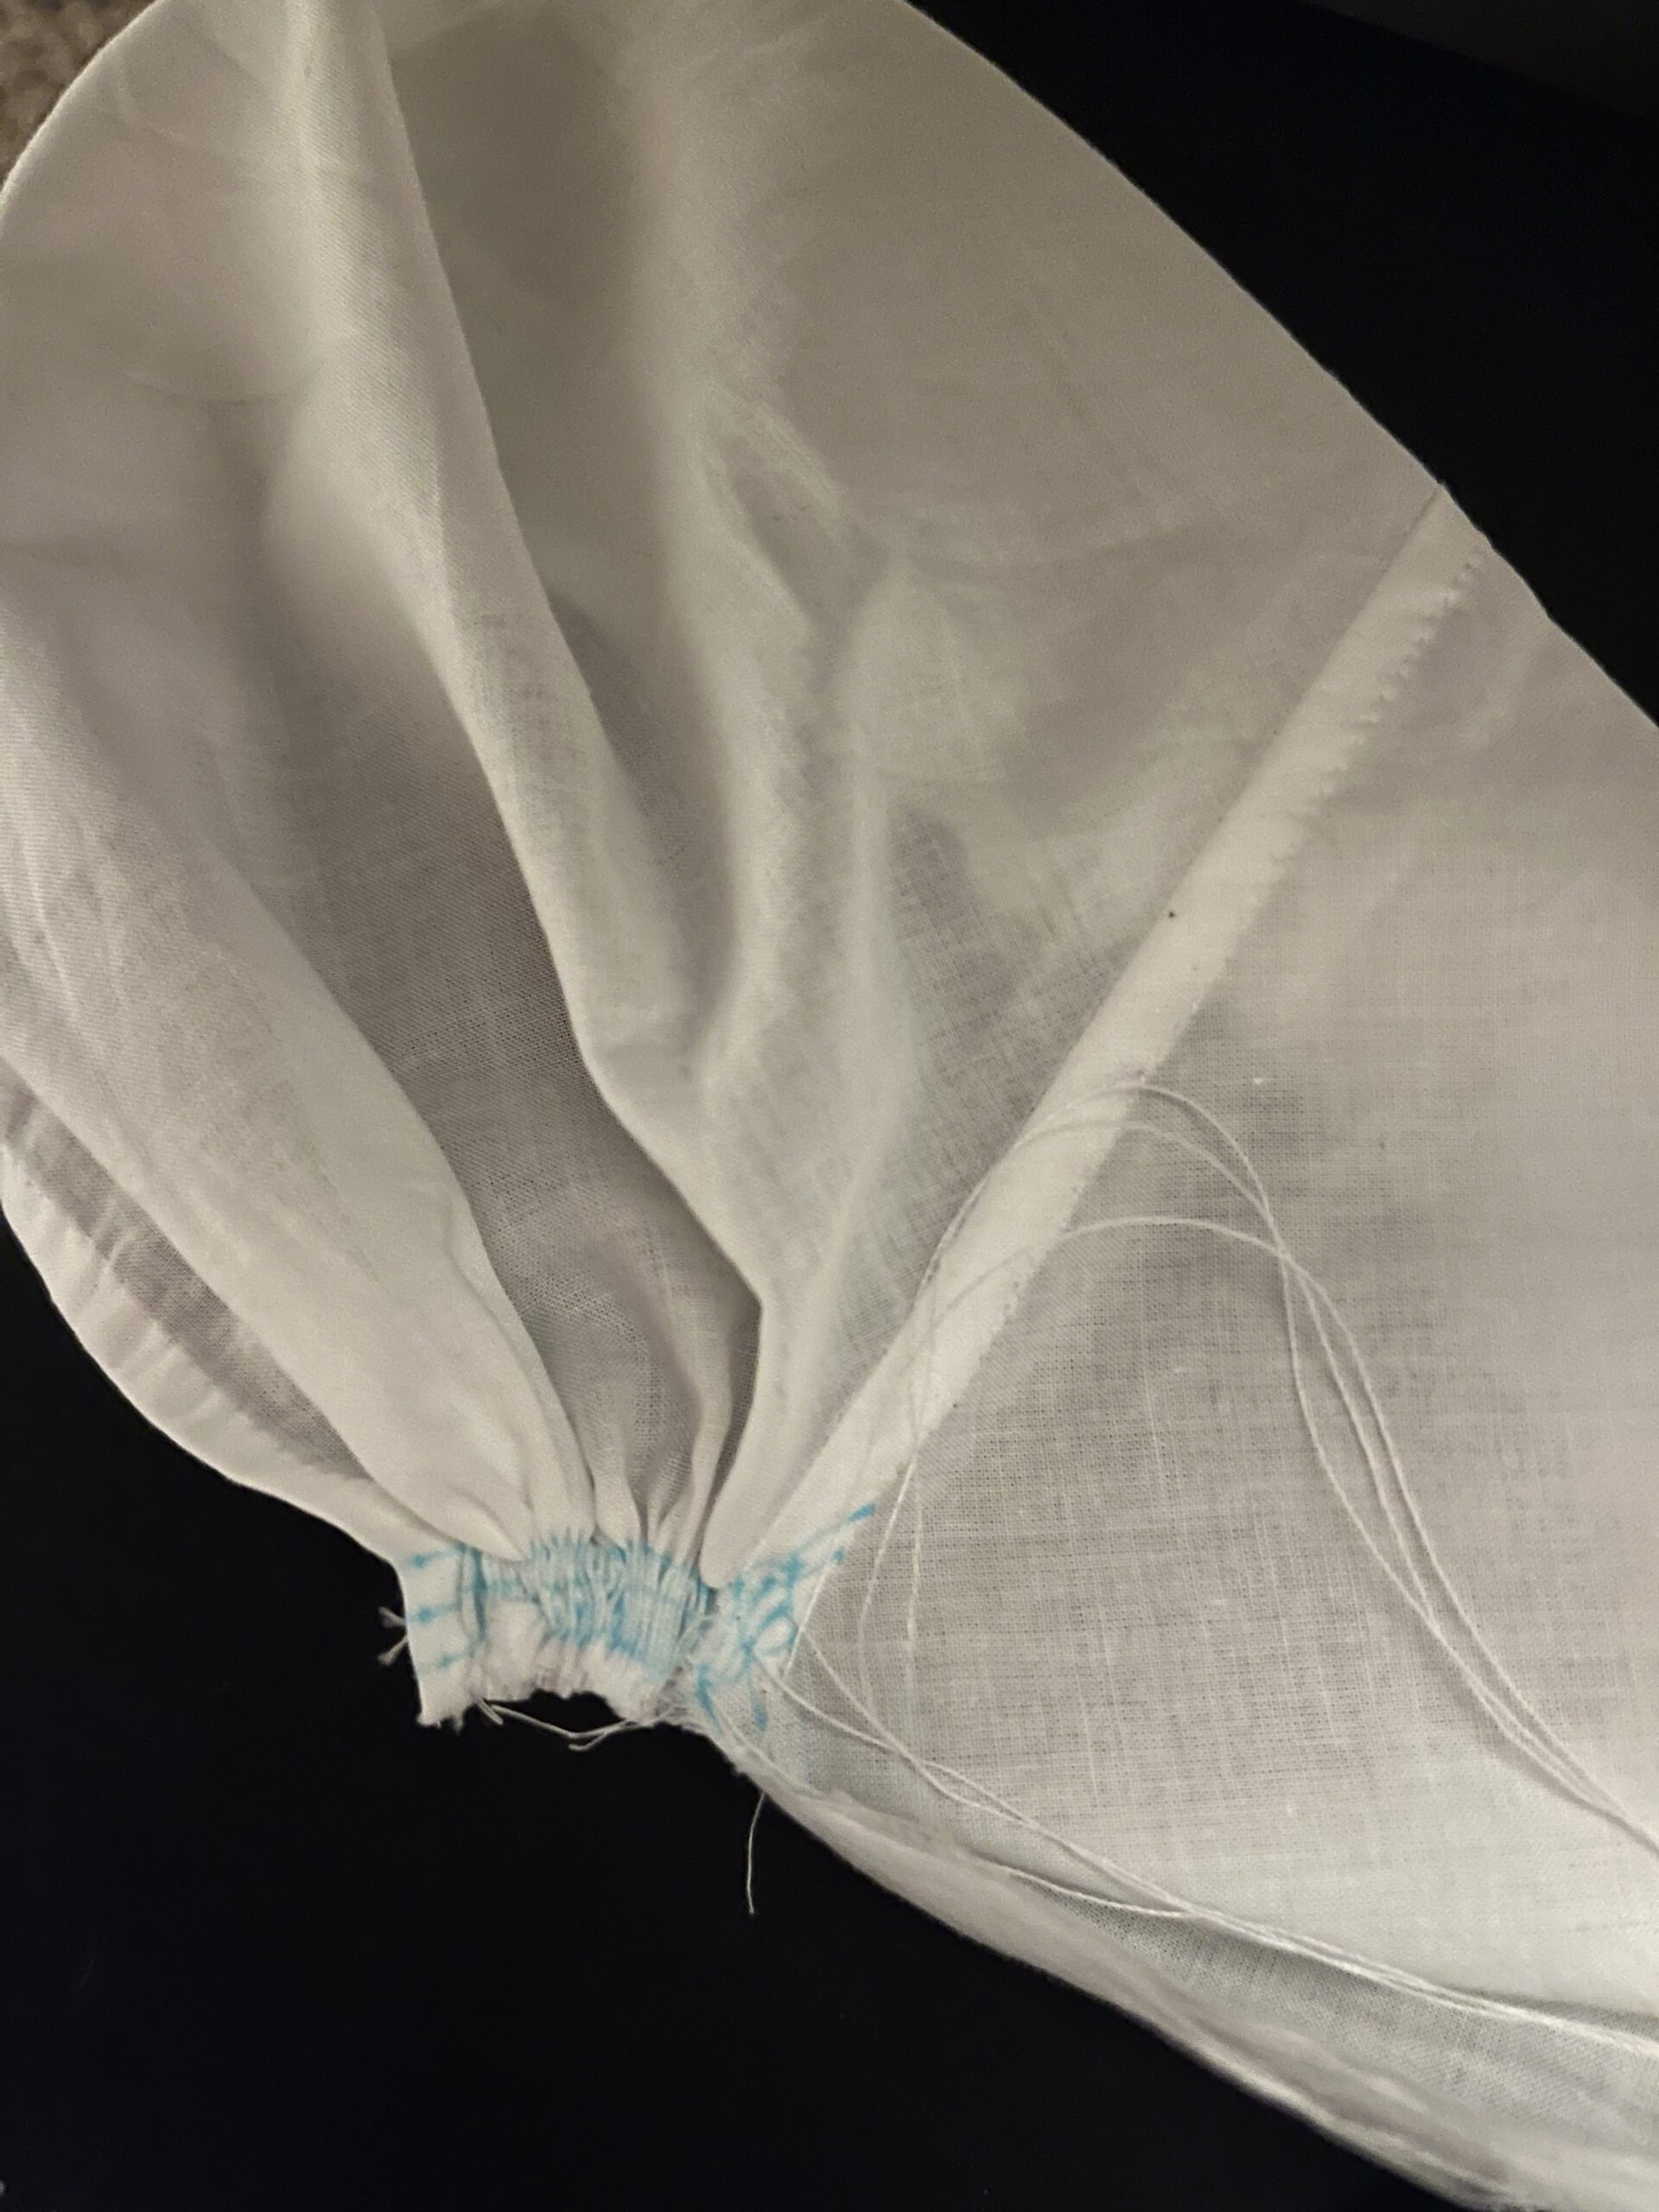
Following my markings, I sewed 3 lines of parallel running stitches, going in and out at the little verticals. The corners get tricky, so you sort of have to approximate these sections and wing it.
When you are sewing so many little stitches, it is very easy to skip a mark and not notice until you’re 4 inches further along the row. If you are sewing a single row, it’s not a problem, but when you’ve got 3 rows that need to align, it IS. A single skipped stitch will throw out your entire precision pleating set. Keep an eye out and be philosophical about unpicking. It happens.
Once my rows are sewn, I gather them up as tightly as possible and leave them for a while to set. Usually overnight. I’ve no idea if this really helps set the pleats, but it FEELS good.
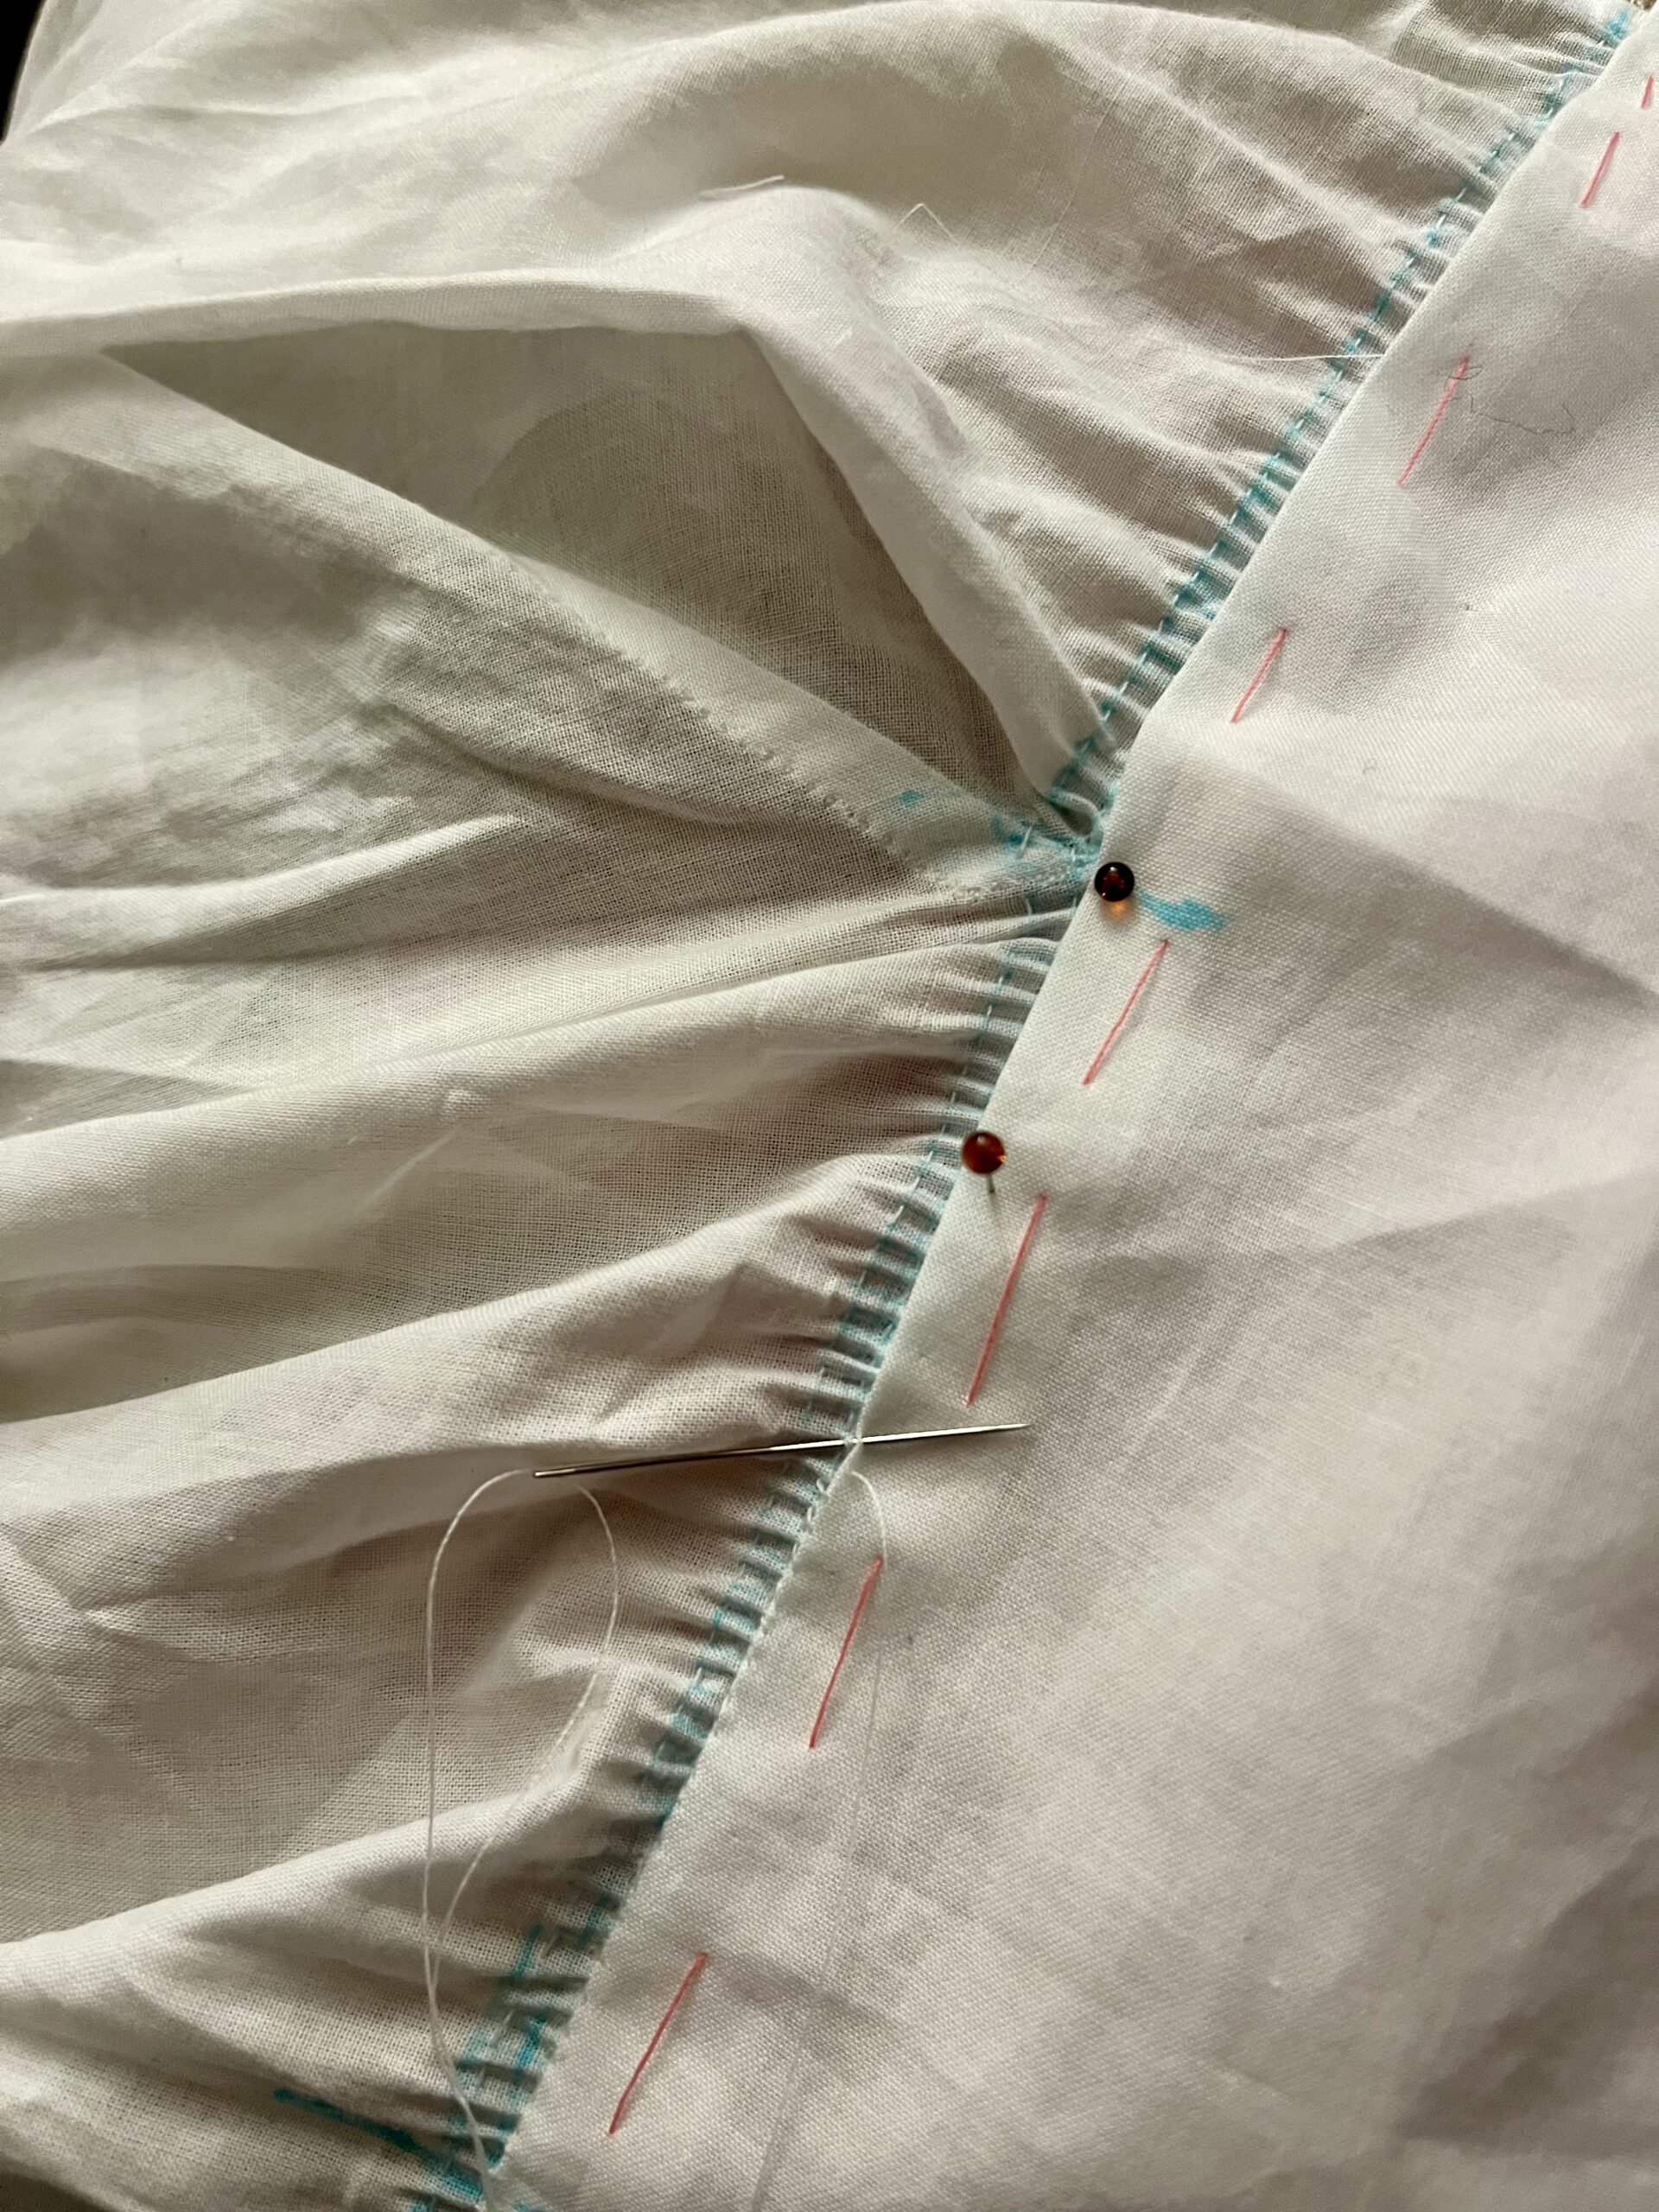
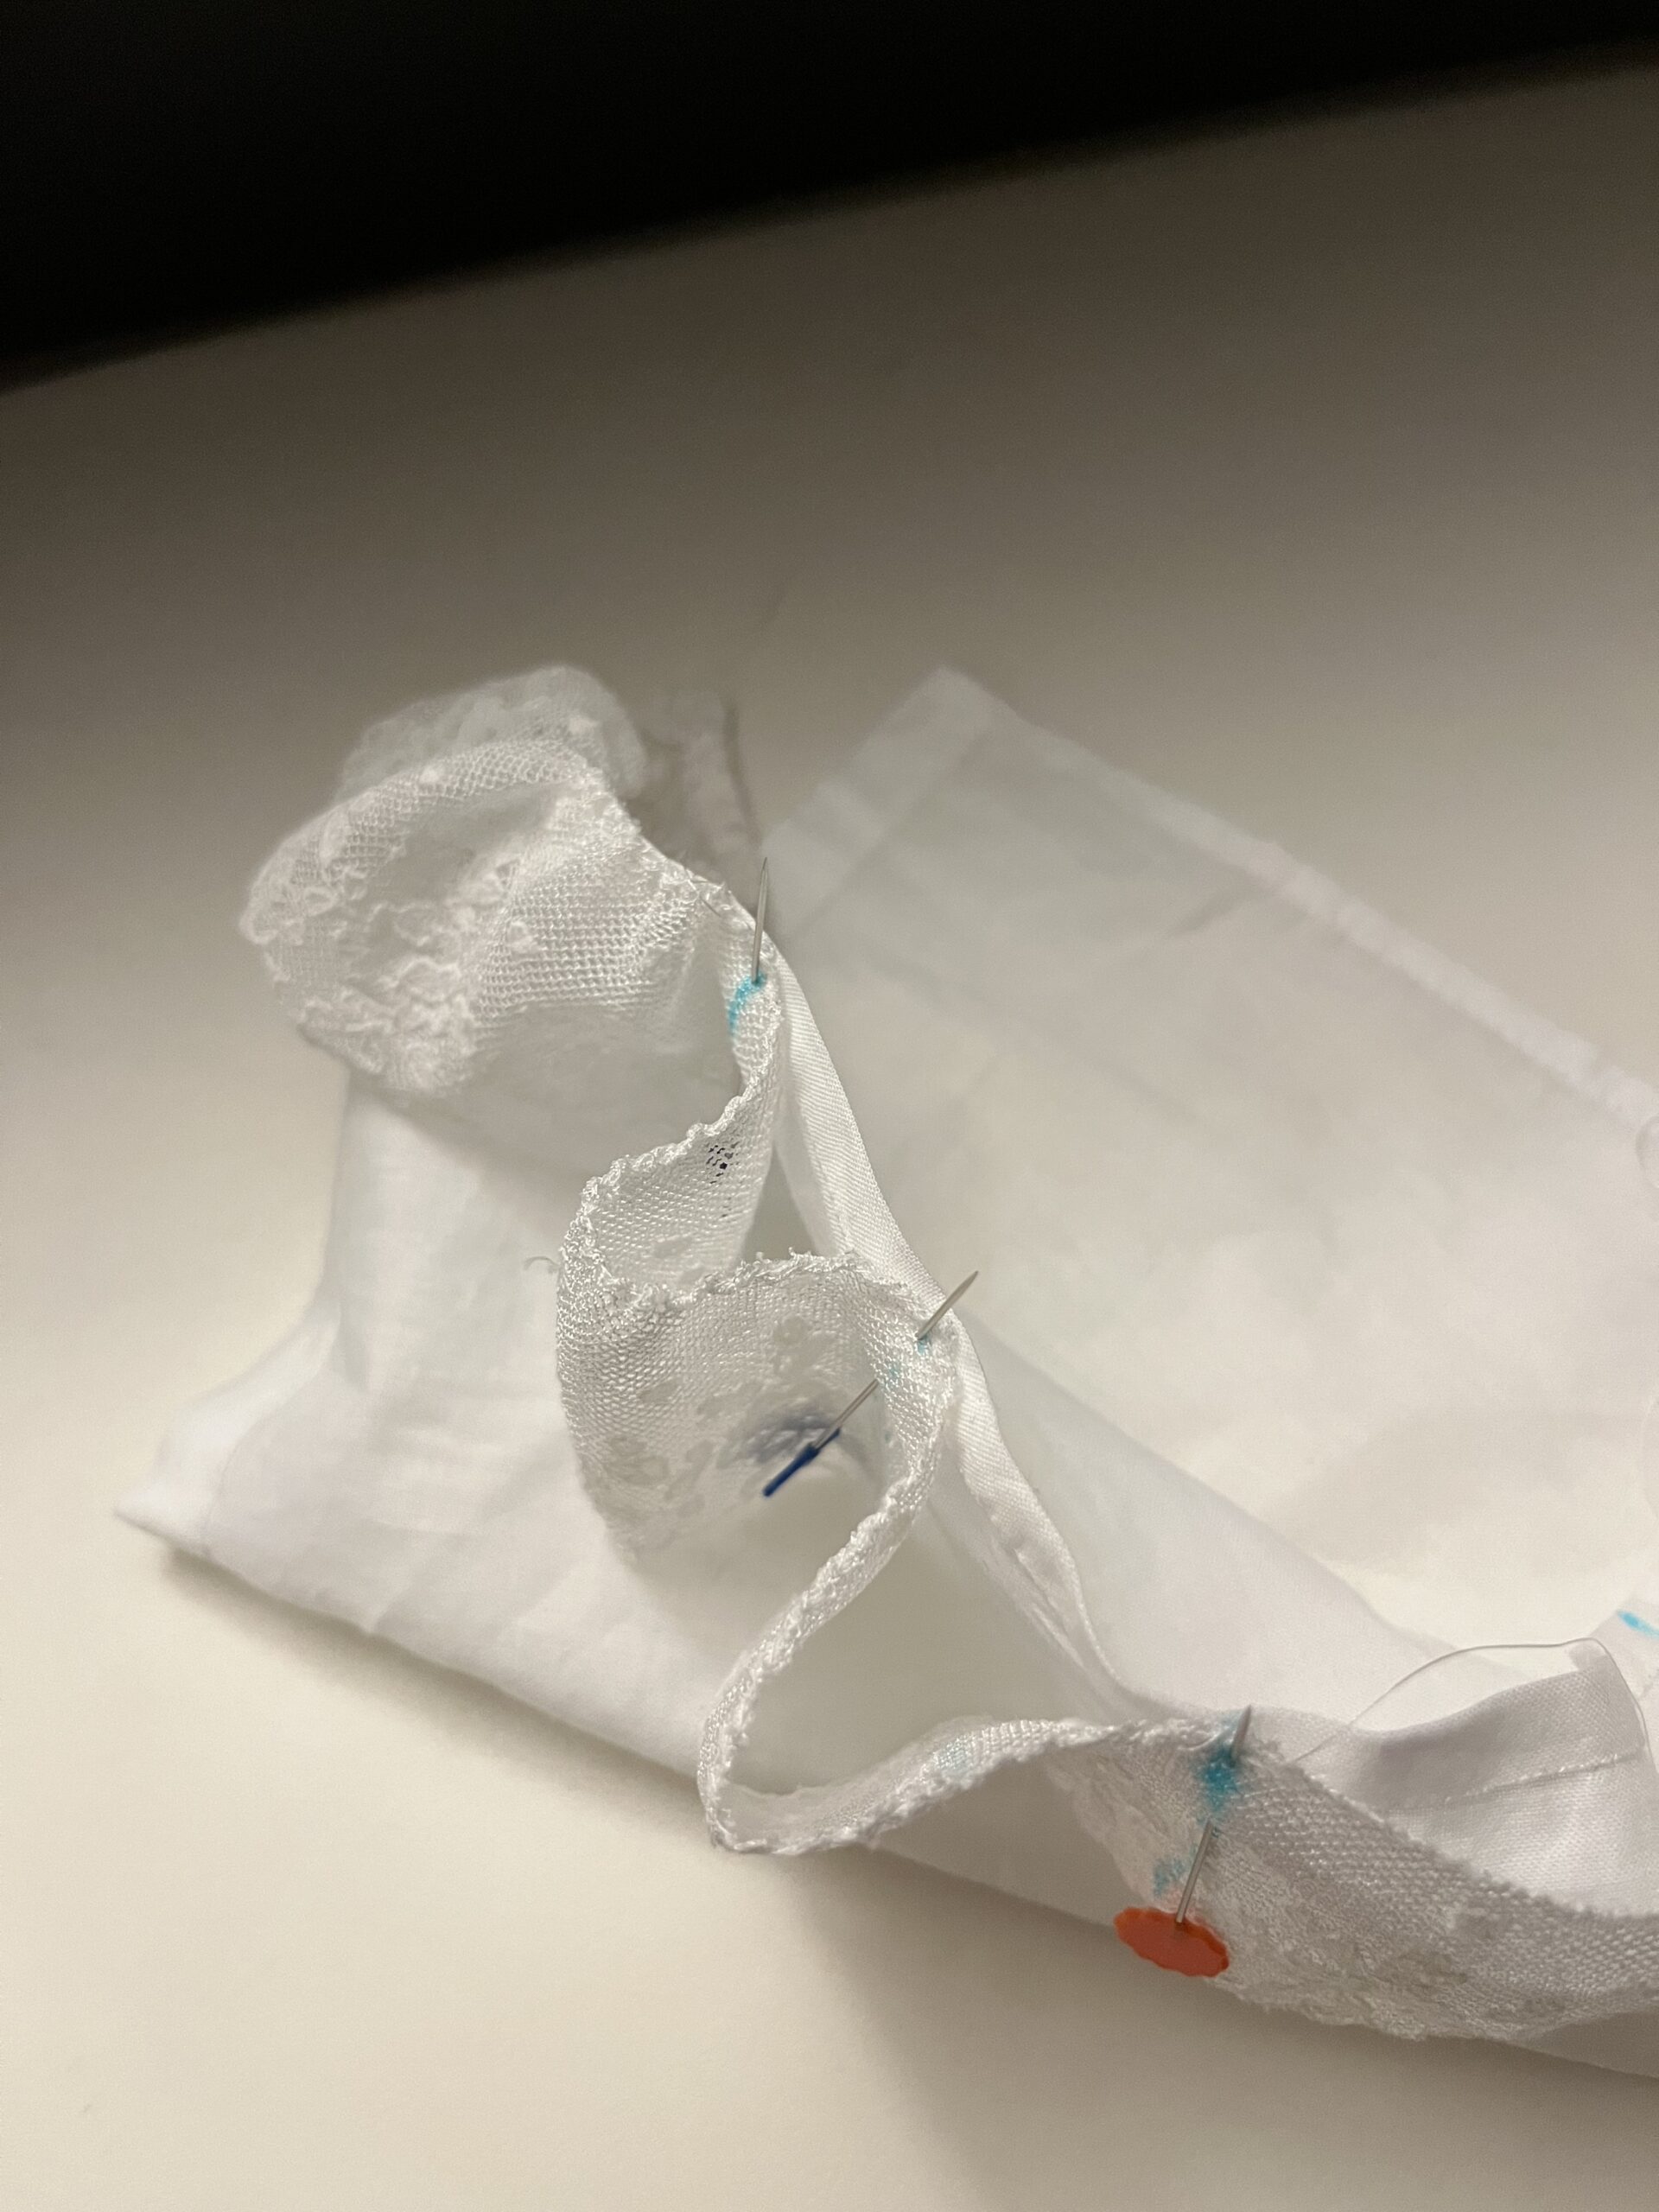
Time to set the gathers! I laid the collar of my chemisette flat on a stiff cushion and pinned it tightly in place, front side up. I made sure that the back side of the chemisette was folded up and out of the way so that it would not be caught up in pins or stitches during the next steps.
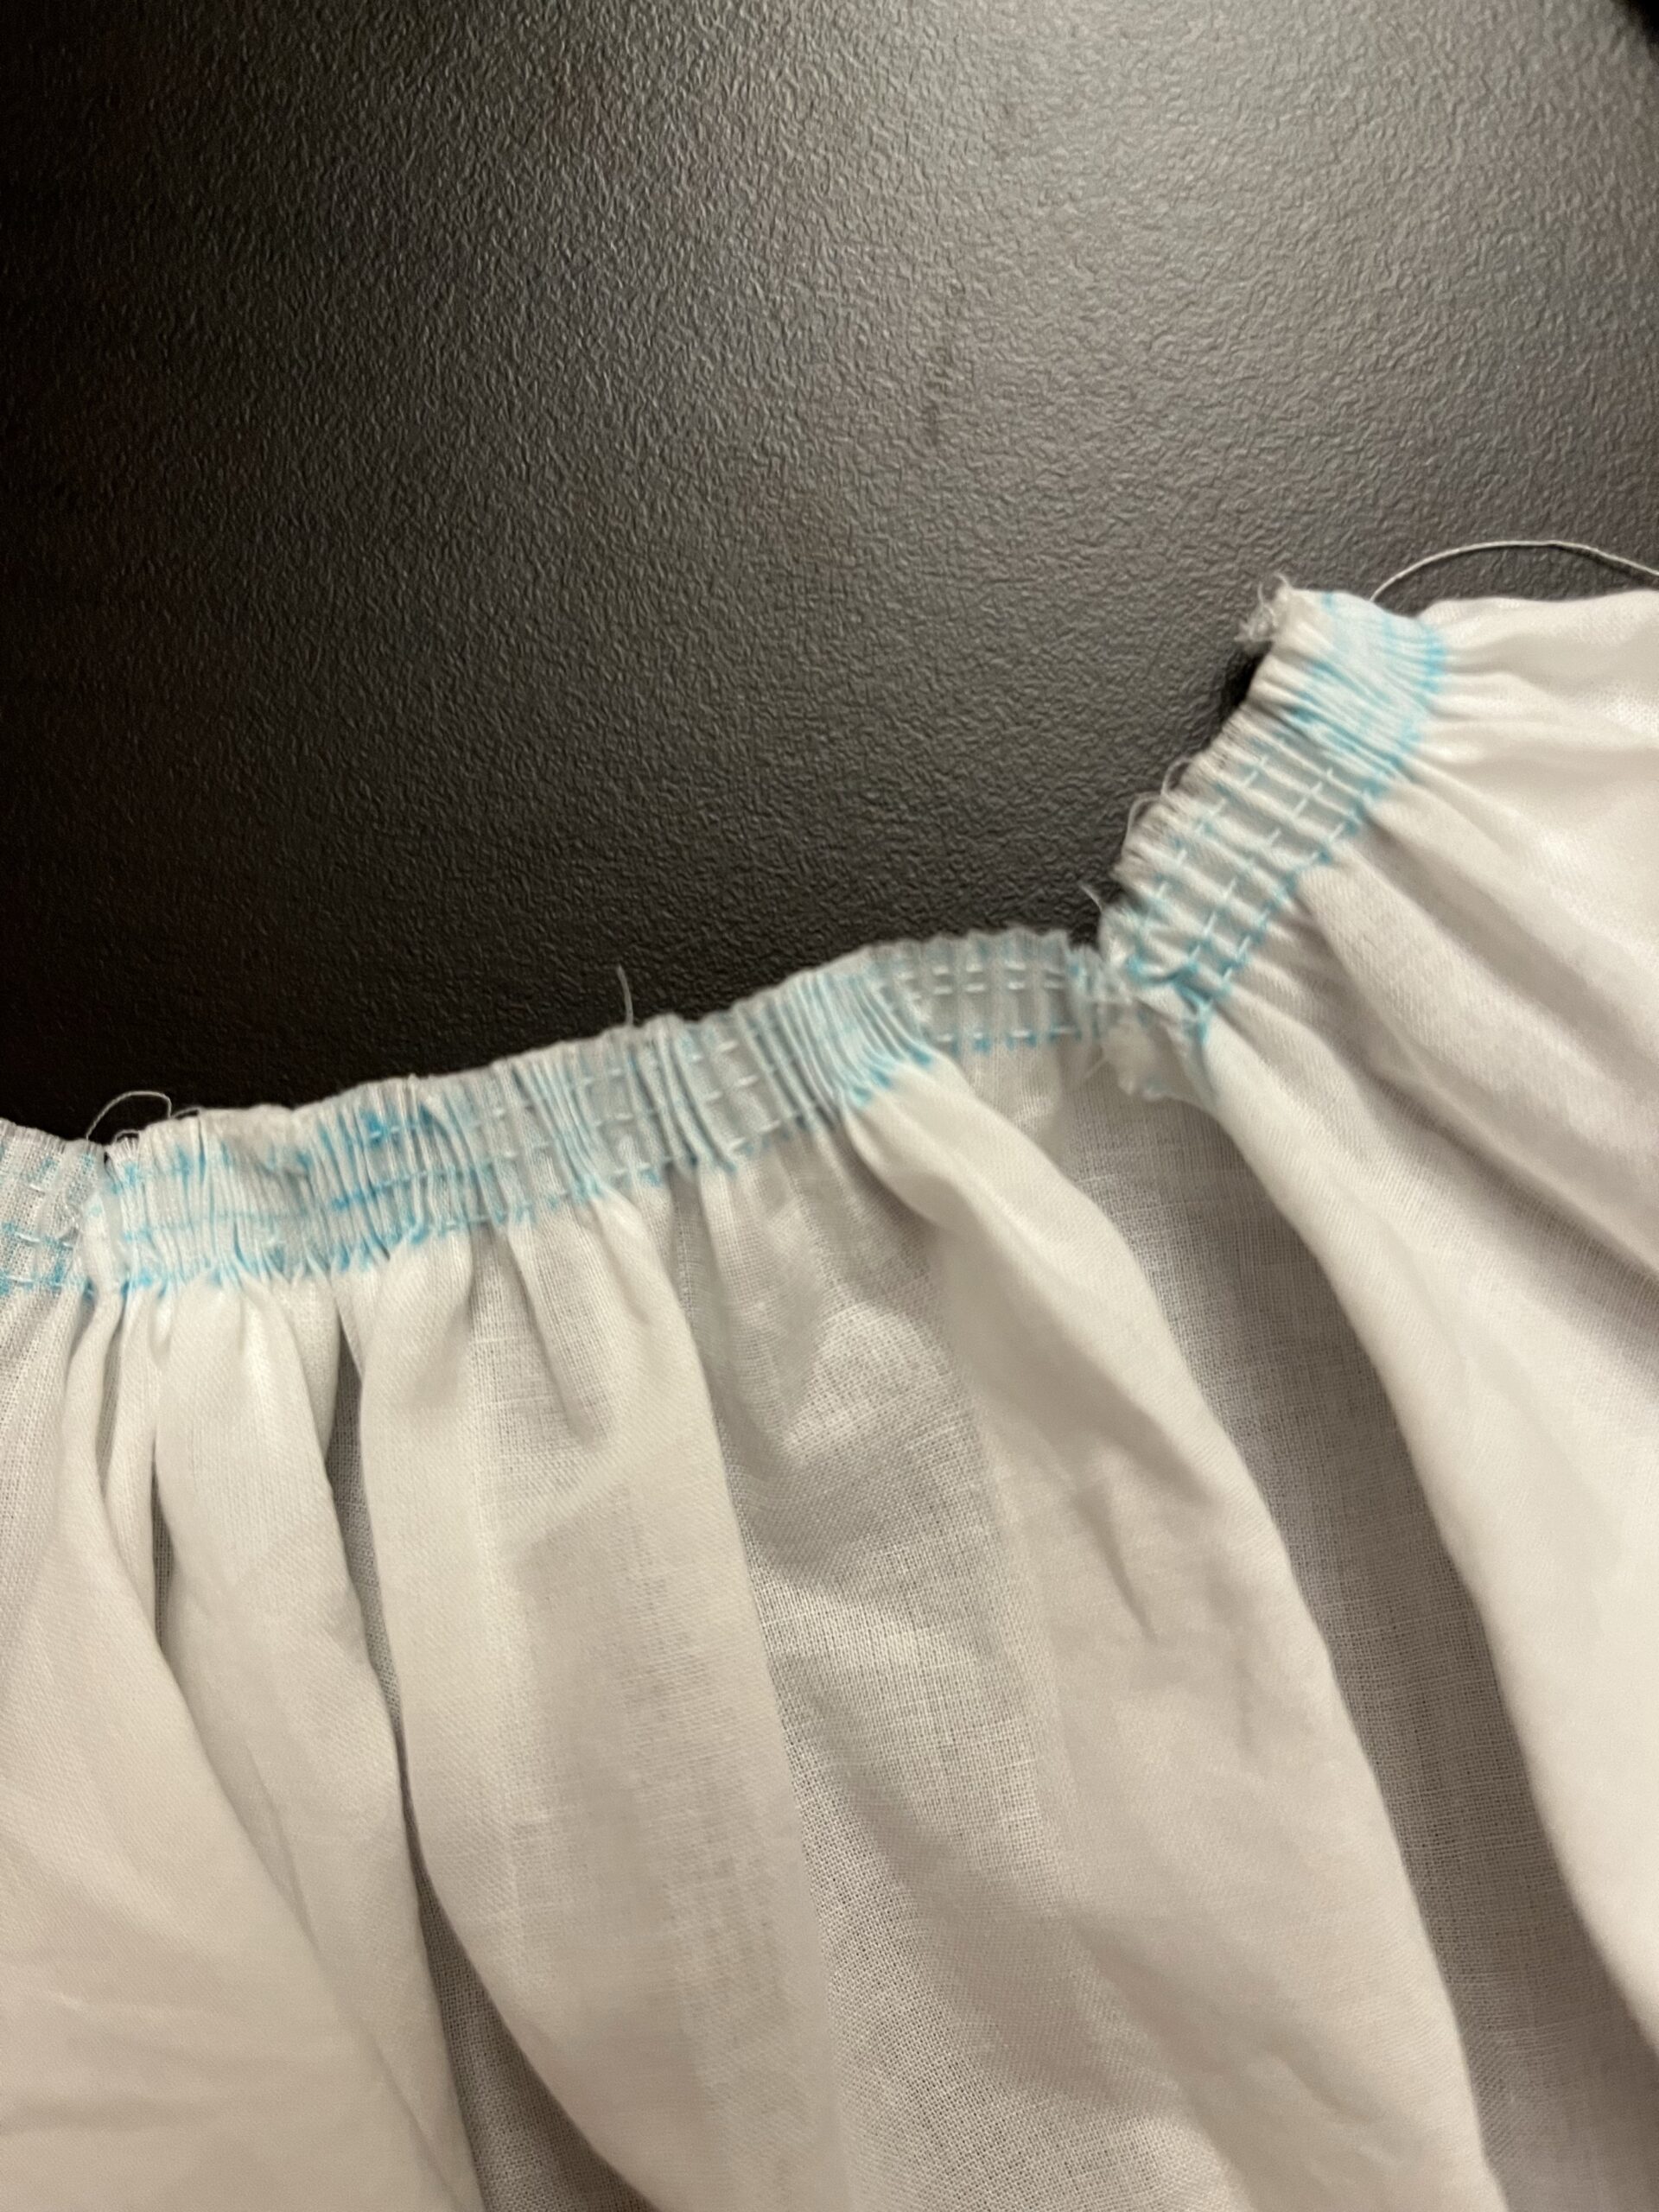
I laid out the chemisette neckline beside the collar, and began to stretch out my pleated section.
Matching the registration lines on both collar and neckline, I pinned the two together at these points (making sure NOT to catch any gathering threads with the pin) with the neckline laid UNDERNEATH the collar, aligning the center blue line on the chemisette with the folded seam line of the collar. I stretched out the chemisette neckline until there was no buckling or wrinkling between the alignment pins.
I massaged and manipulated the pleats in each section into an even distribution. Then, using a darning needle, I “stroked” the pleats downward from the collar until each pleat was proud and perpendicular to the seam line.

Using tiny whip stitches, I sewed the neckline to the collar, catching the peak of each pleat and anchoring it to the collar along the seam line. The corners get tricky, so you sort of have to approximate these sections and wing it.
Once the entire neckline is sewn, I turned the garment over and did it again from the other side! The bottoms of the pleats were now the tops of the pleats, and I stitched those tops to the loose collar edge with tiny whip stitches. This side went more quickly, as the position of the pleats was locked in and there was minimal sliding and wriggling.
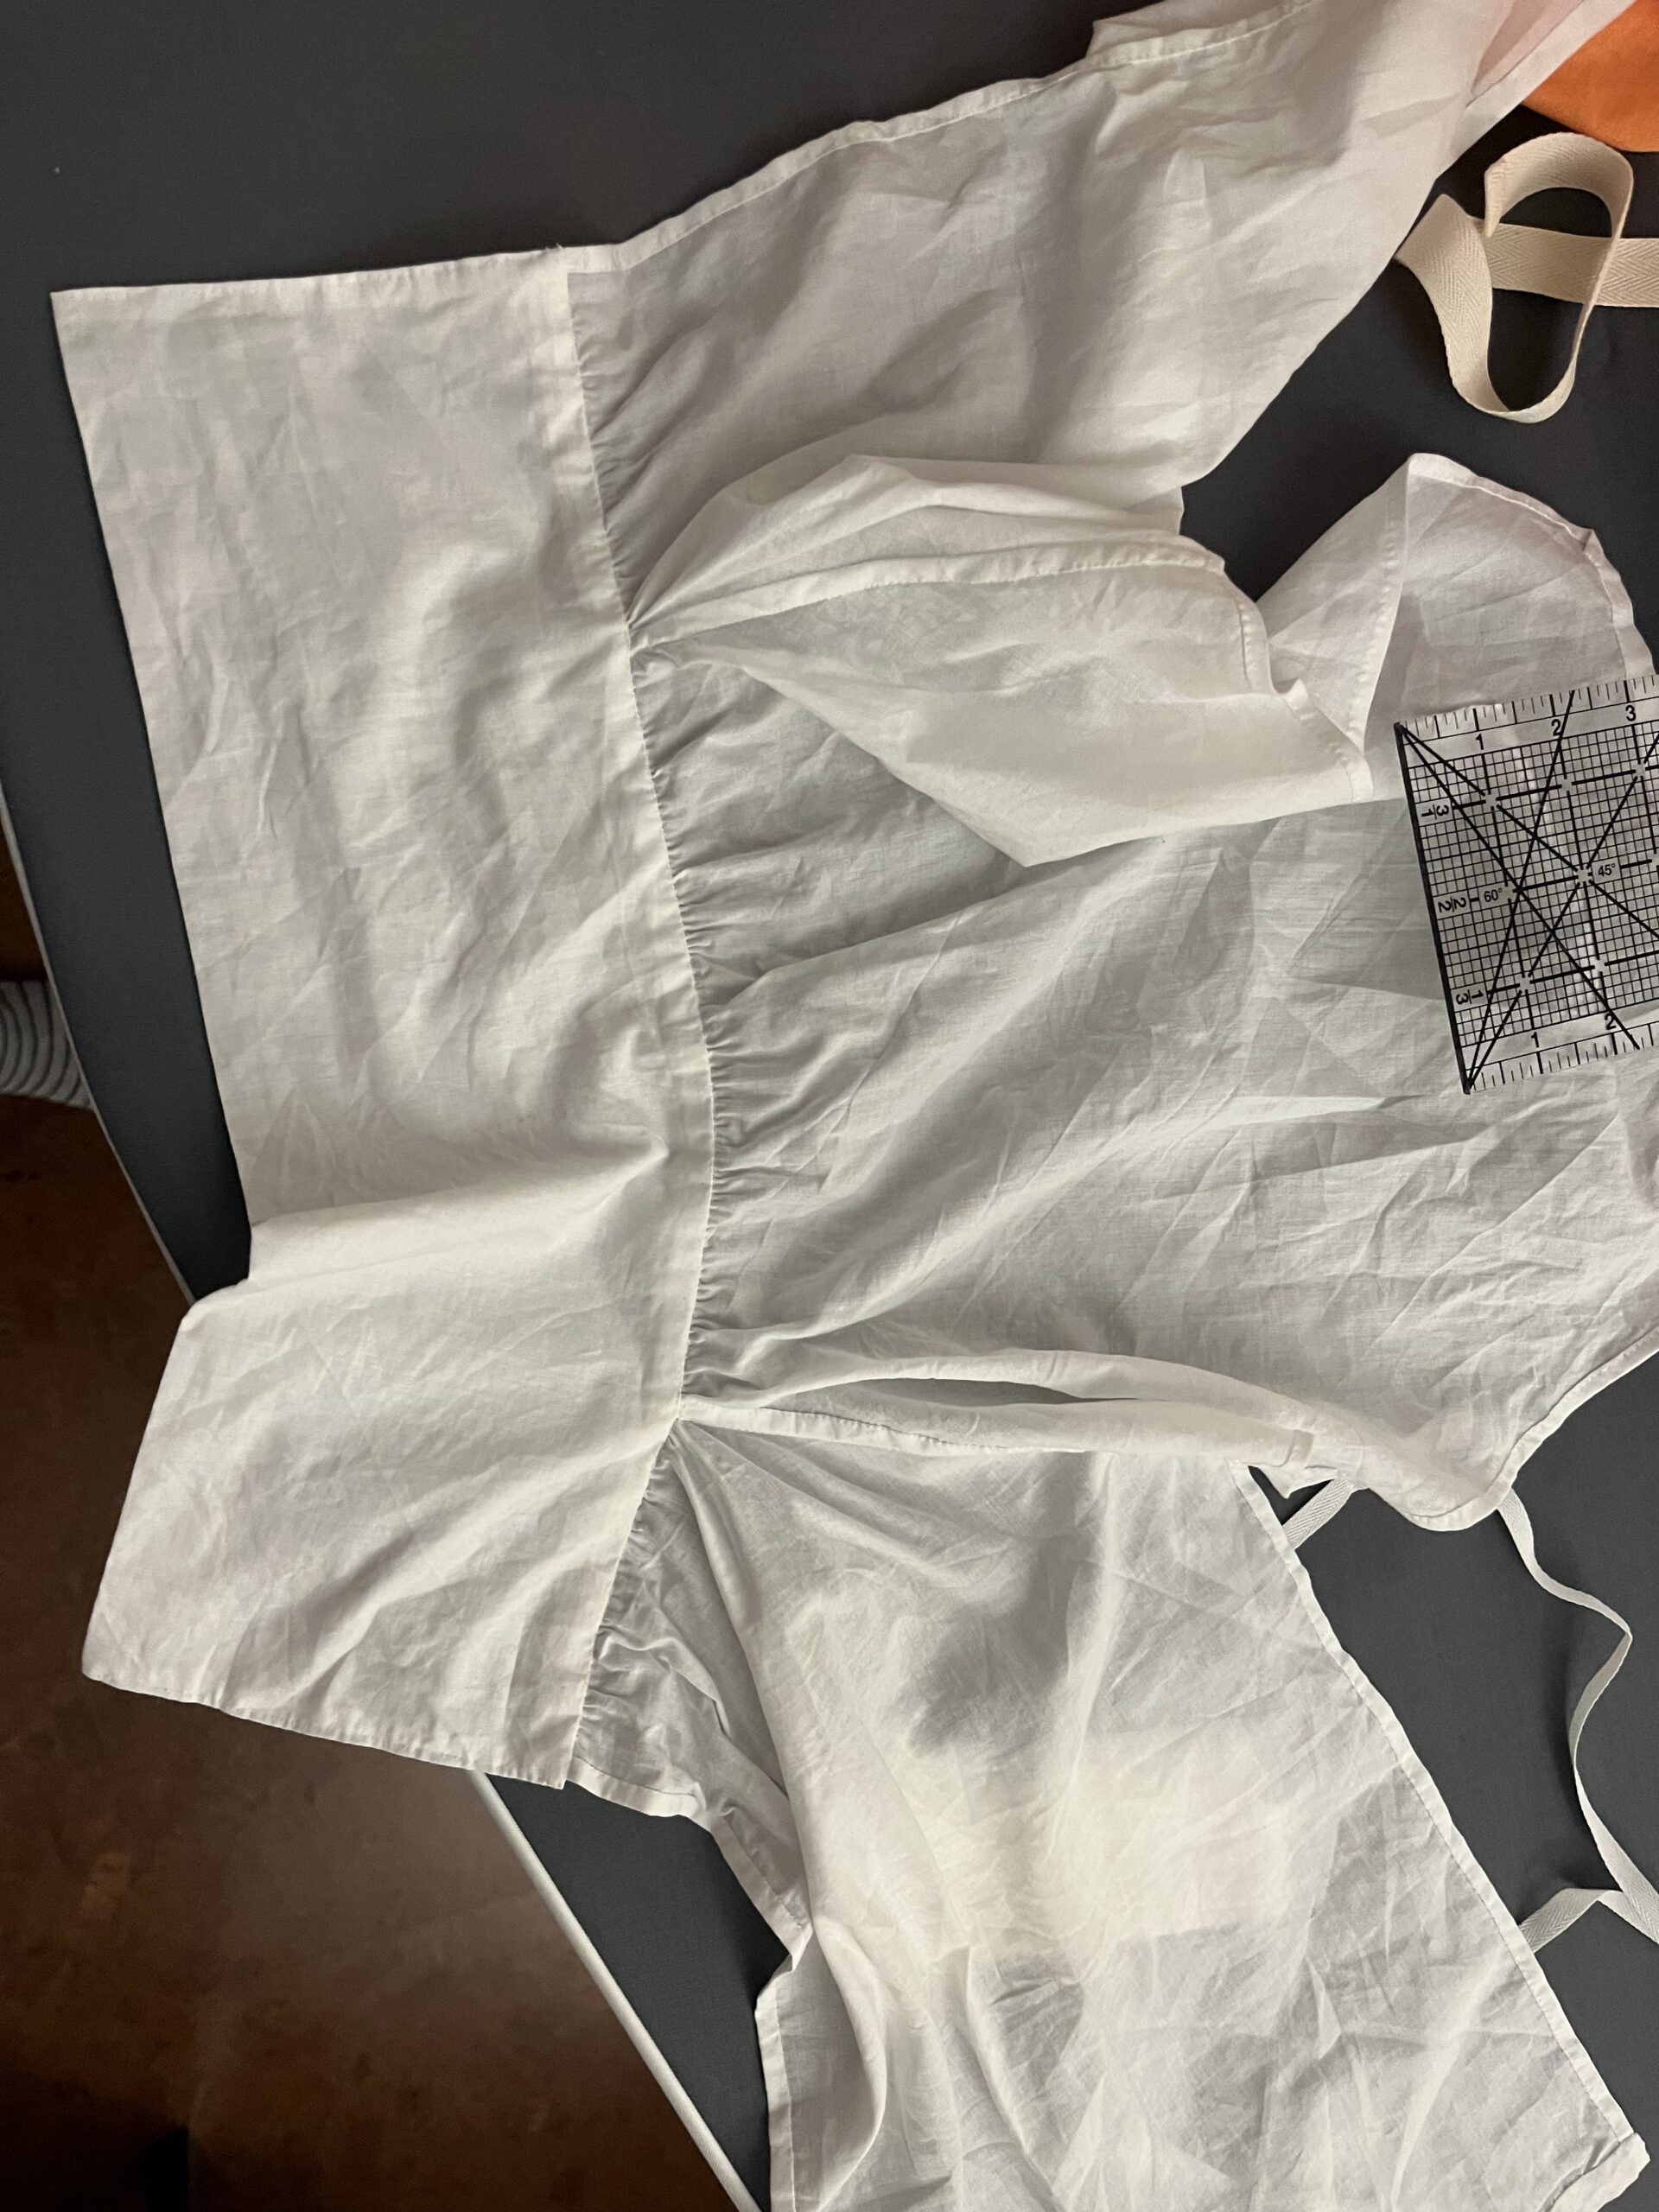
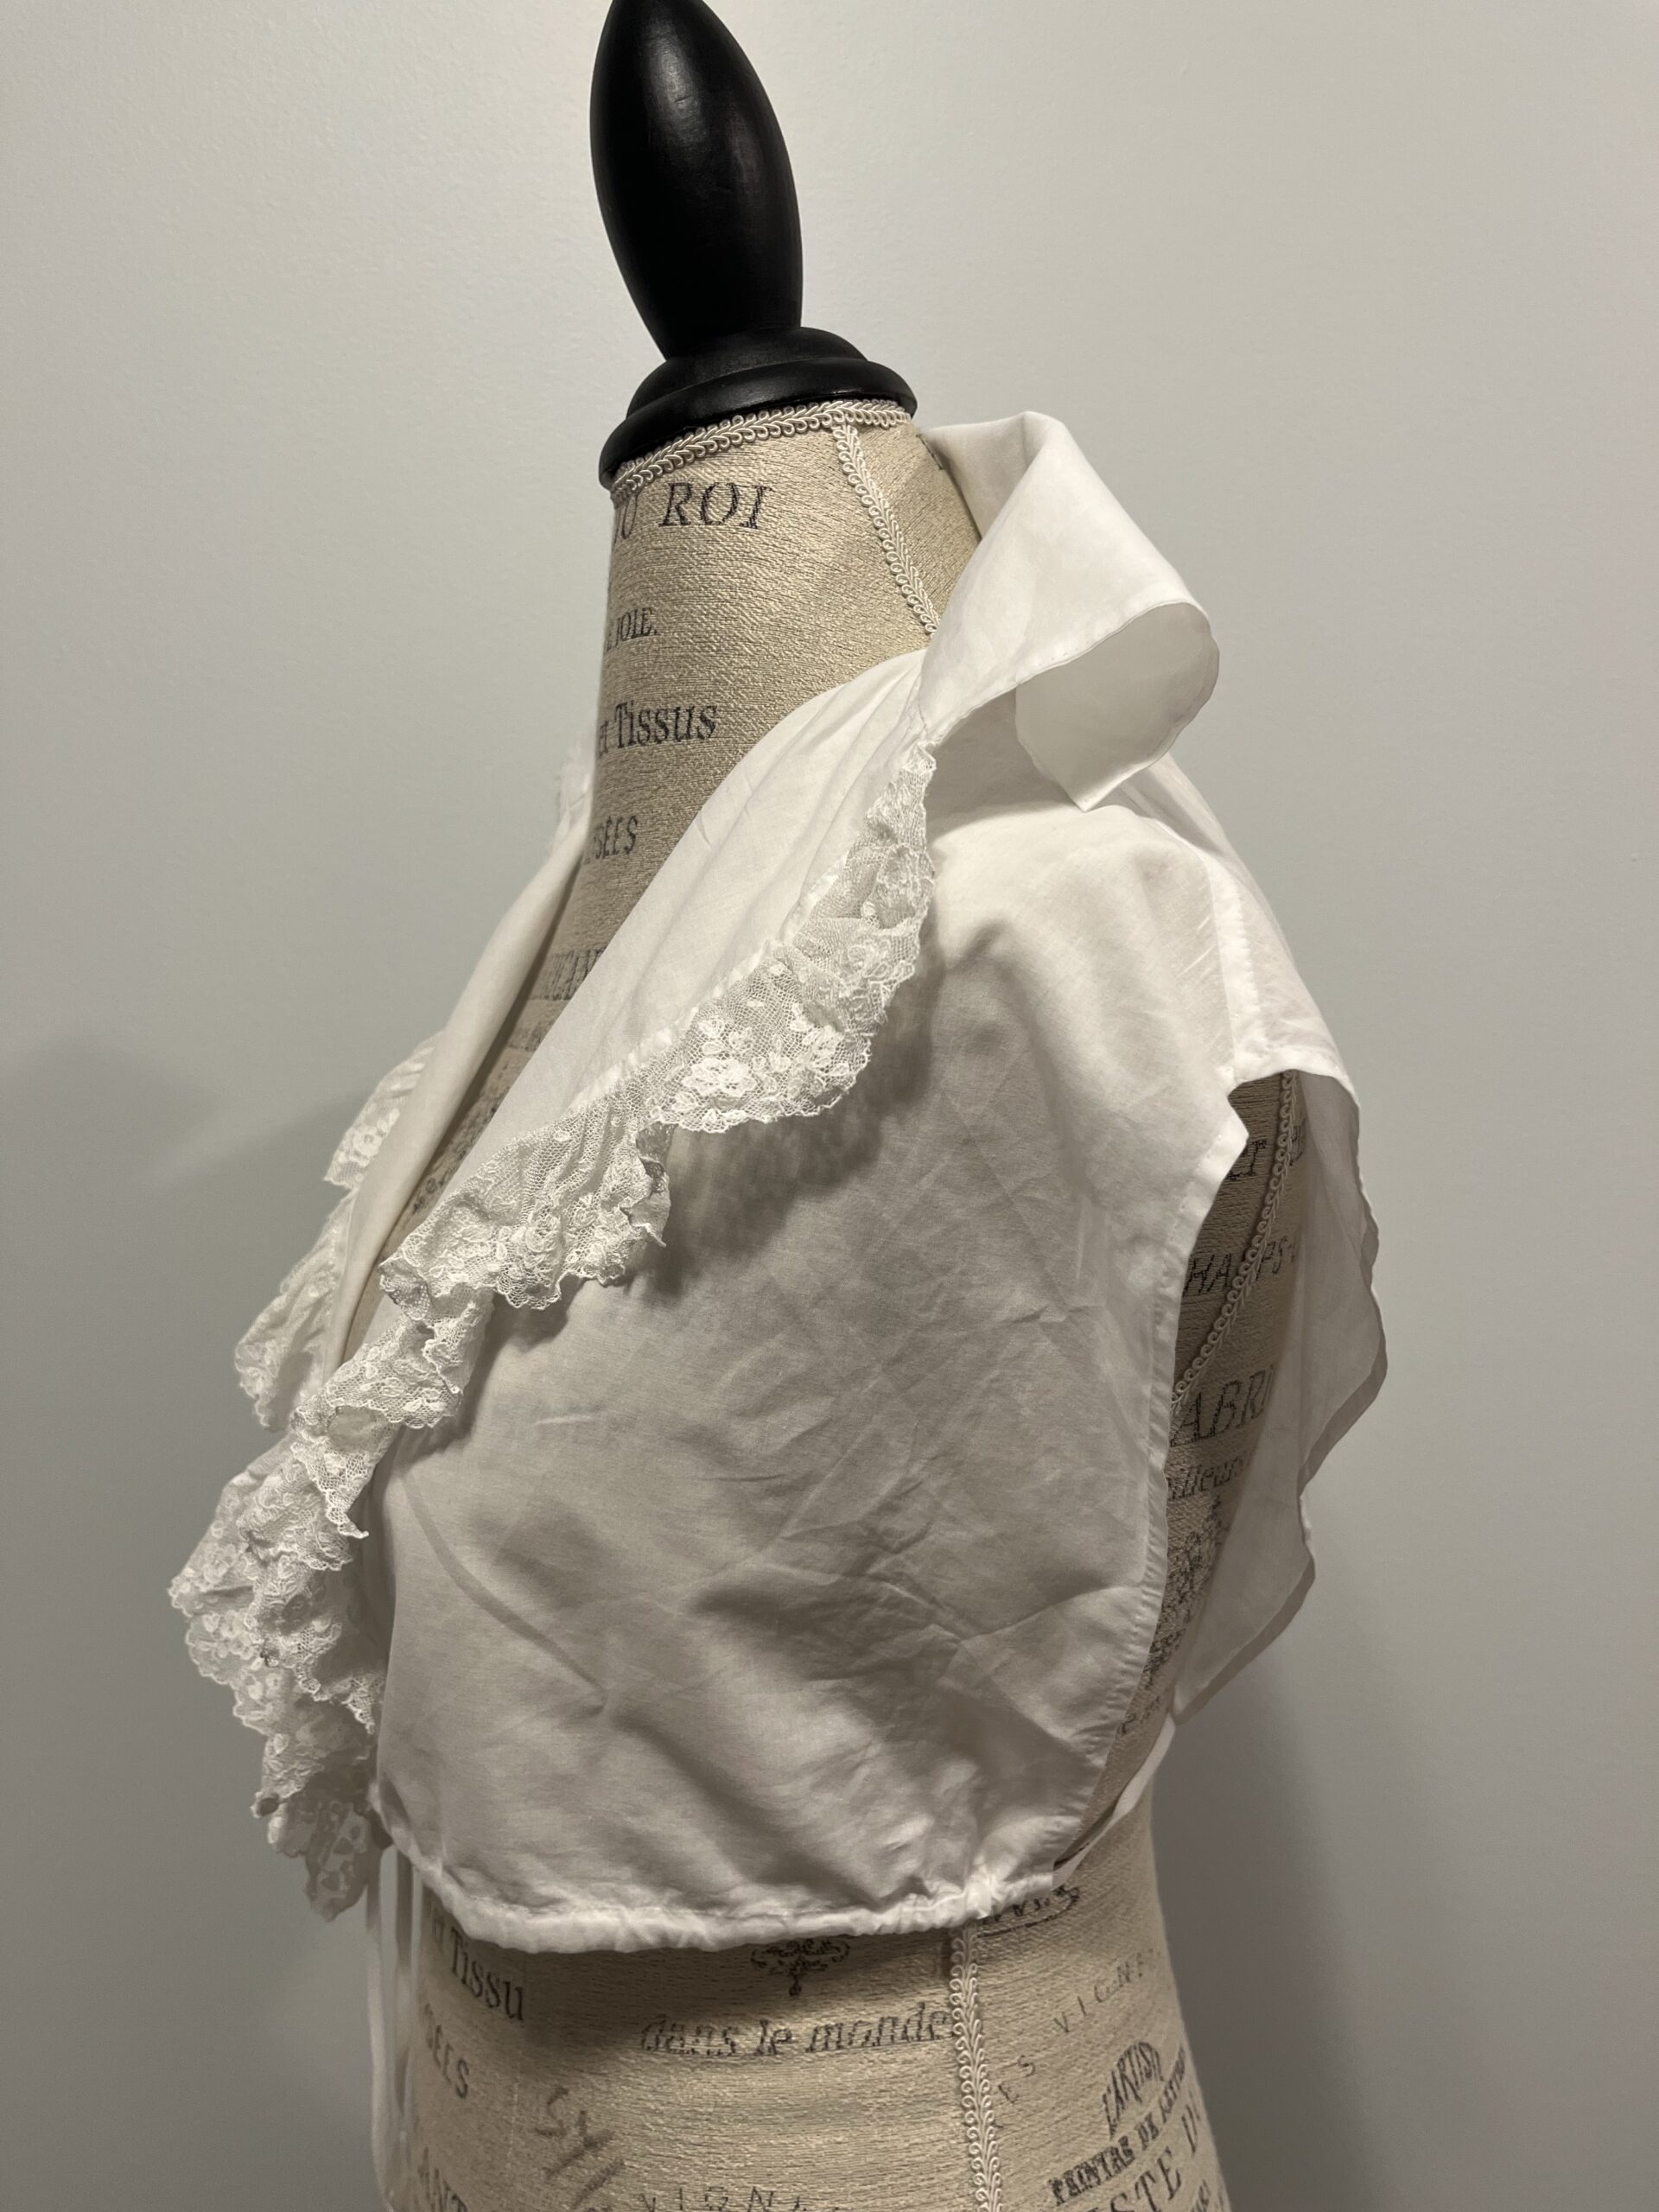
Collar attached, I stitched down the open side edges of the collar with prick stitches, and I had a pair of 1790s chemisettes!
One of them, however, still needed some lace!
Taking my two lace sections, I cut off the raw long edge of this lace trim to right below the stitched line. The line would provide an anchor for my whipped gathers.
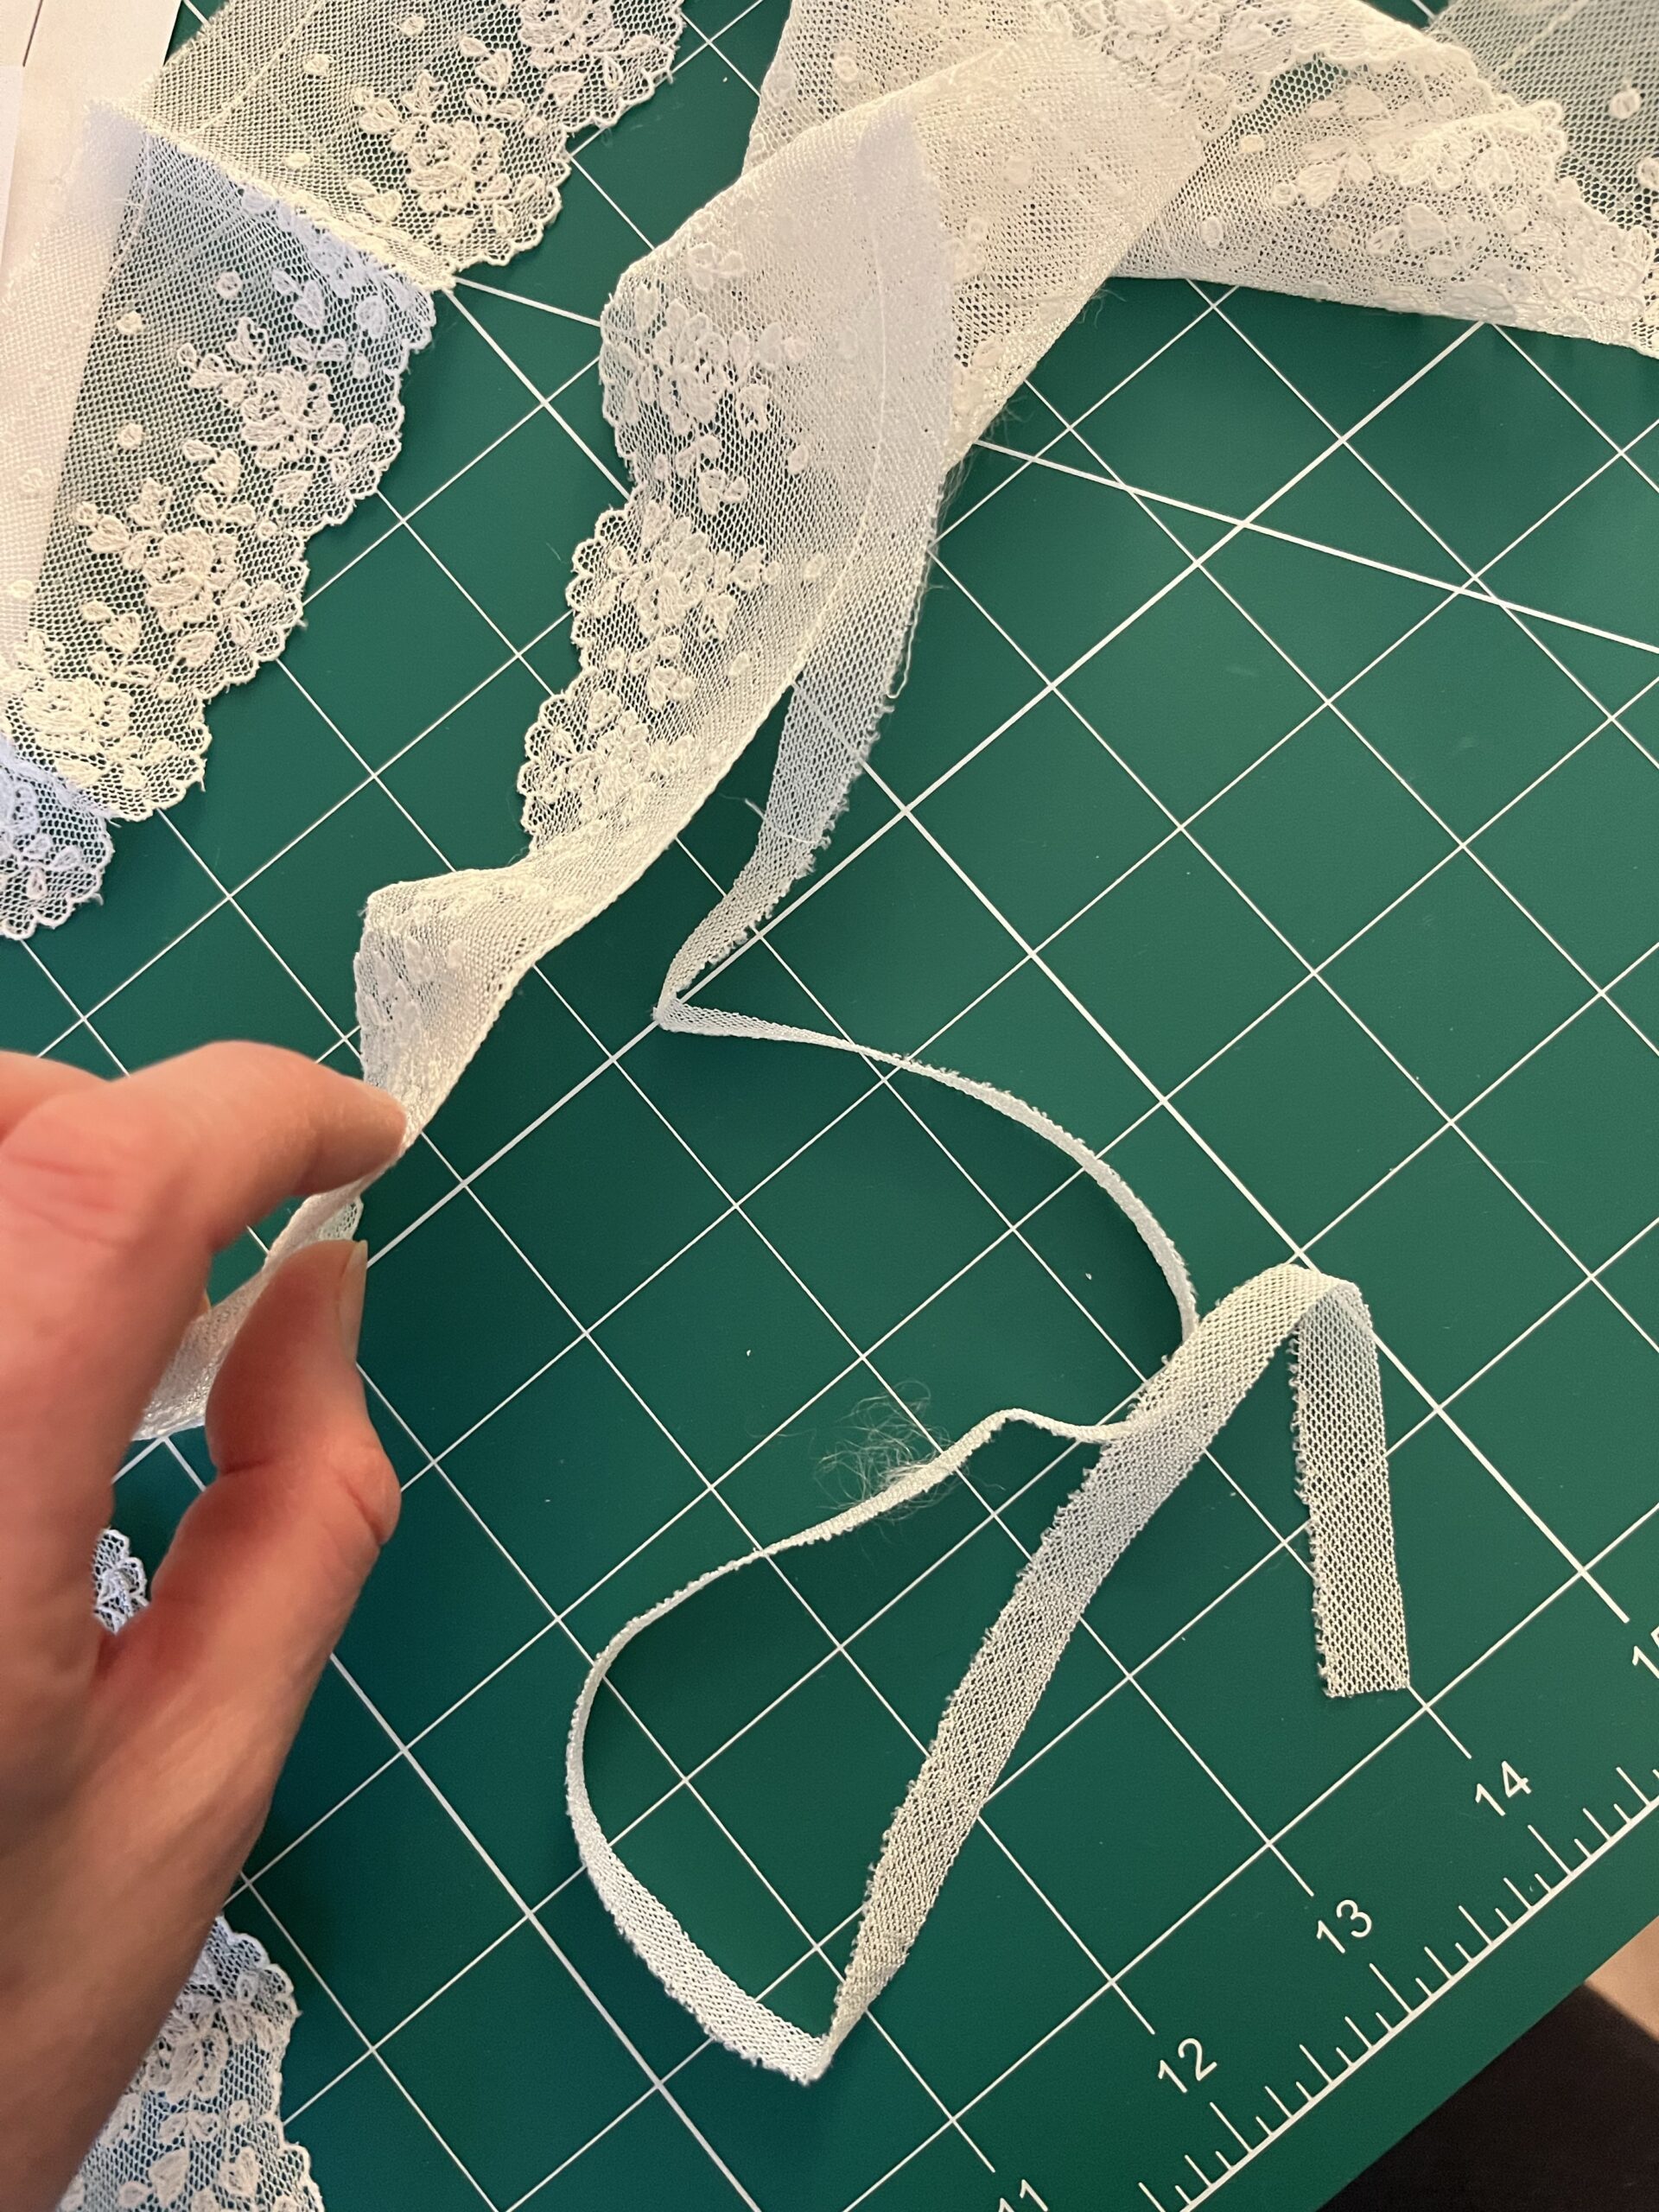
I wanted the short end of the lace to lay flat against the collar instead of flapping about, so I started by hemming the short end of the lace and securing the hemmed edge of the strip flat against the chemisette neckline with more tiny whip stitches. When I came to the end of the hemmed short edge, I knotted off my stitching and gathered like CRAZY until the lace trim stood up straight from the edge of the chemisette without any cupping or spooning. I stitched down the gathers and again secured with a knot.
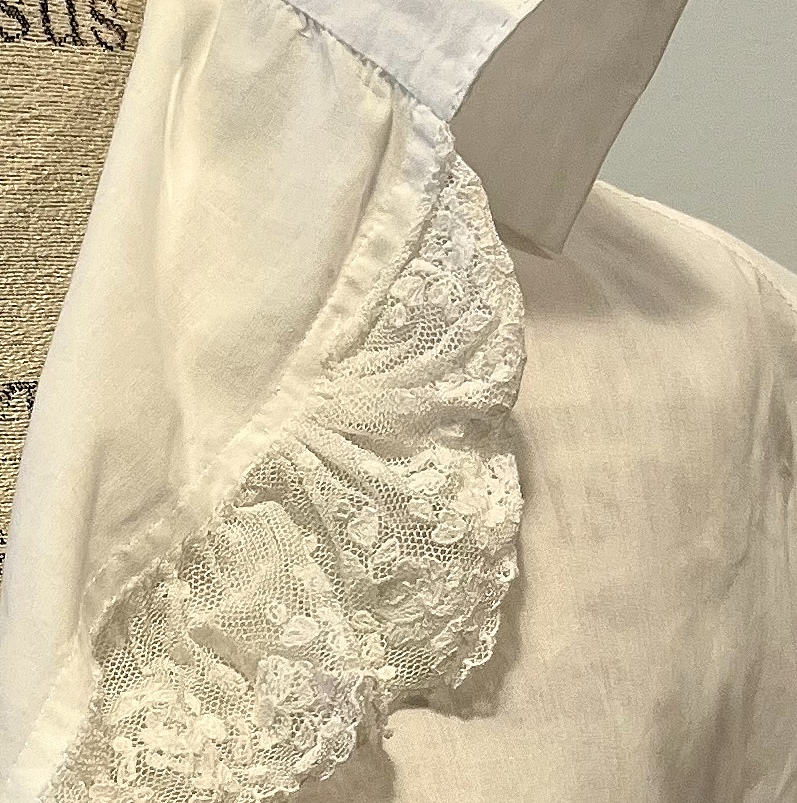
I took the remaining length of the front edge of the chemisette, divided it into halves, quarters and 8ths, and marked the intervals with a water soluble marker. After a bit of experimenting, I decided on a 1.5 : 1 gathering ratio, did the requisite maths and marked 8 sections on the lace. One by one, I whip gathered the sections and stitched them down to the front of the chemisette.
Then I did this all over again on the other front!
The last thing I did on both chemisettes was to run a drawstring through the bottom channels on each one so that they could be secured. And then I was done.
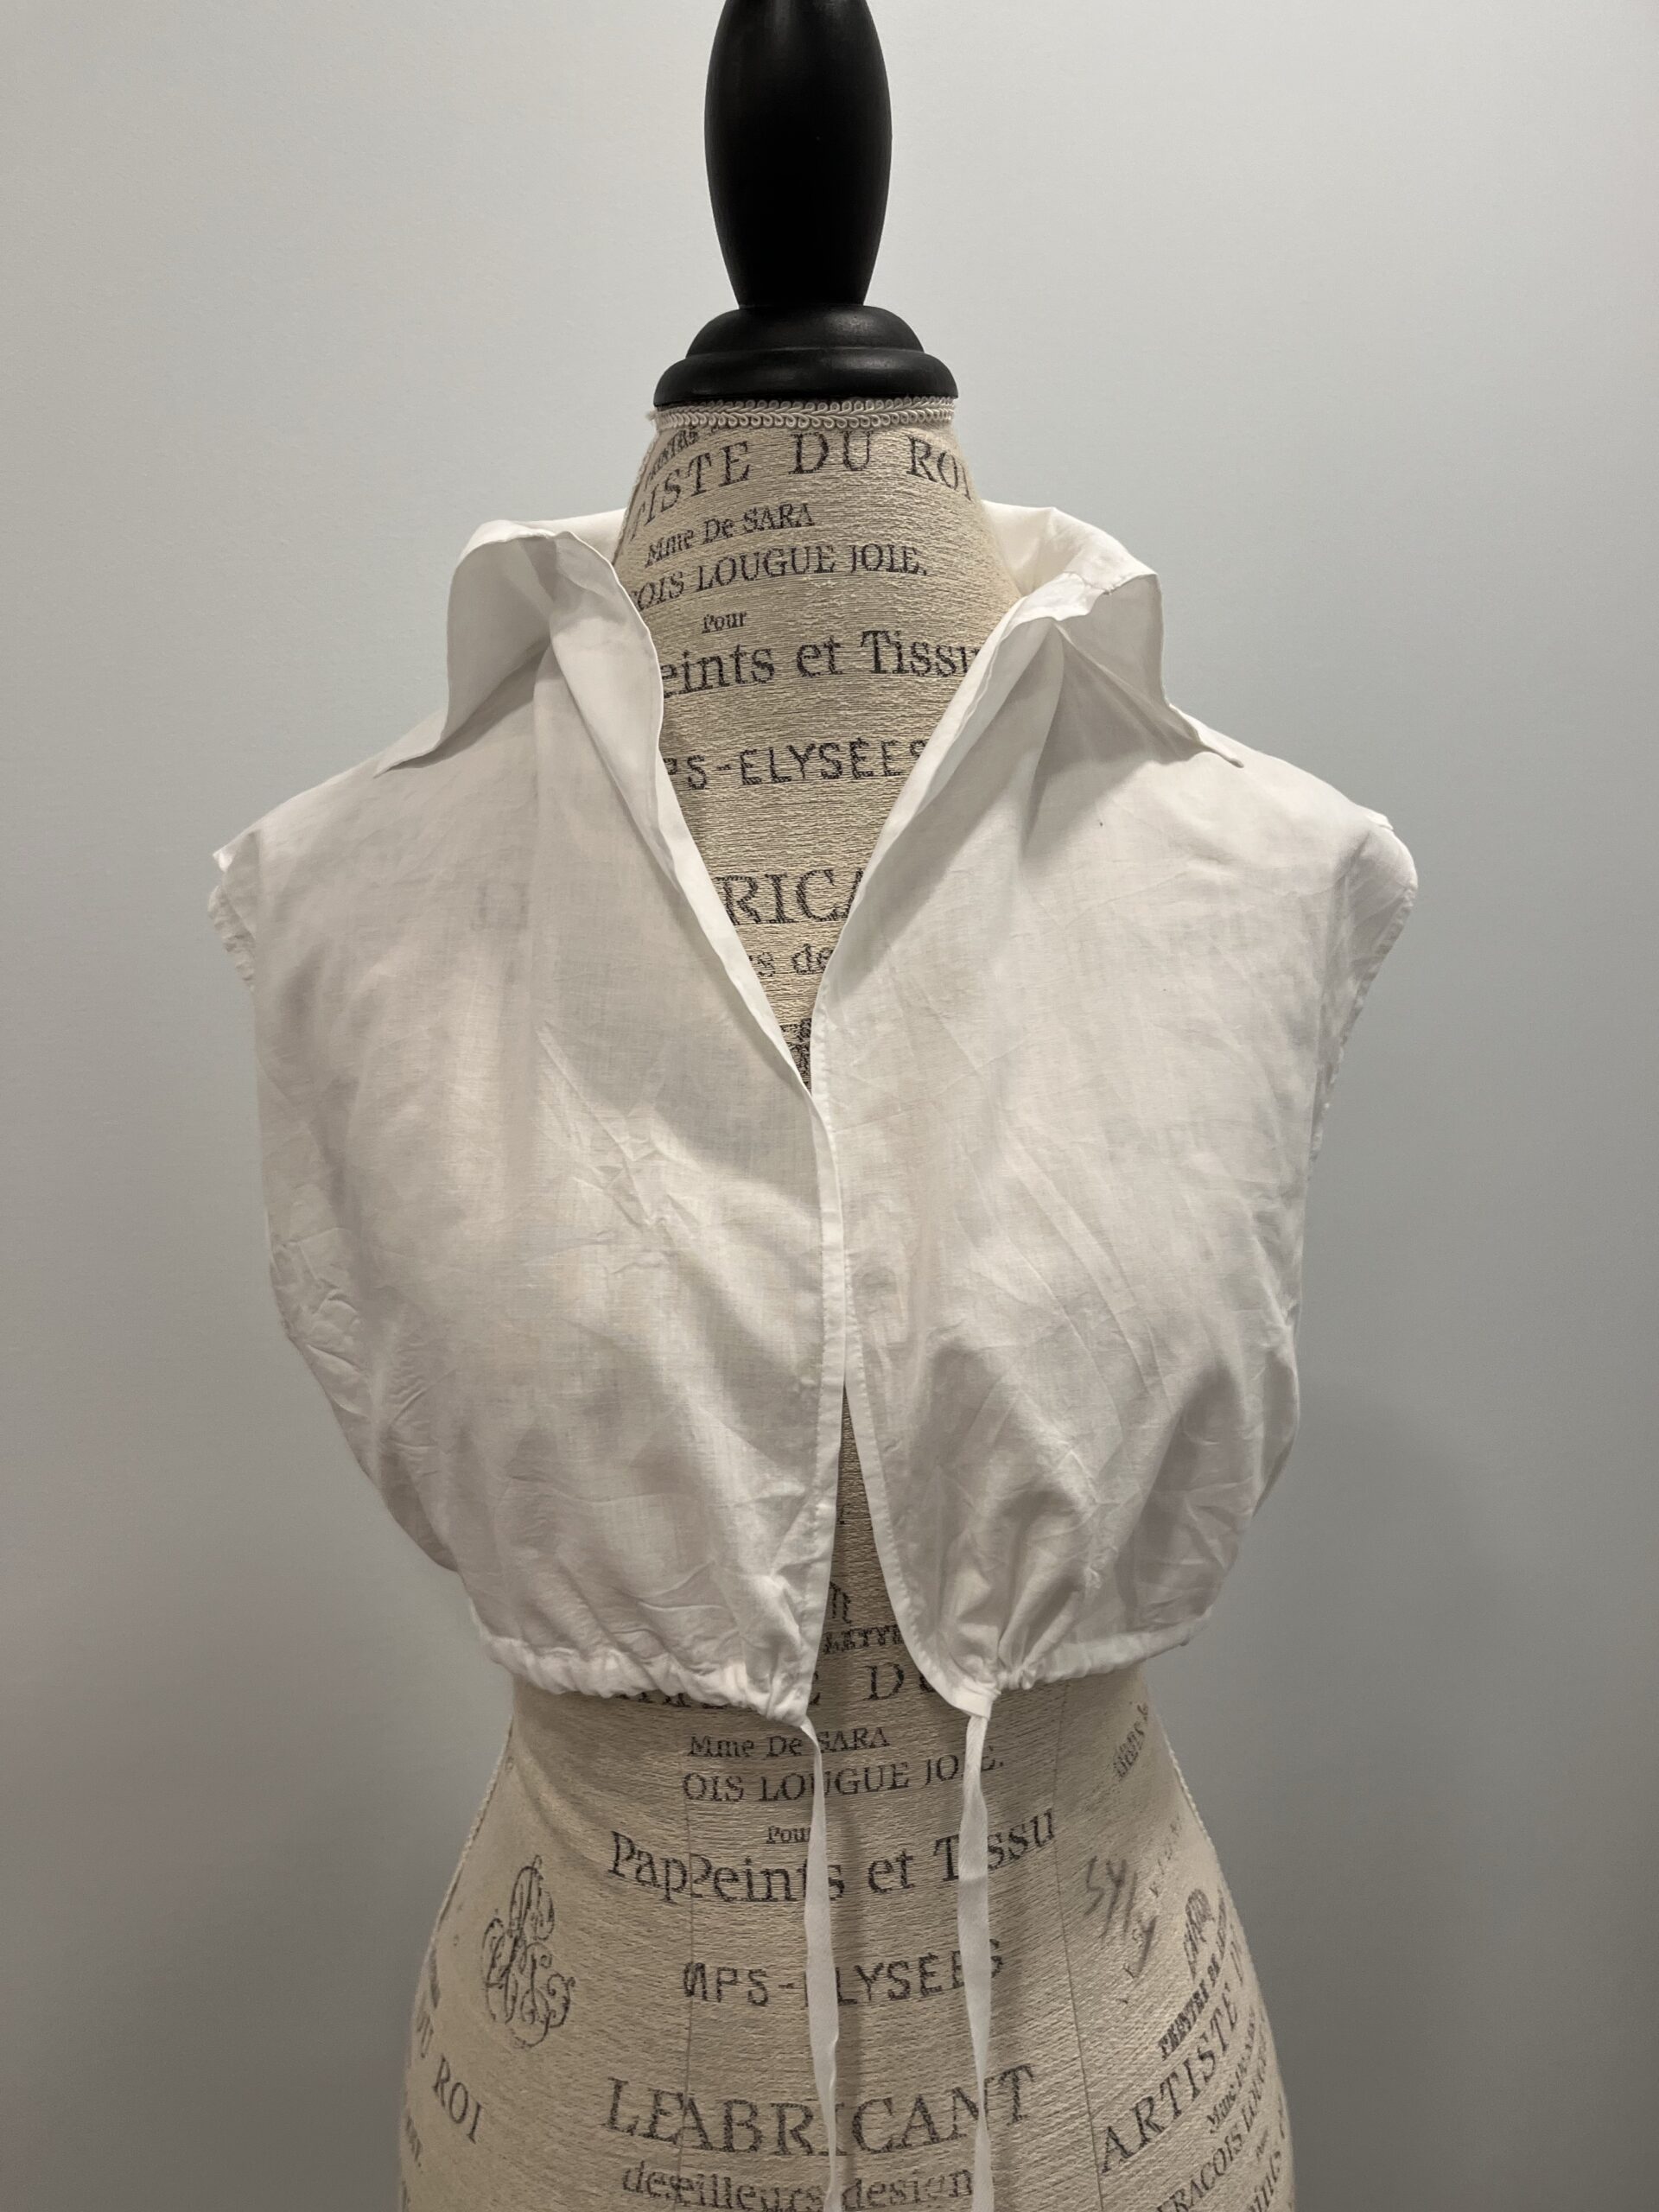
A pair of charming 1790s chemisettes, suitable for any mood -frothy or stern or otherwise!